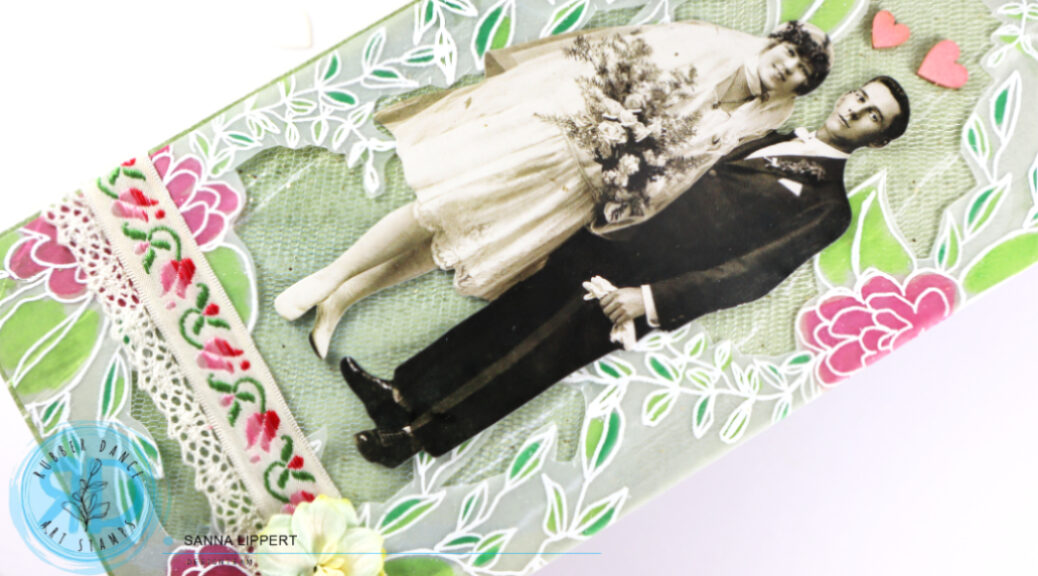
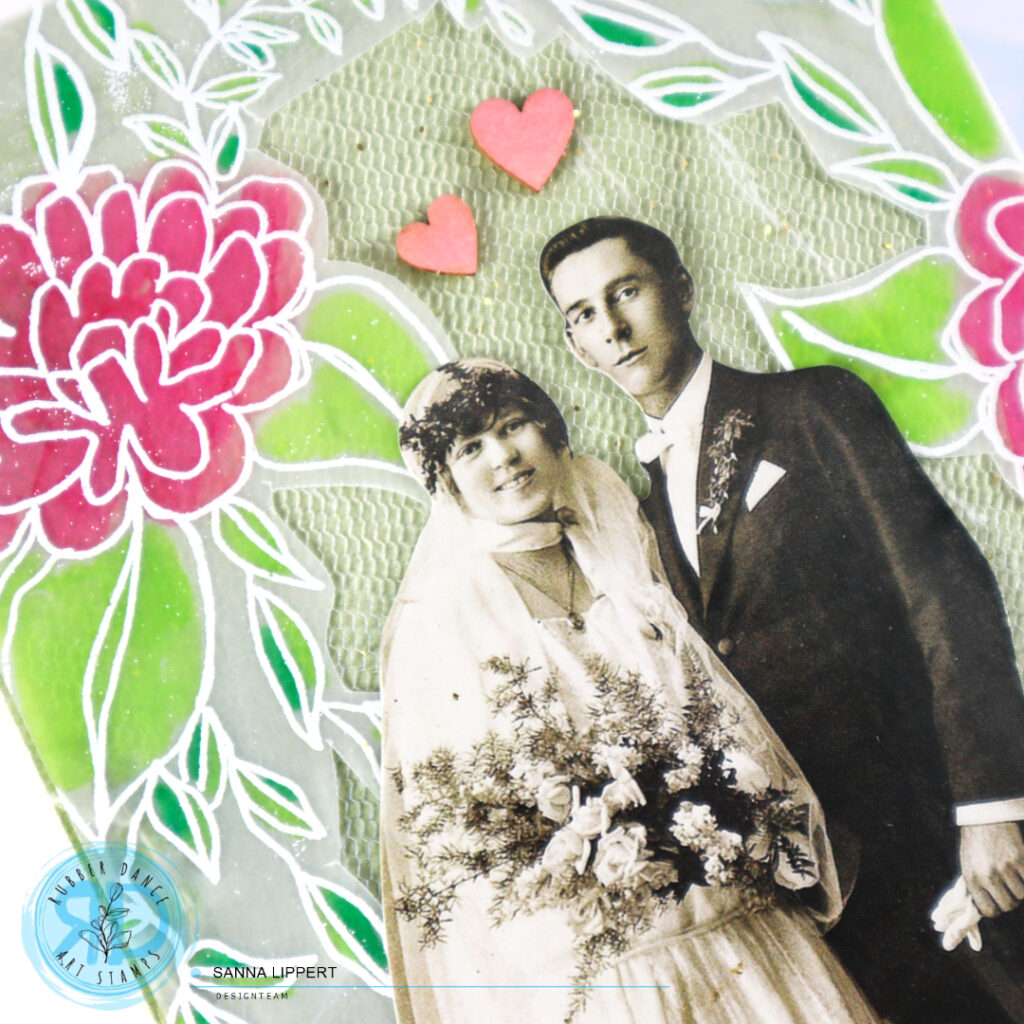
Hello everyone – this tutorial has been sitting and waiting for posting for a very long time, so I figured I´ll just share it now for random inspiration!!! With New Year just around the corner, let´s think of these cards as motivation for 2024 :). Here are three cards with Stamps, Stencils and Stickers. Hope you like them!
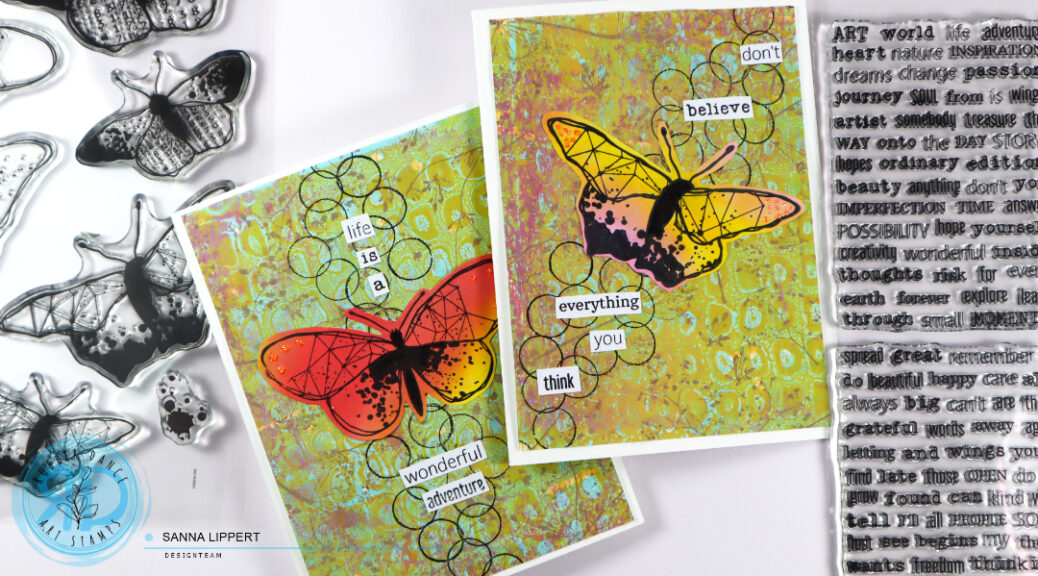
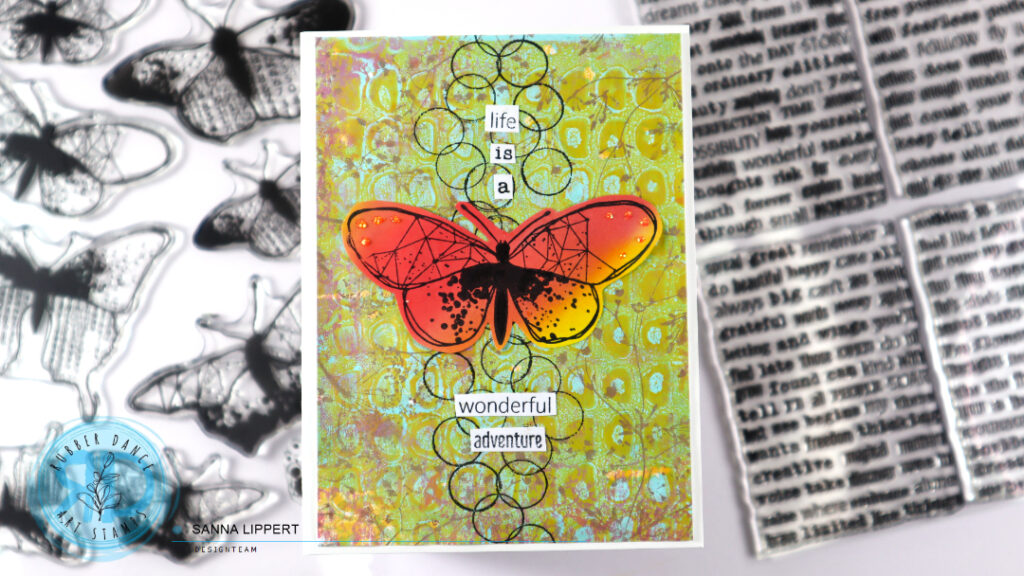
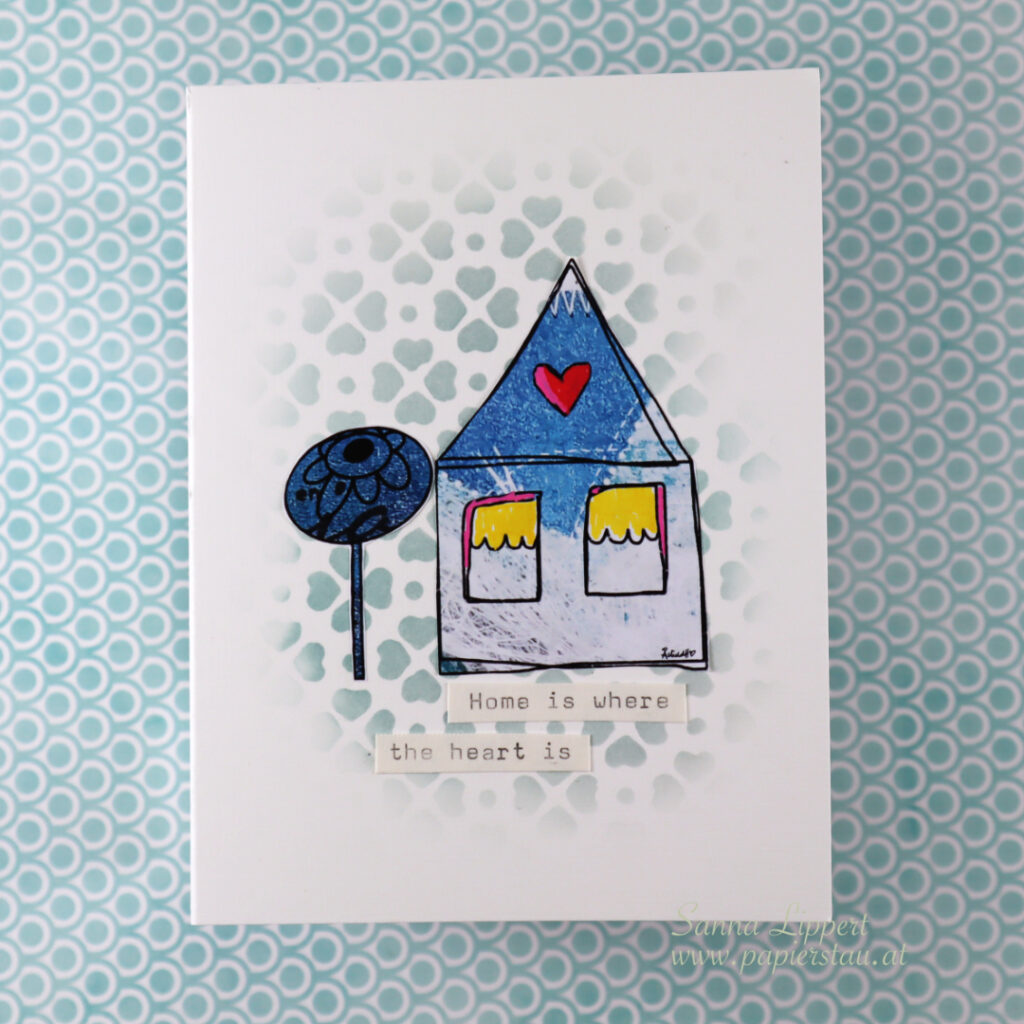
Card 1:
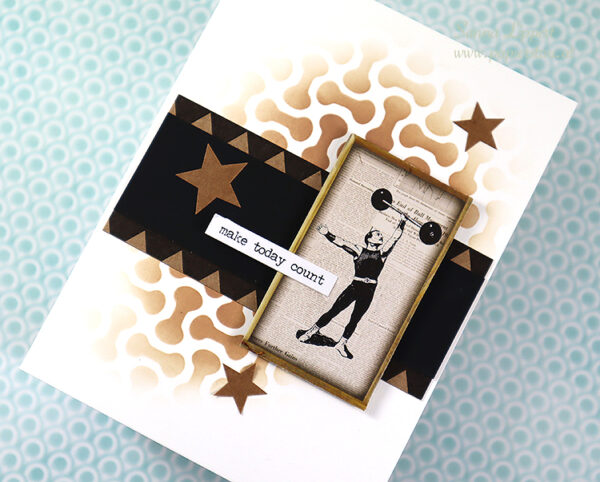
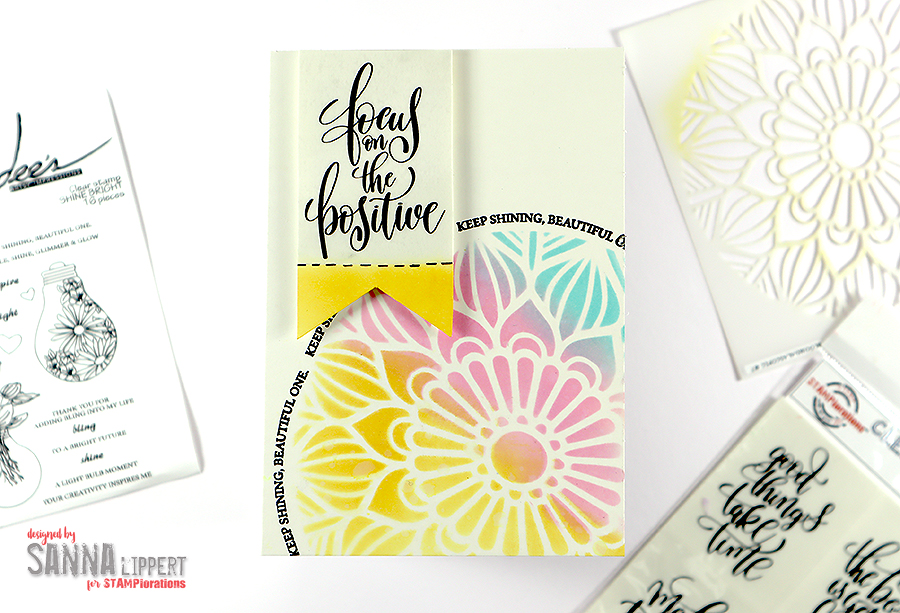
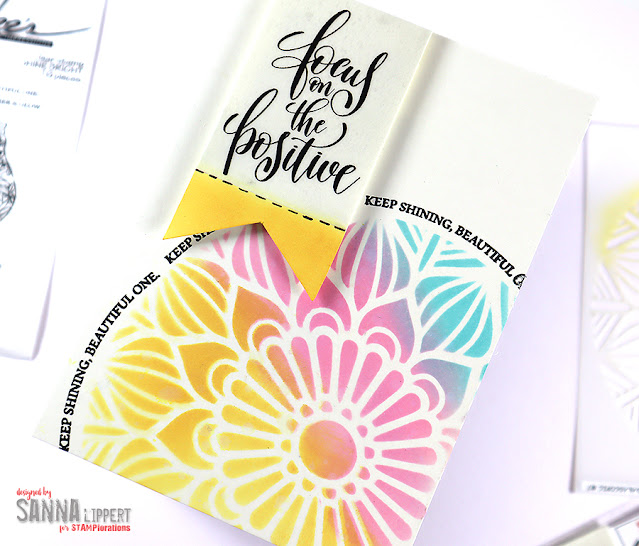
For this card I used following products: Bloomdalascopic #7 stencil, Good Things clear stickers and Shine Bright stamp set.
To create this card I did the following steps:
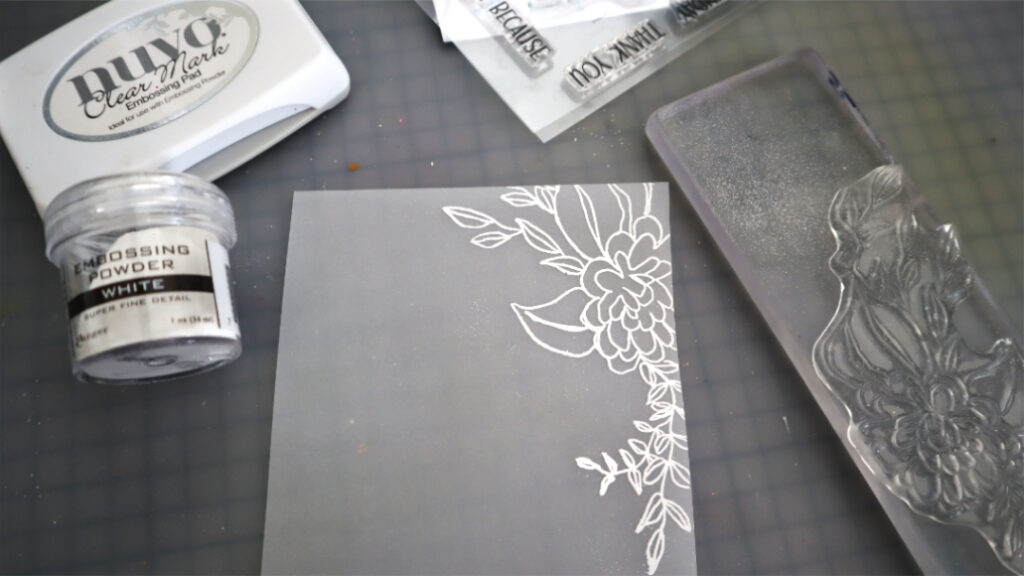
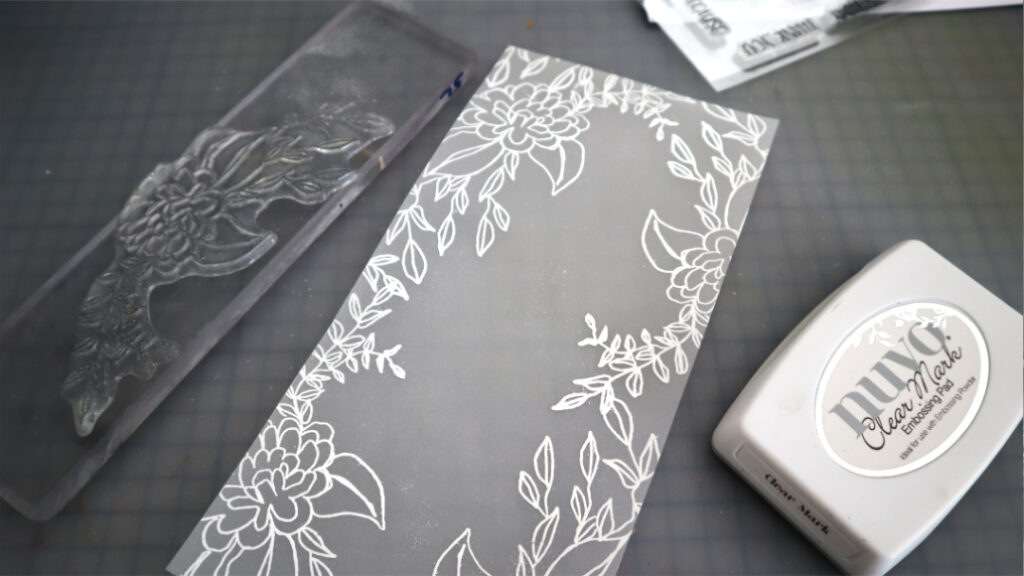
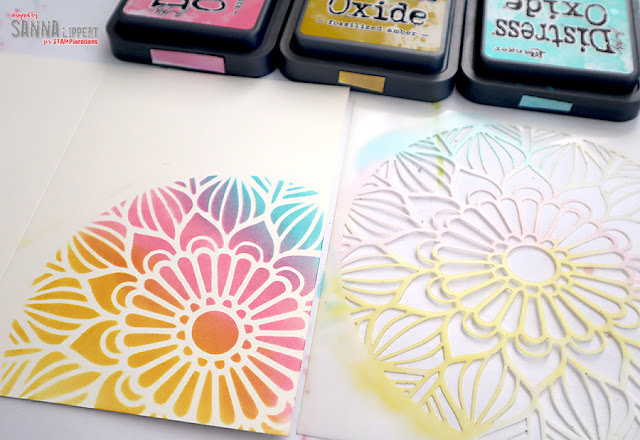
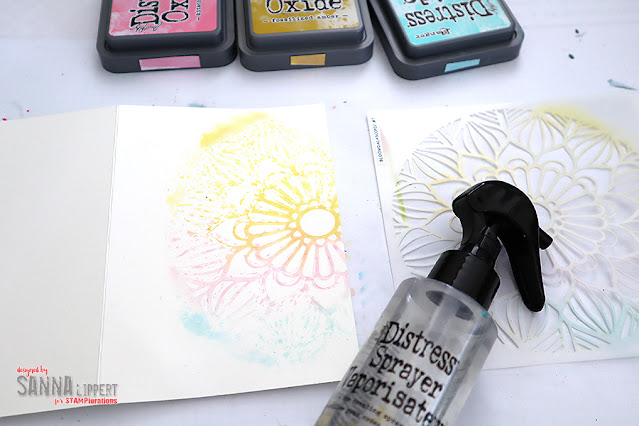
Step 1: I first placed the stencil onto the card base and applied Distress Oxide thru it in three different tones (yellow, pink and blue). Then I removed the stencil and misted it with water to and pressed it onto a second card base (this is the beginning of card two), but since I did it at this point, I will also mention it already here.
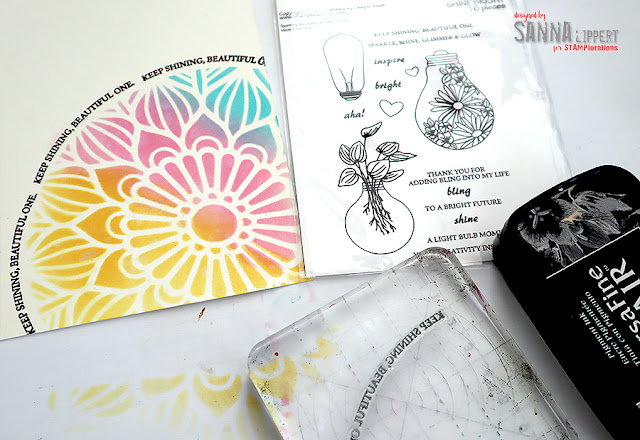
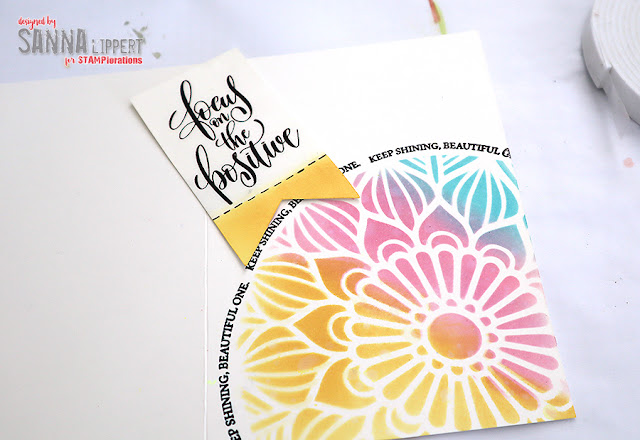
Step 2: Next I added the stamping using the Shine Bright stamp set and black ink. I bend the sentiment into a curve to follow the line of the stencil border.
Step 3: After that I cut a piece of the same toned cardstock to adhere the Good Things clear sticker sentiment onto it, I fussy cut the piece into a banner/flag and inked the bottom are in the same yellow tone as I had used in the stencil pattern earlier. For more texture I also adhered the sentiment with 3D foam on place.
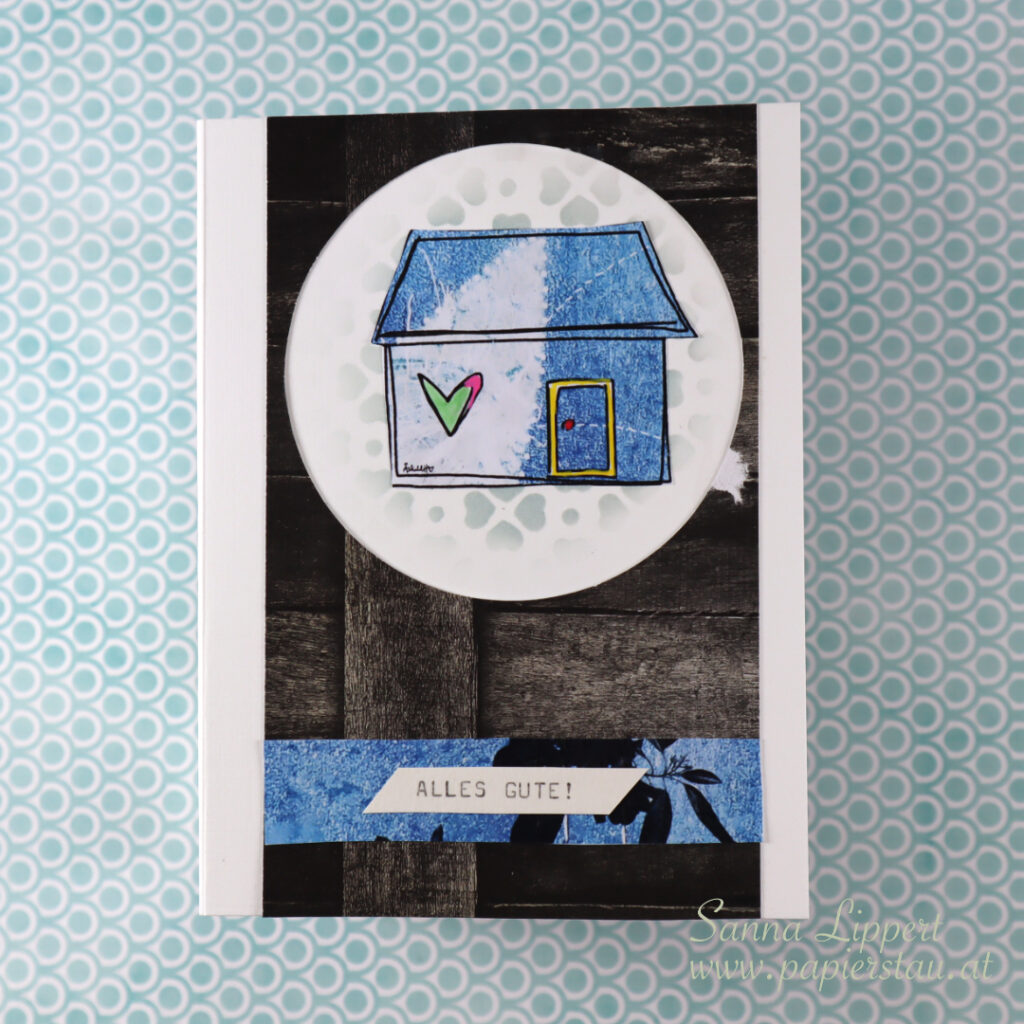
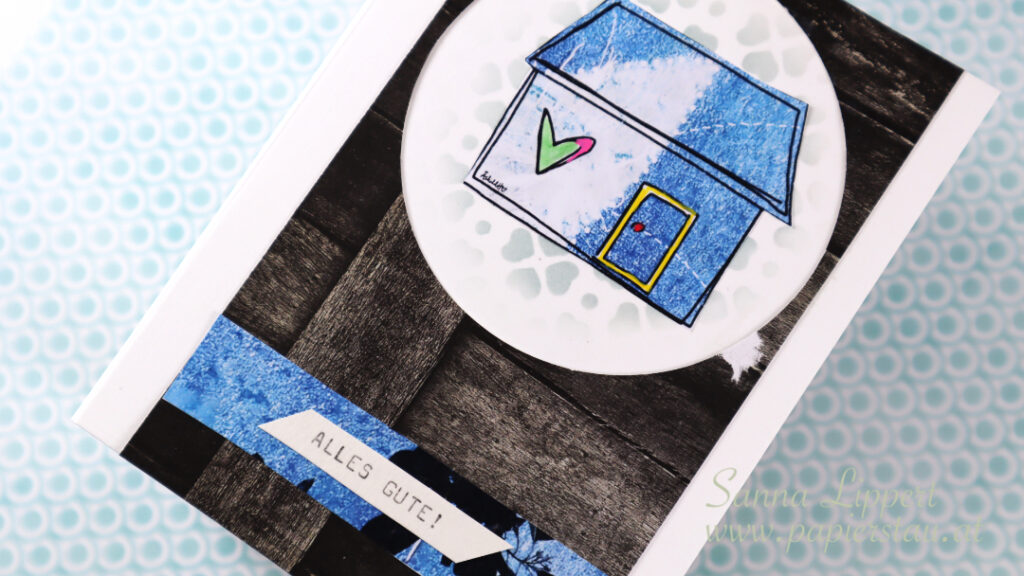
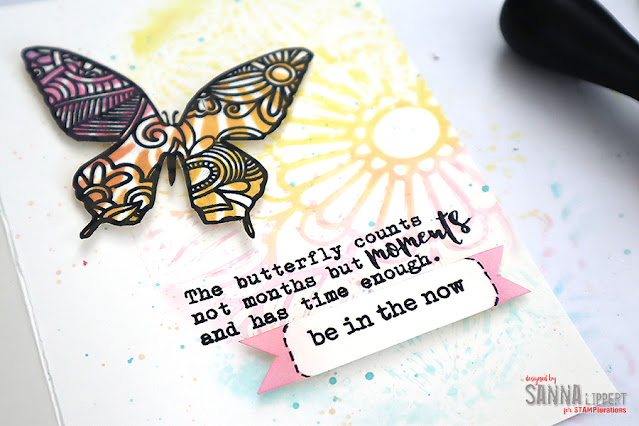
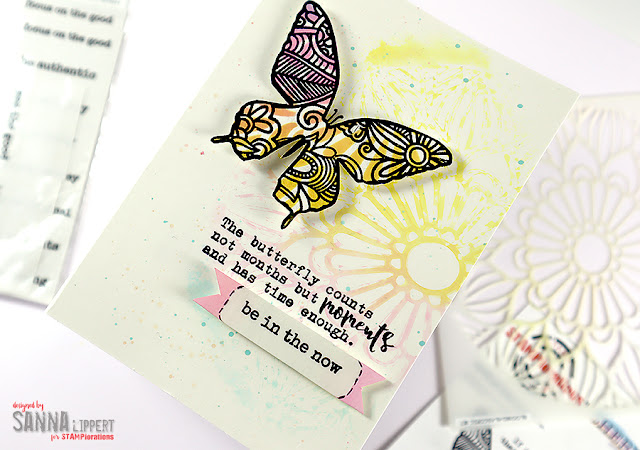
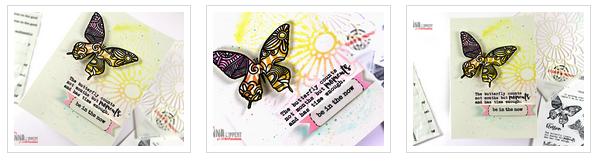
Card 2:
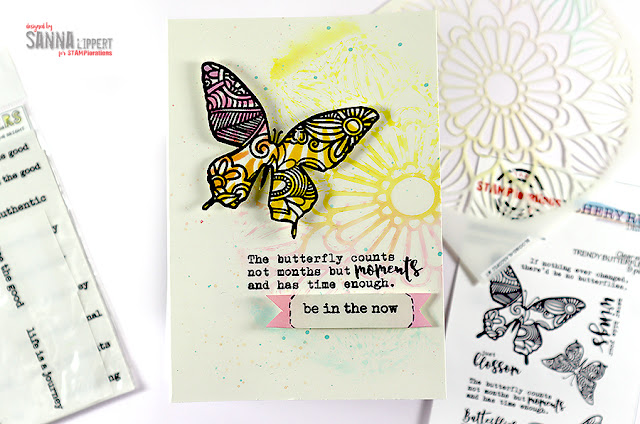
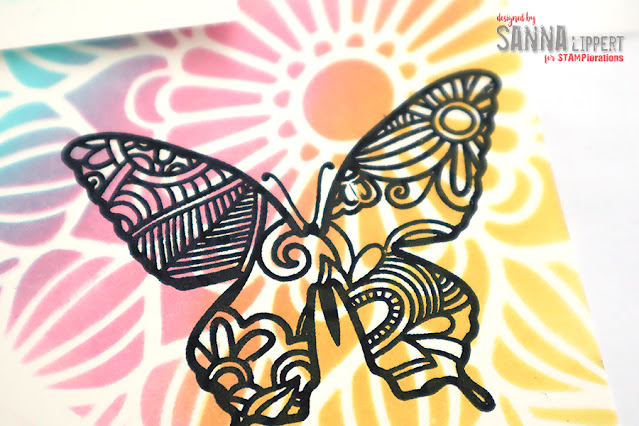
For this card I used the following products: Bloomdalascopic #7 stencil, Trendy Butterflies stamp set and Shine Bright clear stickers.
To create the card I used the following steps:
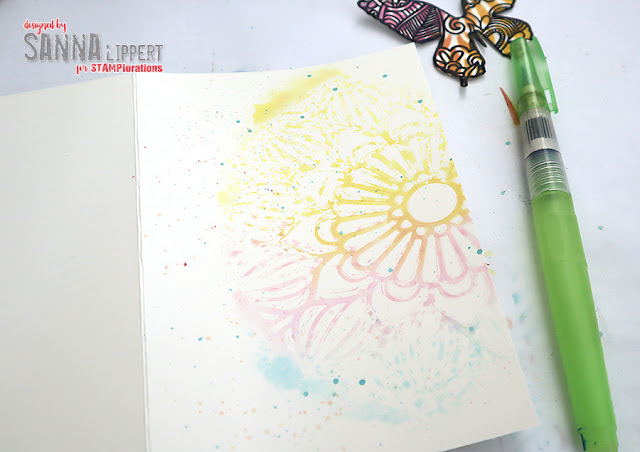
Step 1: Like mentioned in the beginning, I took the already inked Bloomdalascopic #7 stencil and misted the Distress Oxide inked areas and then pressed the stencil onto the card base for a second image.
Step 2: Create another similar background like on the first card and stamp a Trendy Butterfly onto it with black ink and then fussy cut the image.
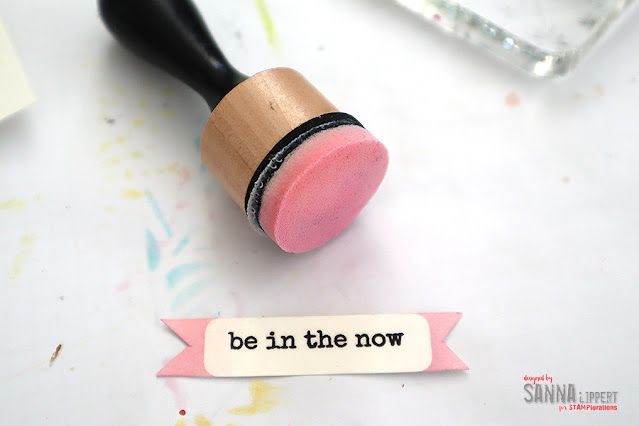
Step 3: Adhere the clear sticker onto a piece of cardstock, fussy cut into a banner and ink the edges pink.
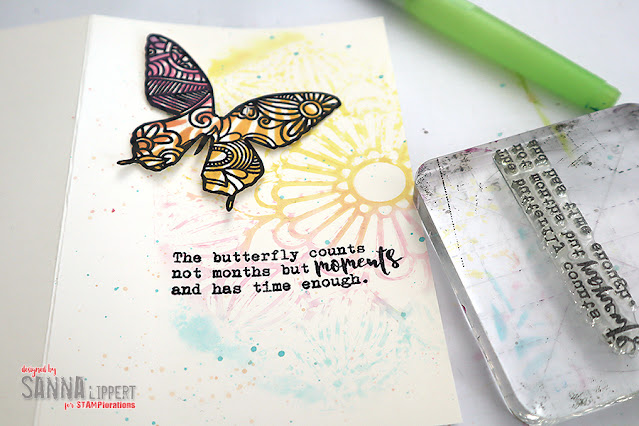
Step 4: Add a few ink splatters onto the background for additional interest.
Step 5: Add a stamped sentiment directly onto the card base and adhere the butterfly on place using 3D foam.
Step 6: Finally use 3D foam and adhere the banner under the previously stamped sentiment and hte card is done. Here is the finished card once more:
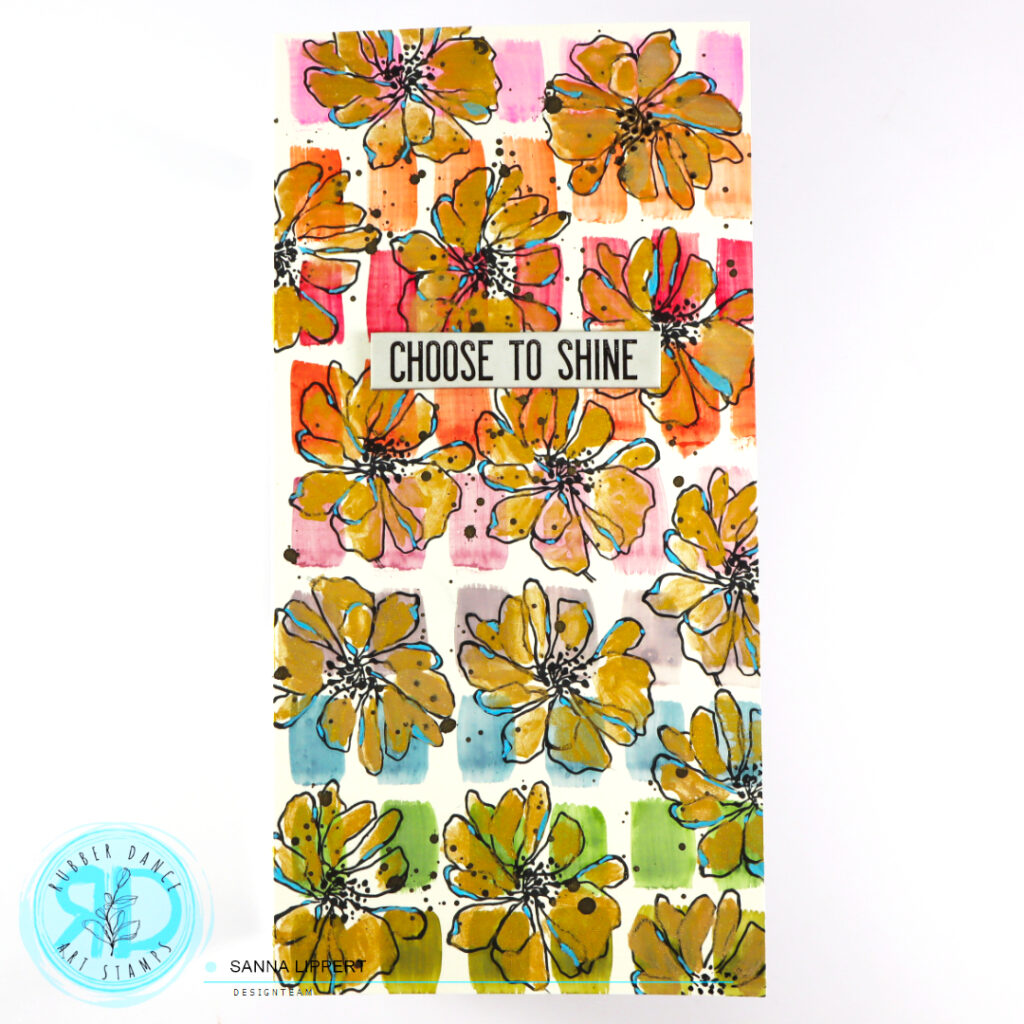
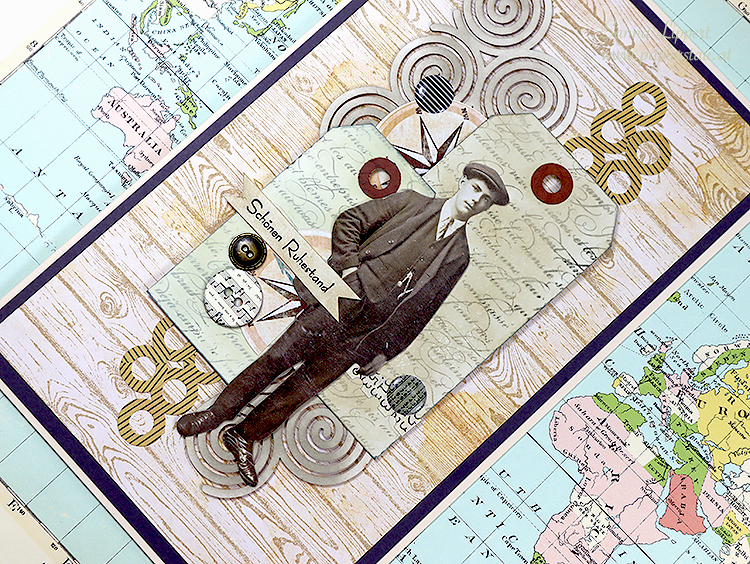
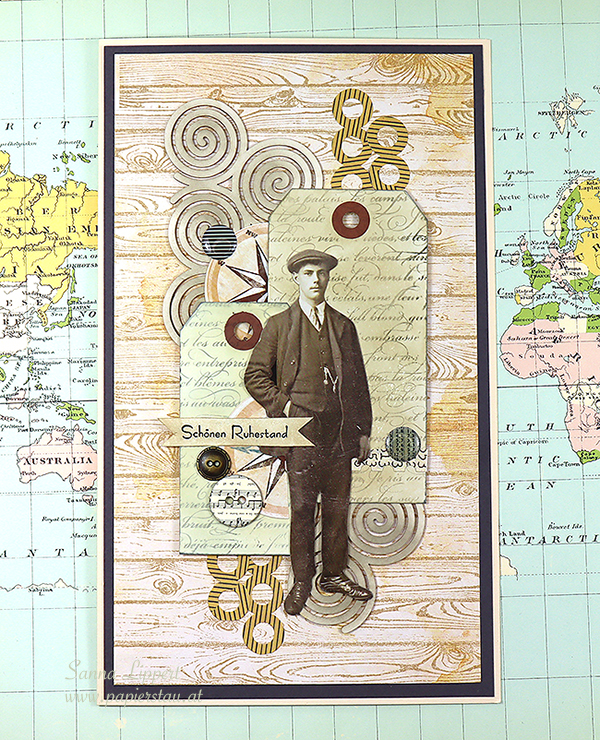
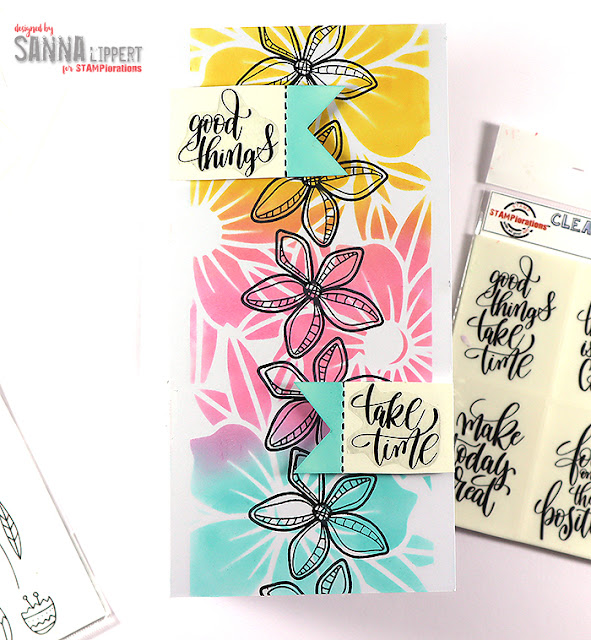
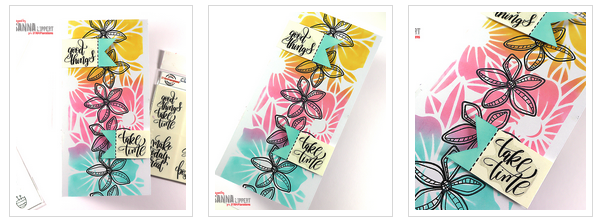
Card 3:
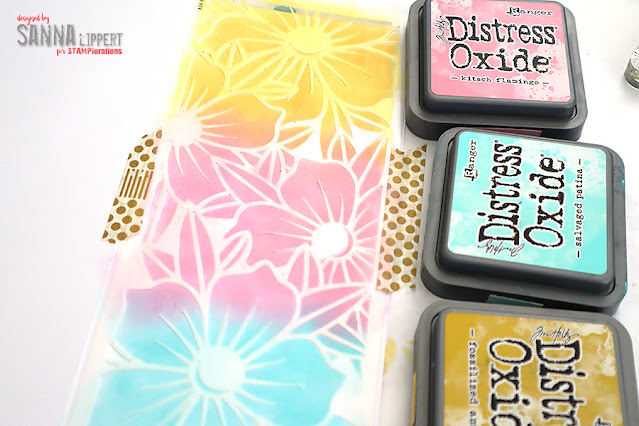
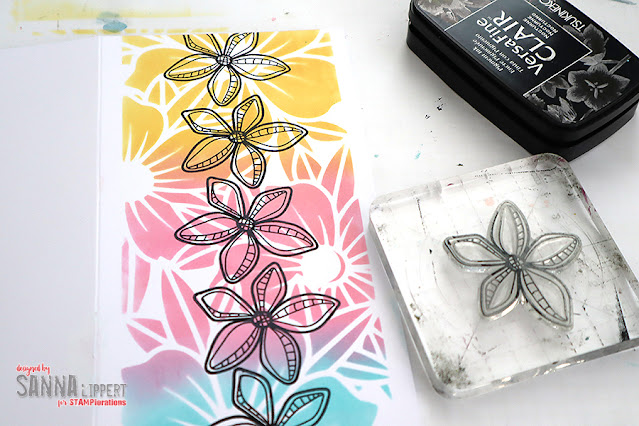
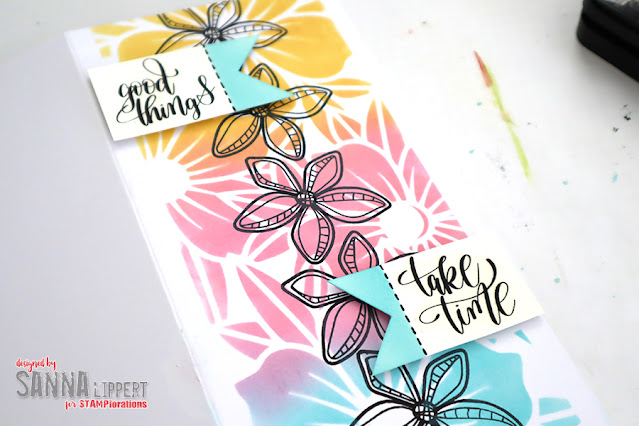
For the third card I used the following products: Big Blooms Slimline Stencil, Bloom Doodles stamp set and Good Things clear stickers.
And this is how I created card number three:
Step 1: I placed the Big Blooms stencil on top a white slimline card base and added the same Distress Oxide colours thru it onto the card, like on the previous two cards.
Step 2: Next I stamped a row of flowers into the middle section of the card with black stamp ink and the Bloom Doodles set.
Step 3: For finishing touches I added the Good Things clear sticker (fussy cut into two parts!) onto cardstock and again cut them into banners/flags. This time I inked the ends of the banners with blue ink and adhered them with 3D foam to the card for more texture.
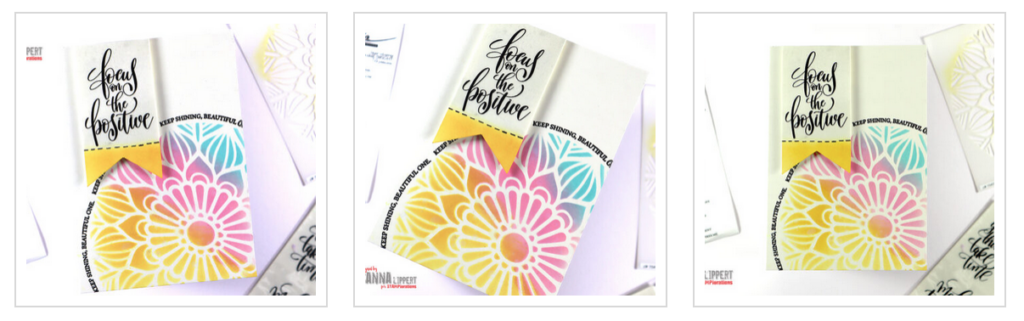
So I´ ve basically used the same idea on all cards with same colours, but they still look different because I´ ve either changed proportions of stenciling or stamping or positioning on the card bases. I like to challenge myself this way to see with how many different variations I can come up with using one idea.
I hope I could inspire you to pull out some stamps, stencils and stickers and play with them yourself!
Take care, Sanna
Supplies: