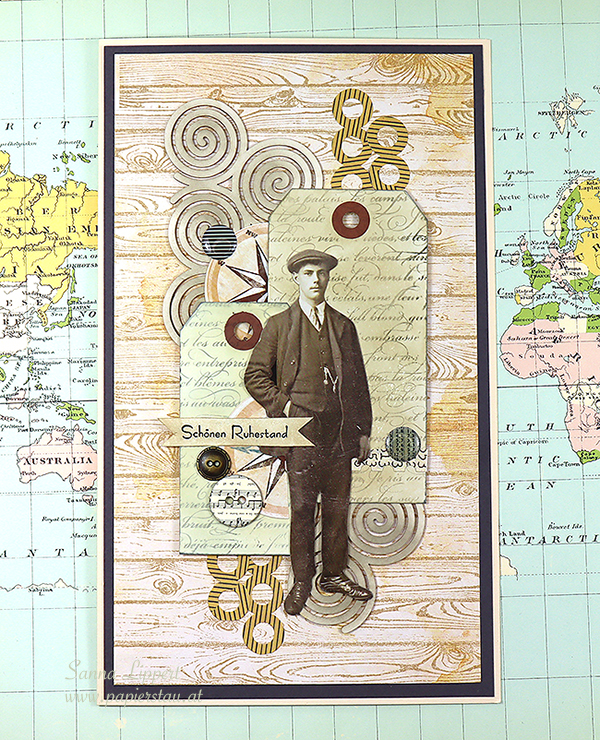
Hello everyone and happy March! I have a card share up with a slimline sized Christening card today.

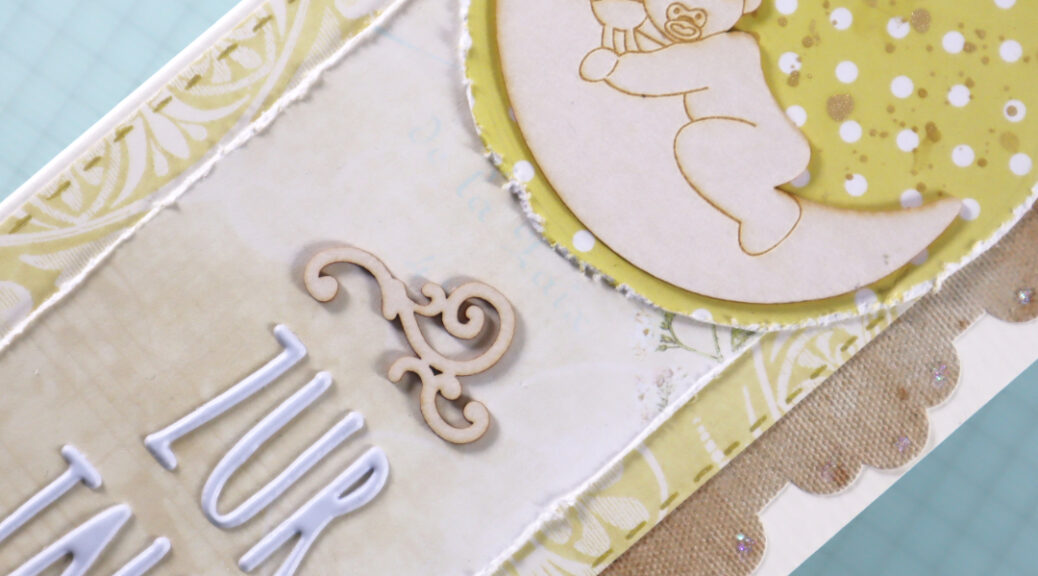
I´ve used various papers in yellow and beige tones from my paper stash. The card is for a baby girl, but it´s not supposed to be pink, thus the light yellow and beige tones.
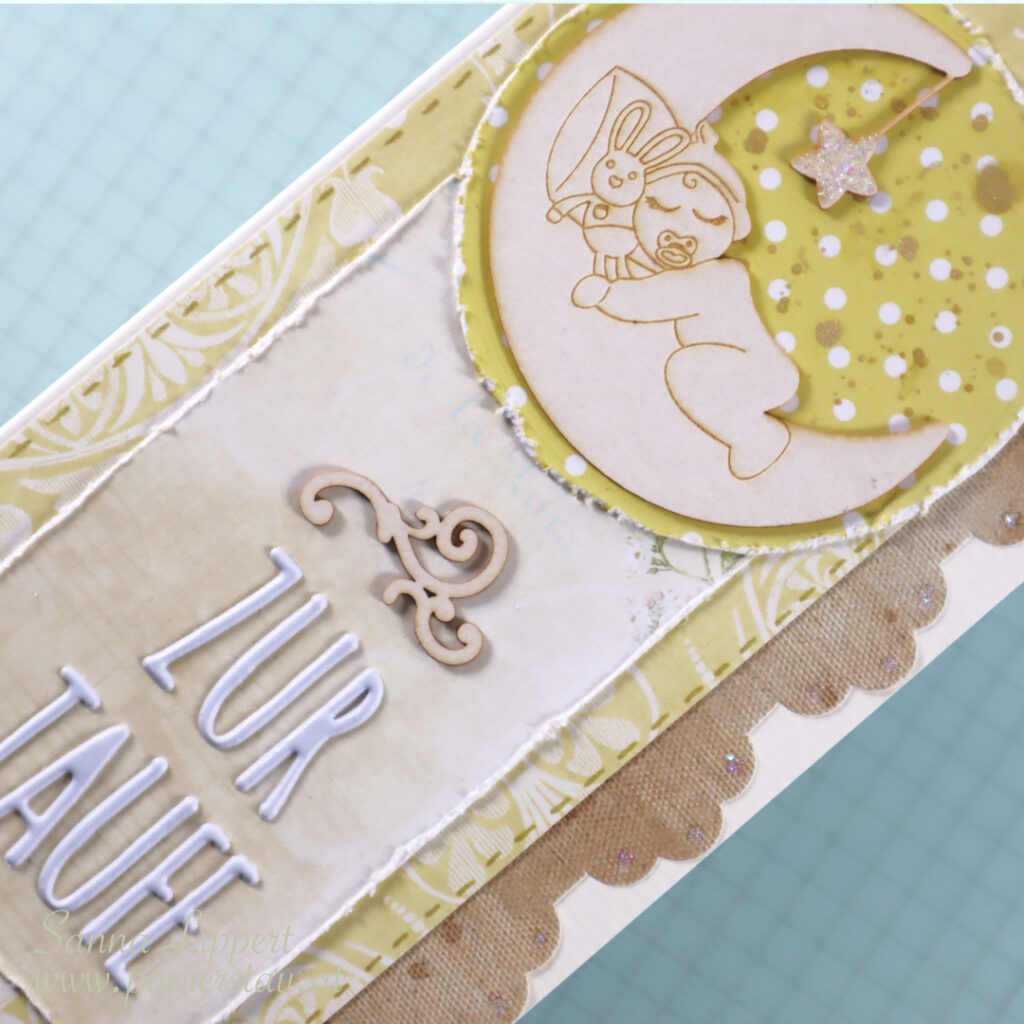

The chipboard pieces are by Wycinanka and the alpha stickers are American Crafts. I´ve added some golden gel pen faux stitching around the edges and some Gansai Tambi golden pigment droplets to the focal point circle and some Stickles for the chipboard star to add a little twinkle. On the inside there is a little pocket for a gift card etc.
Happy crafting,
xx, Sanna