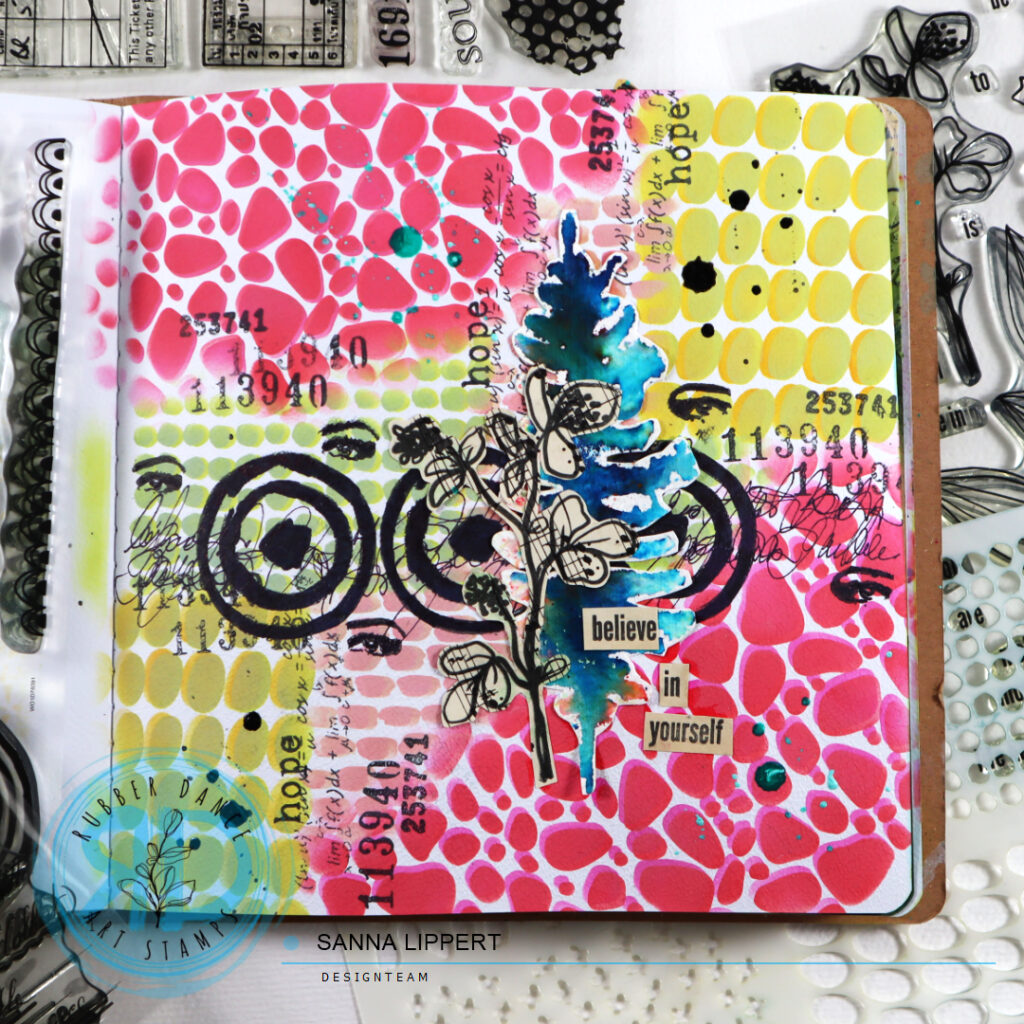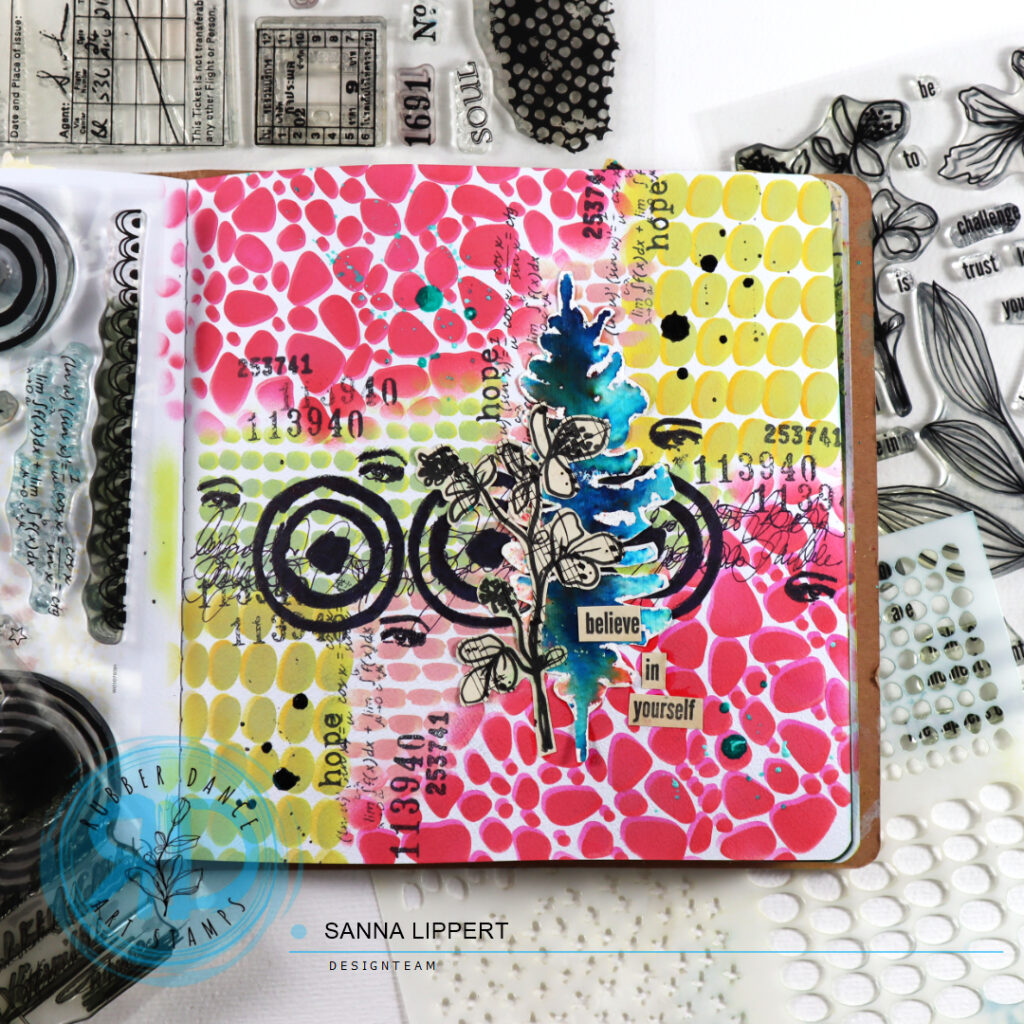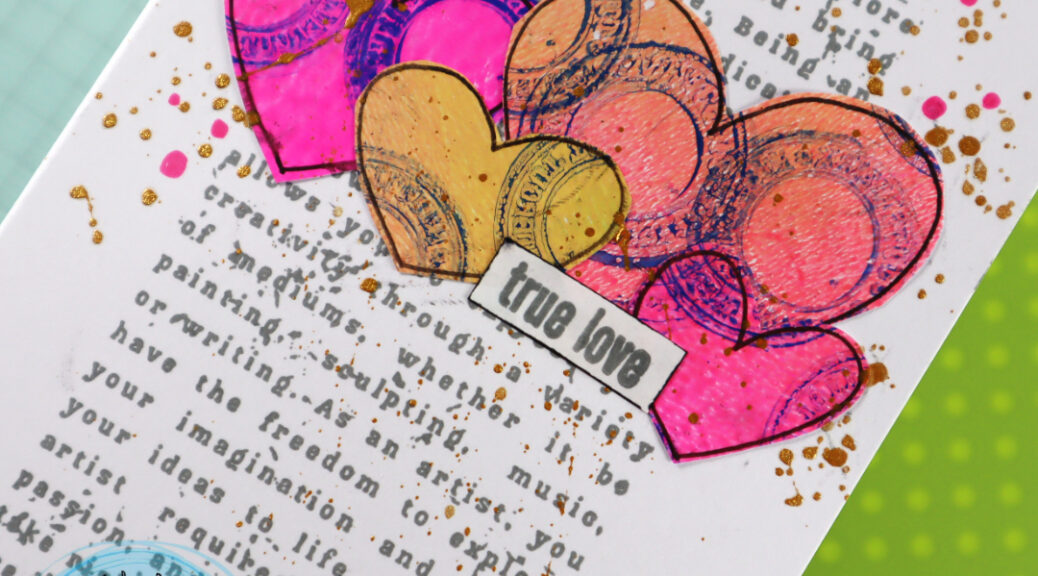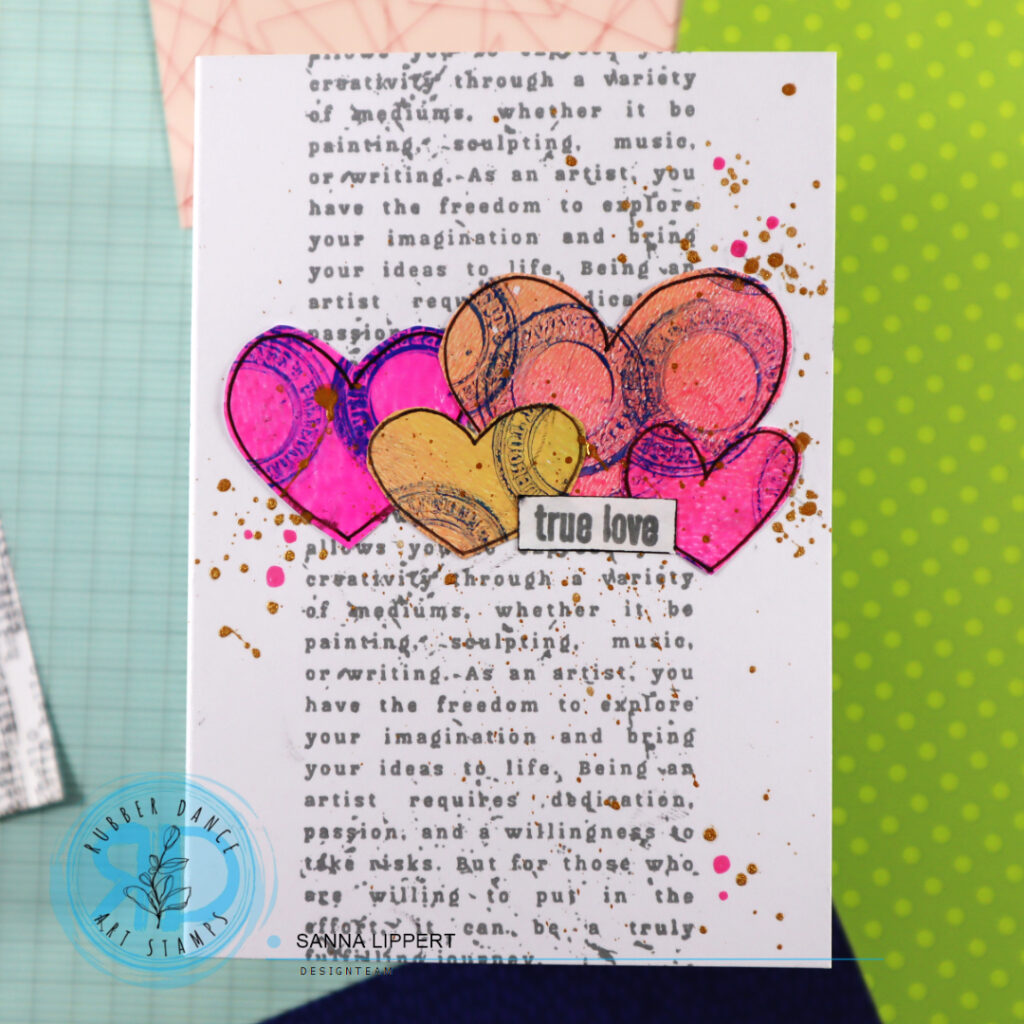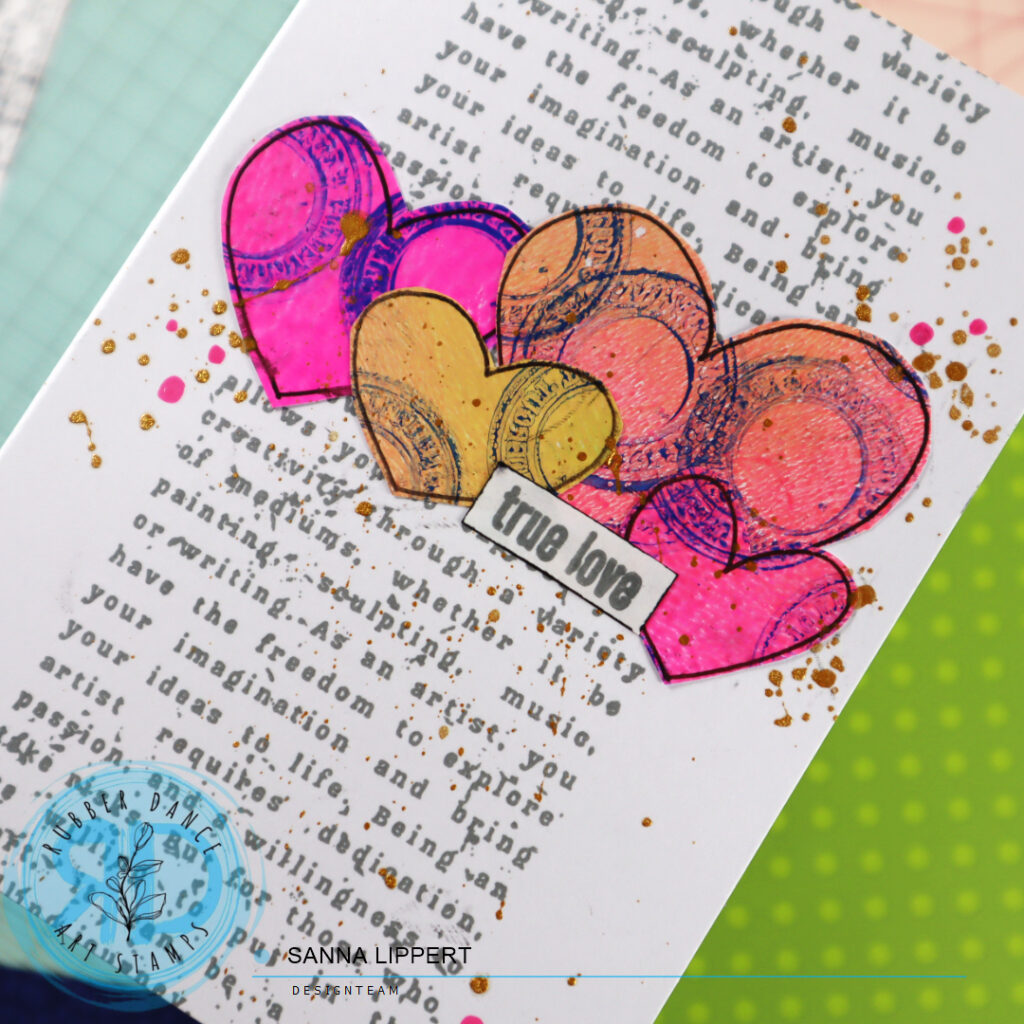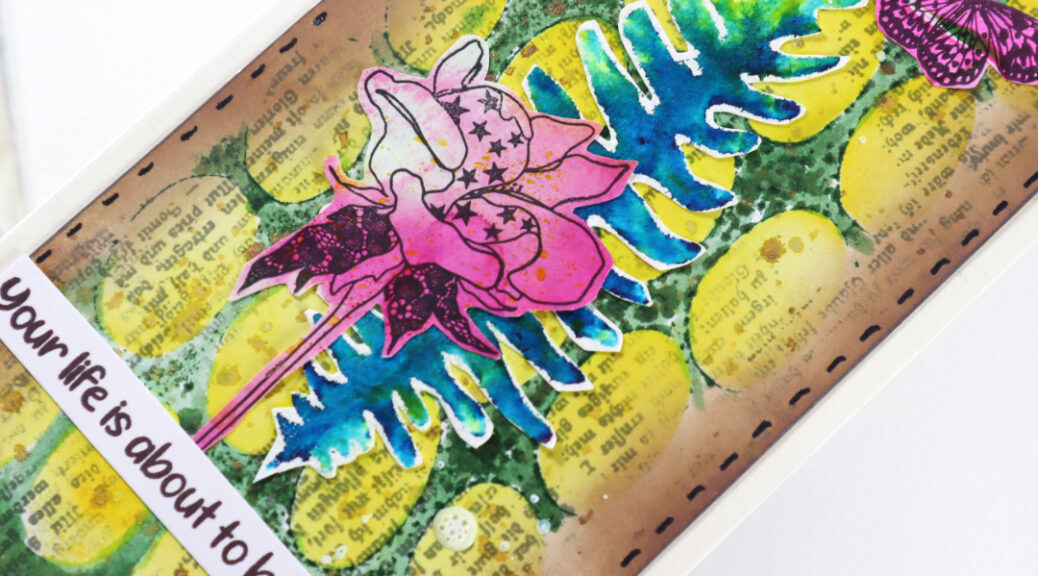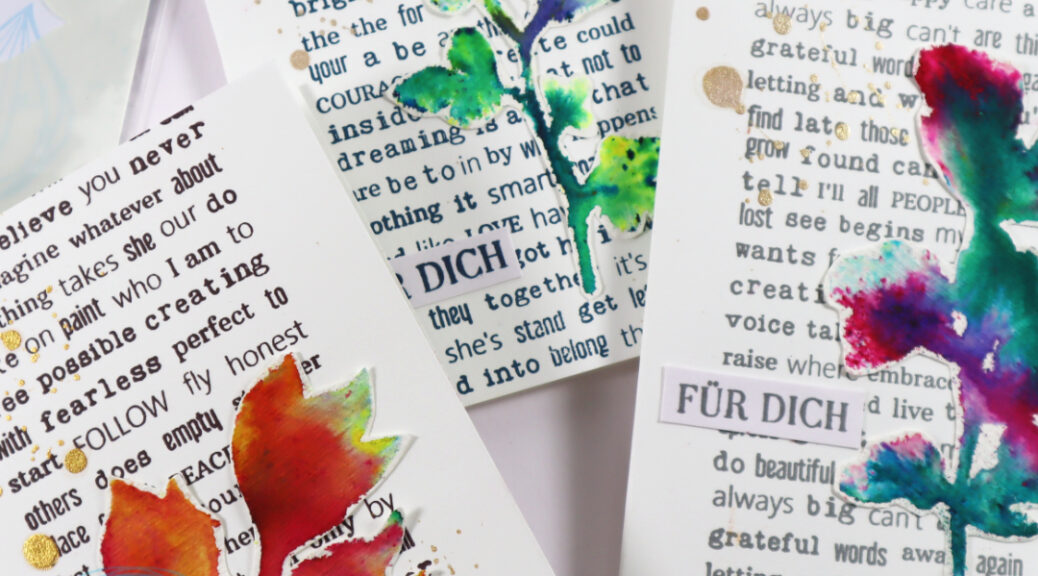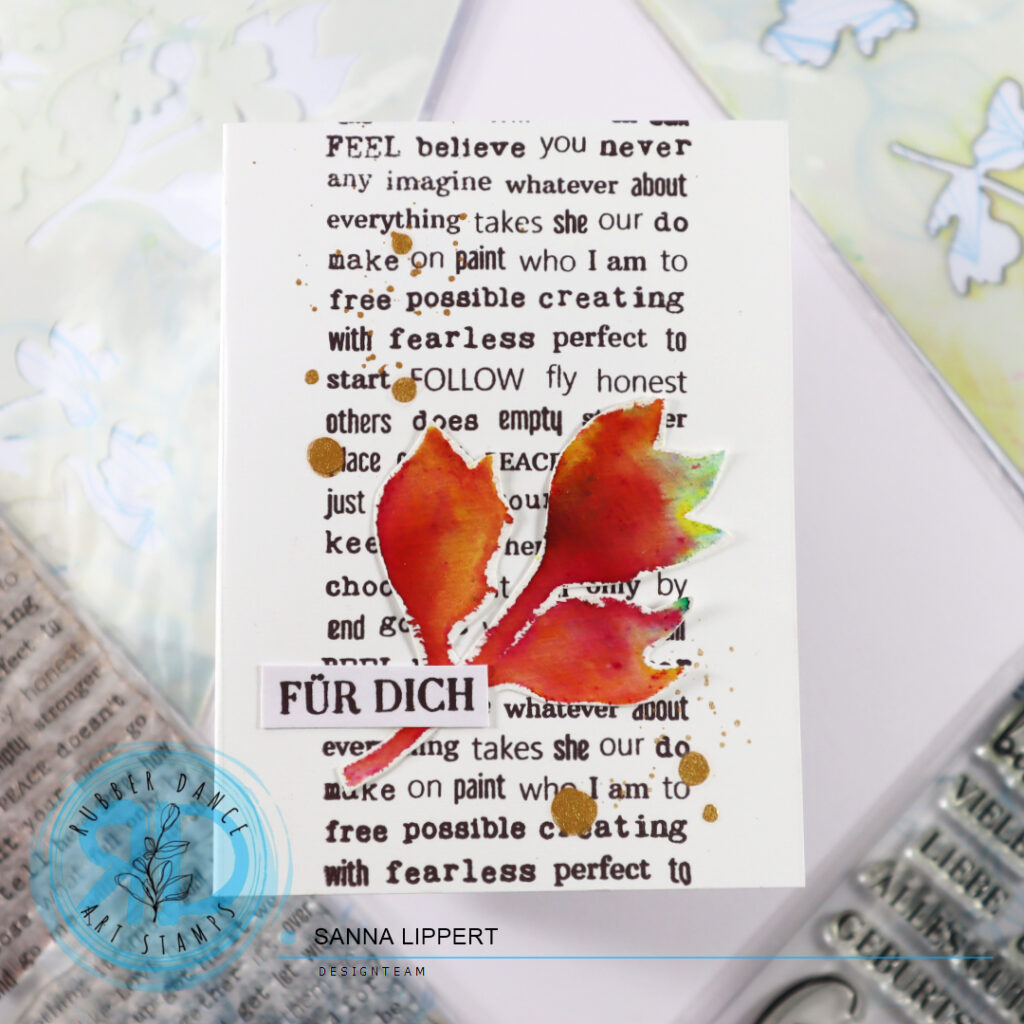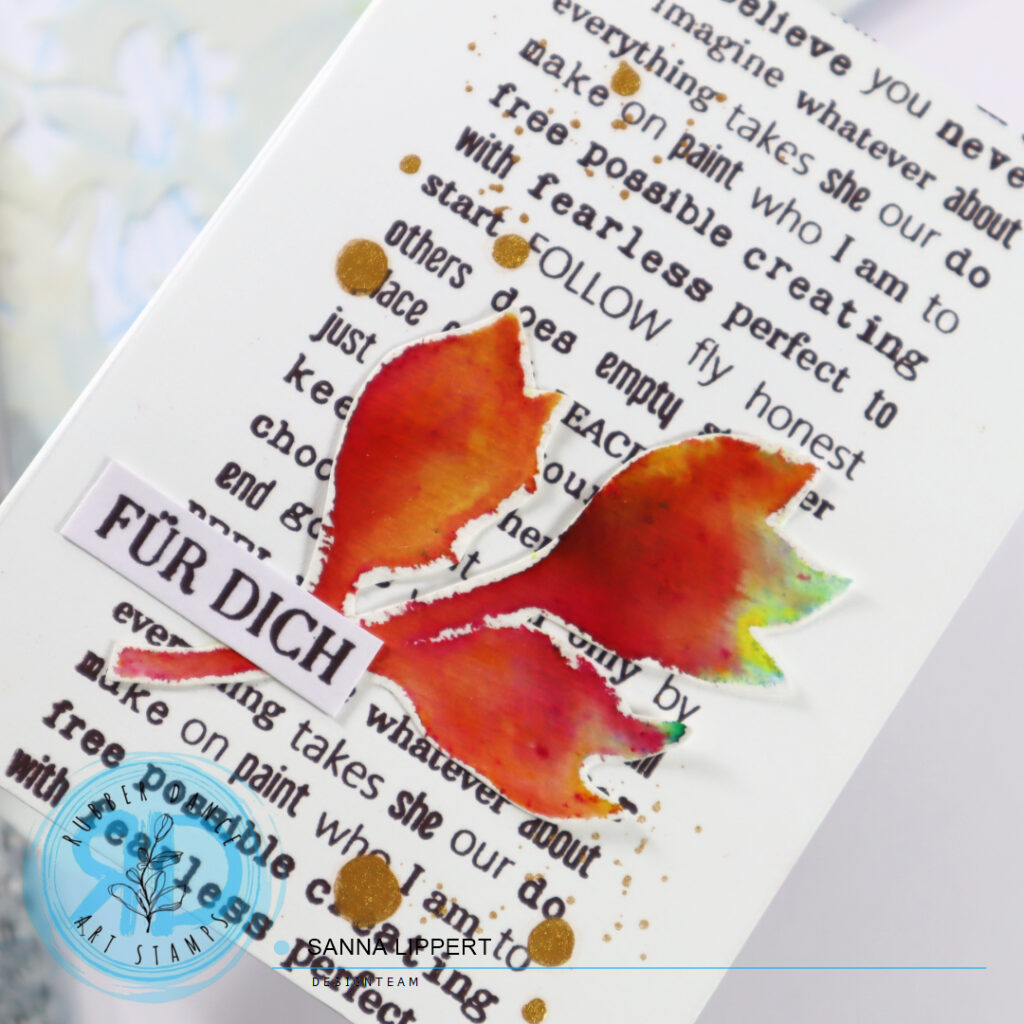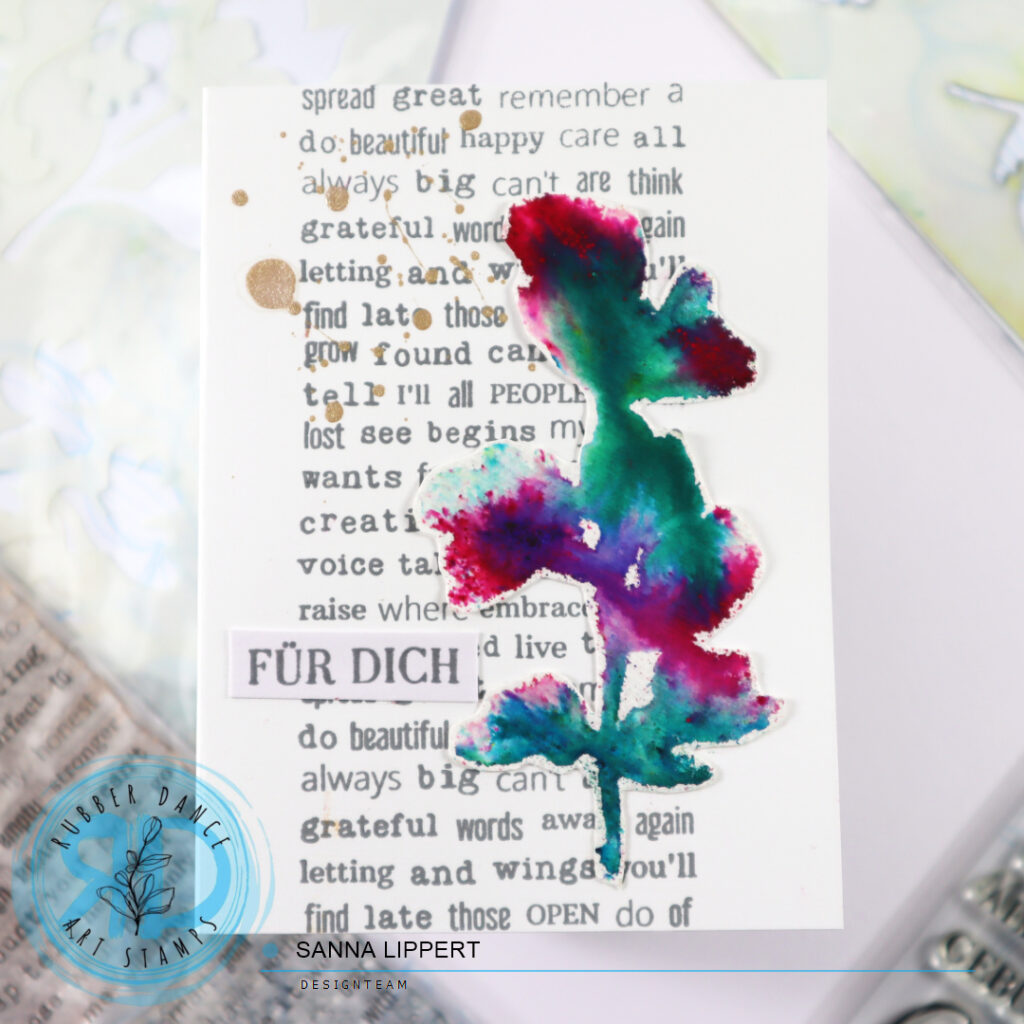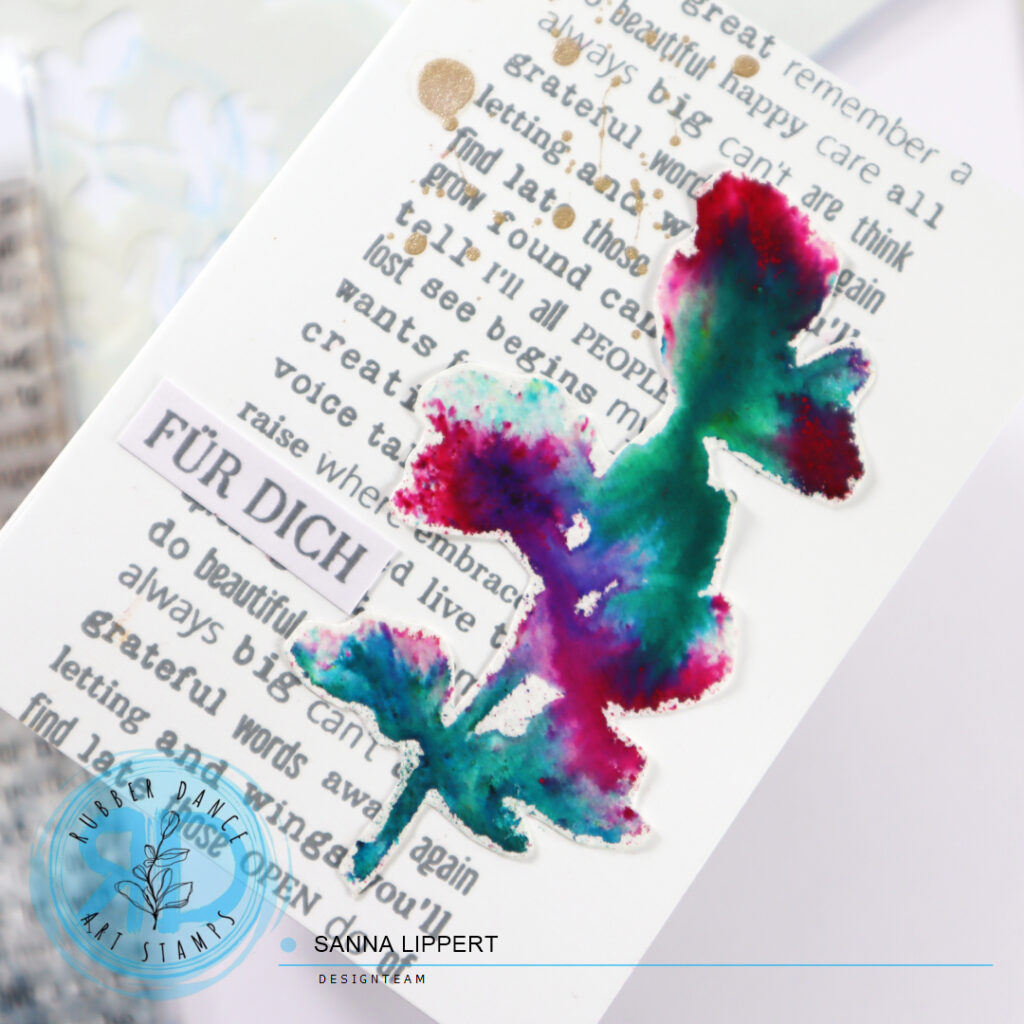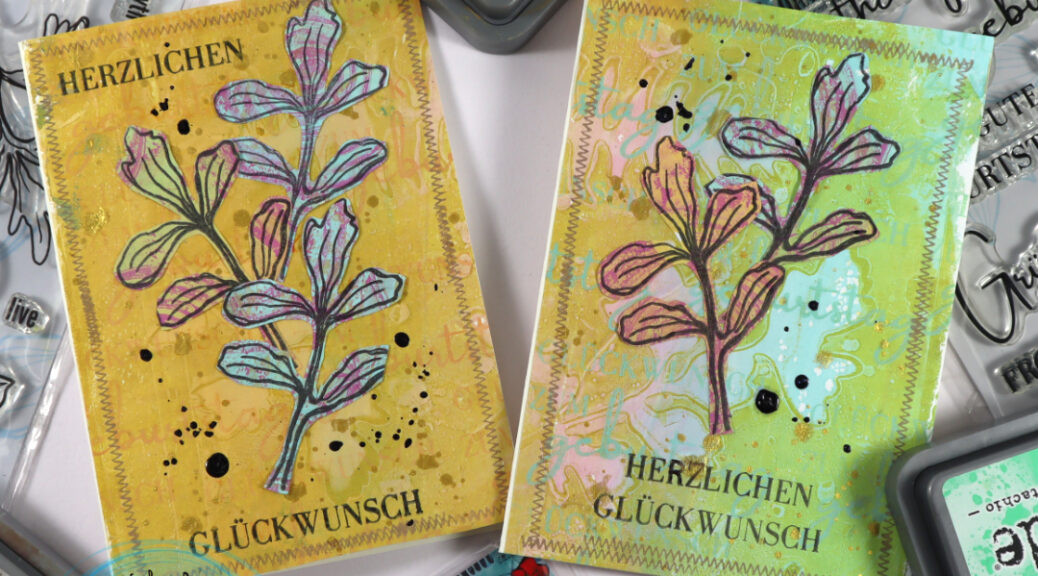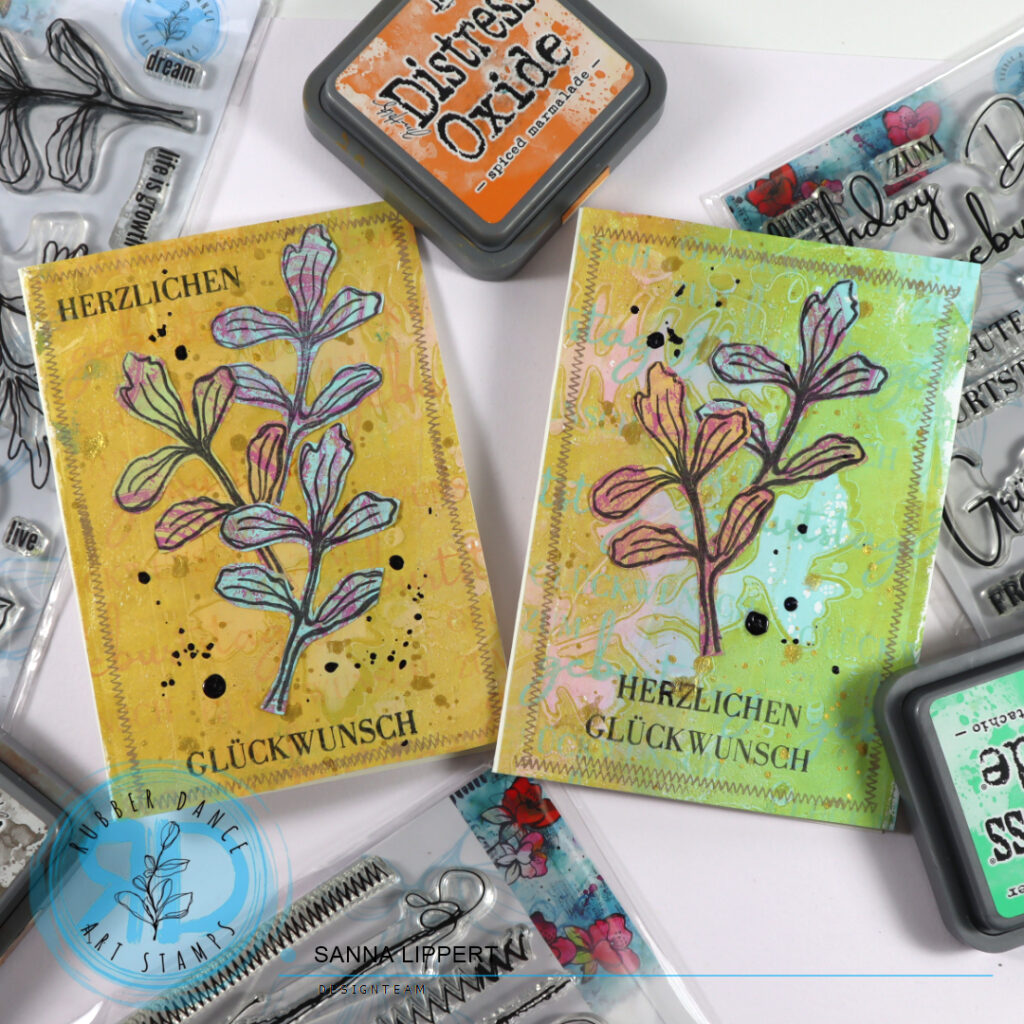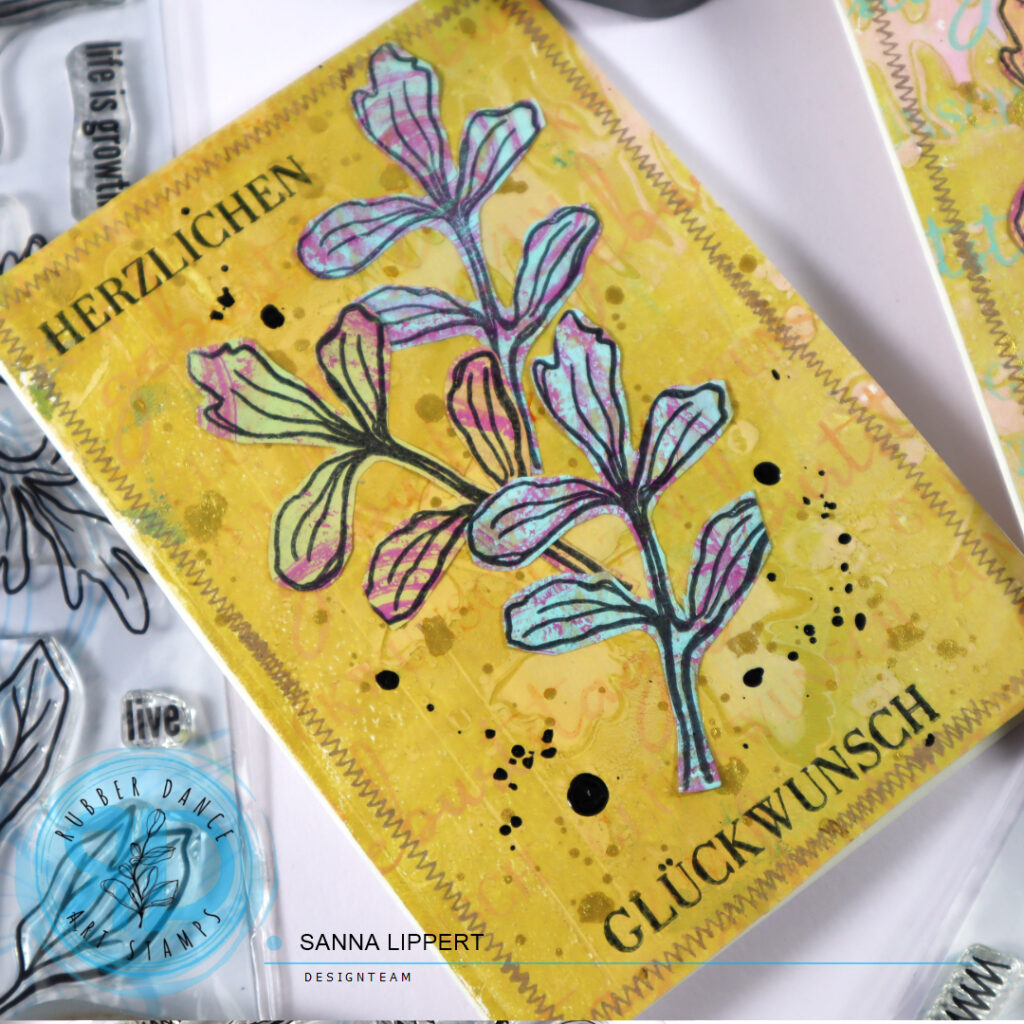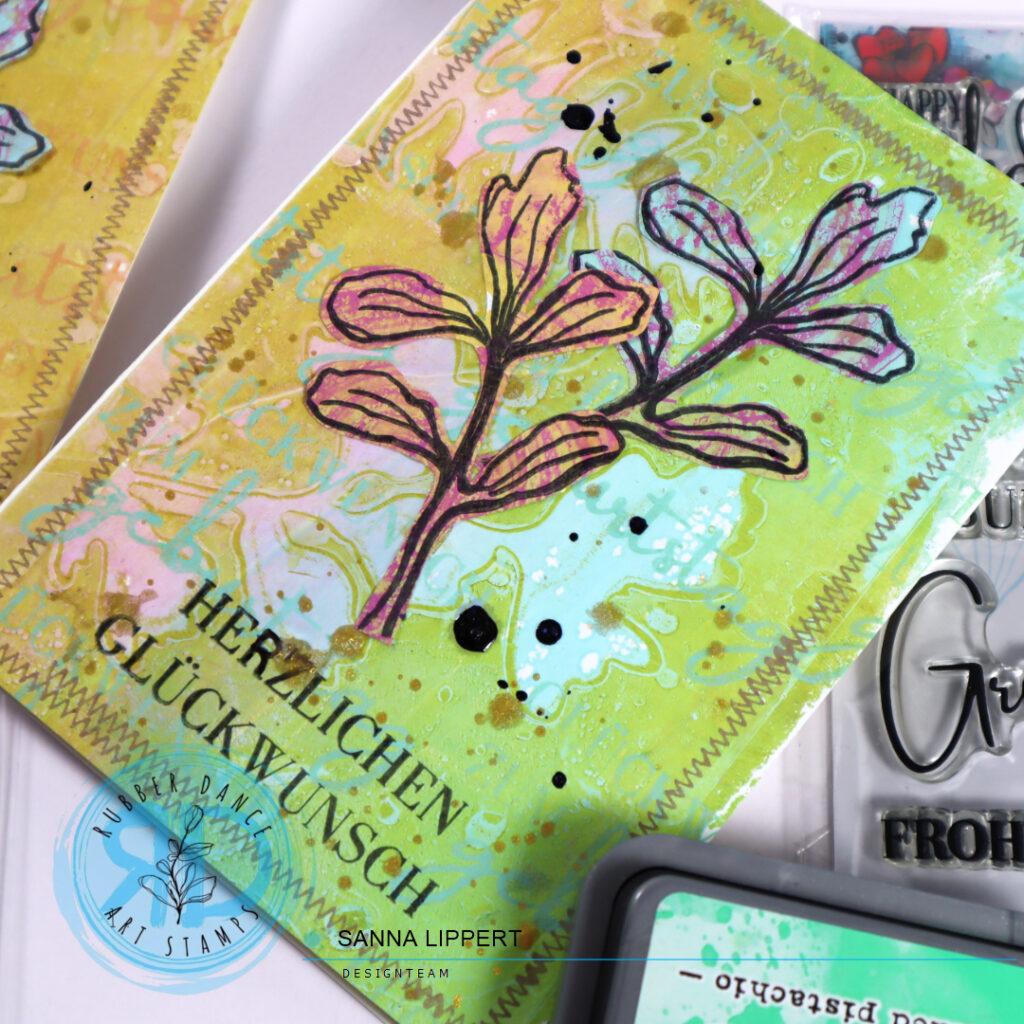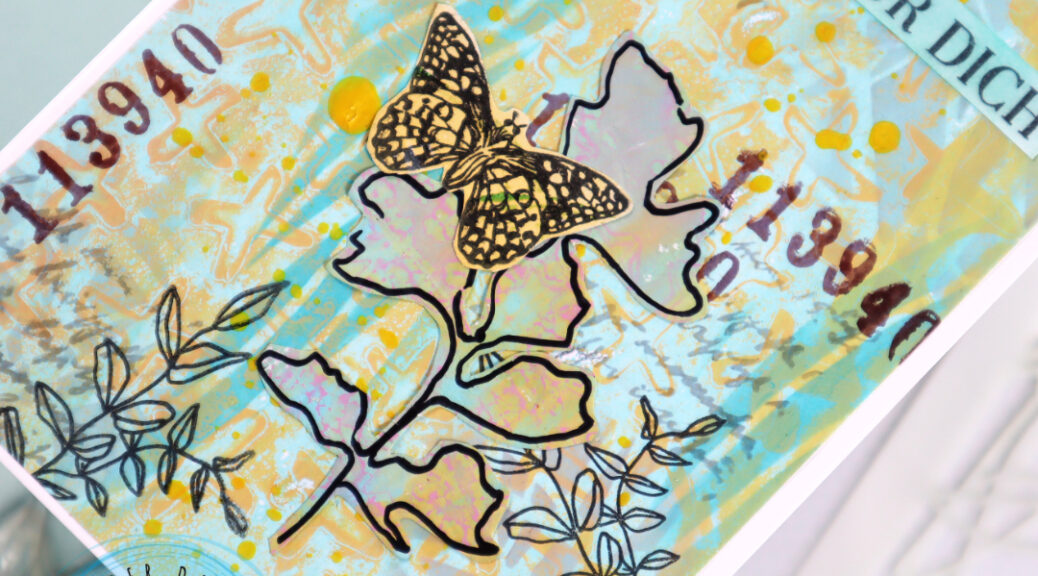
Hello everyone! Today I´m sharing a set of two cards, created using Rubber Dance products:: Organic #2, Sketchy Flowers #3, Scribbles #1, Mix It Up 6, Kartengrüße, Butterflies and Moths as well as Sketchy Leaves 5.
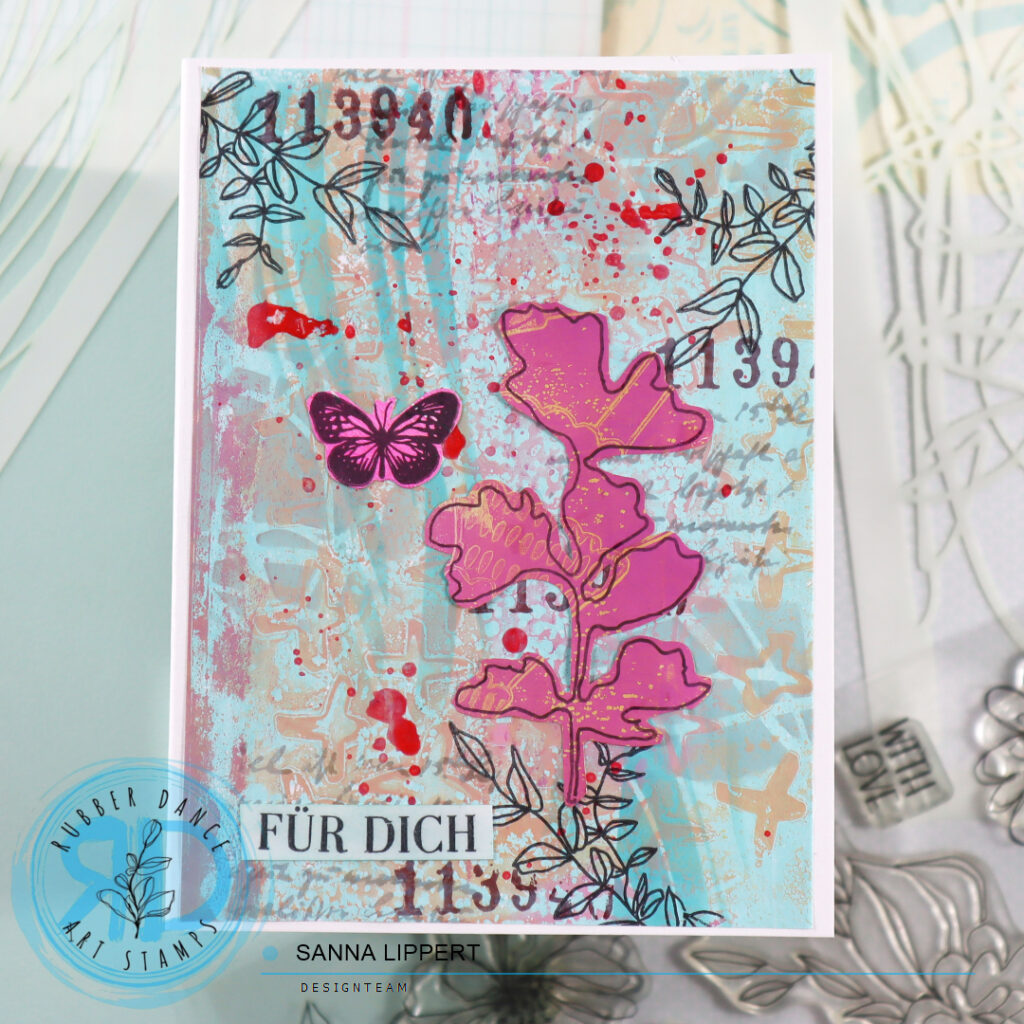
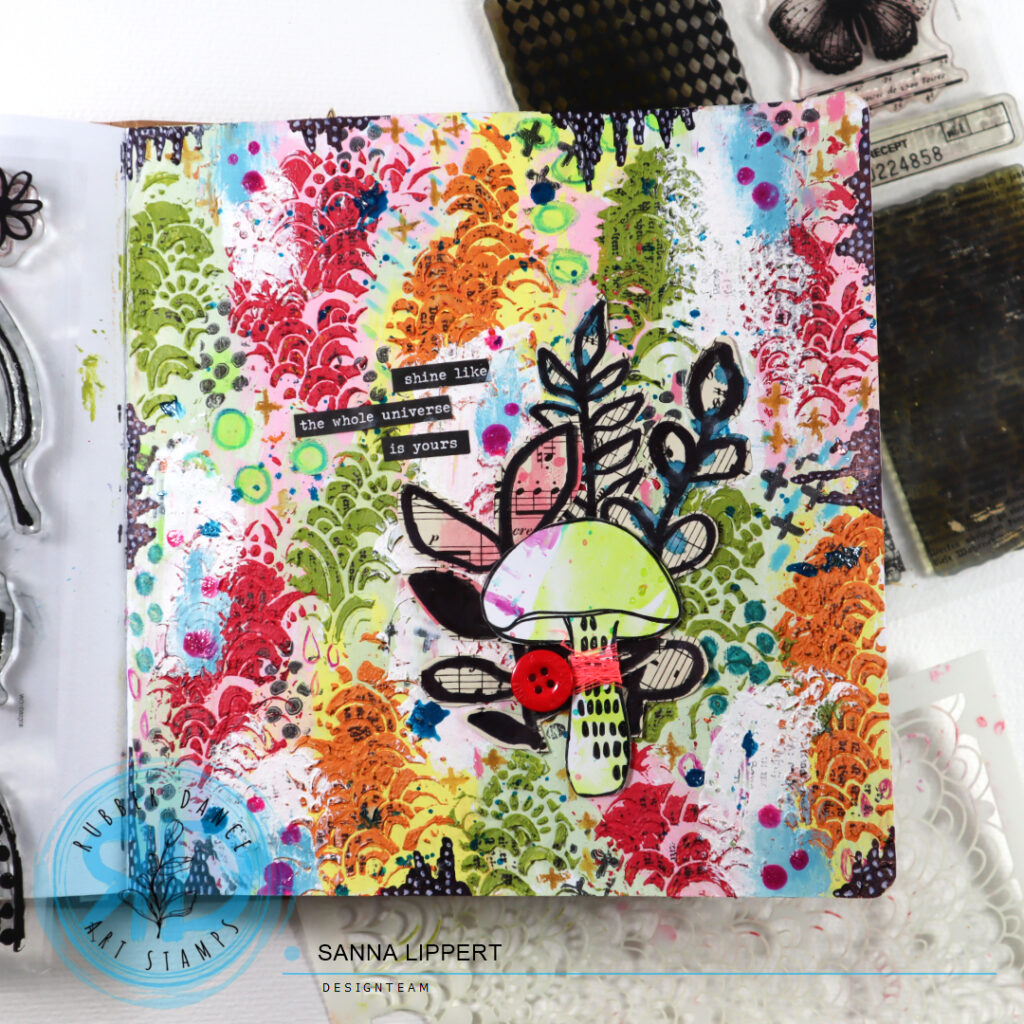
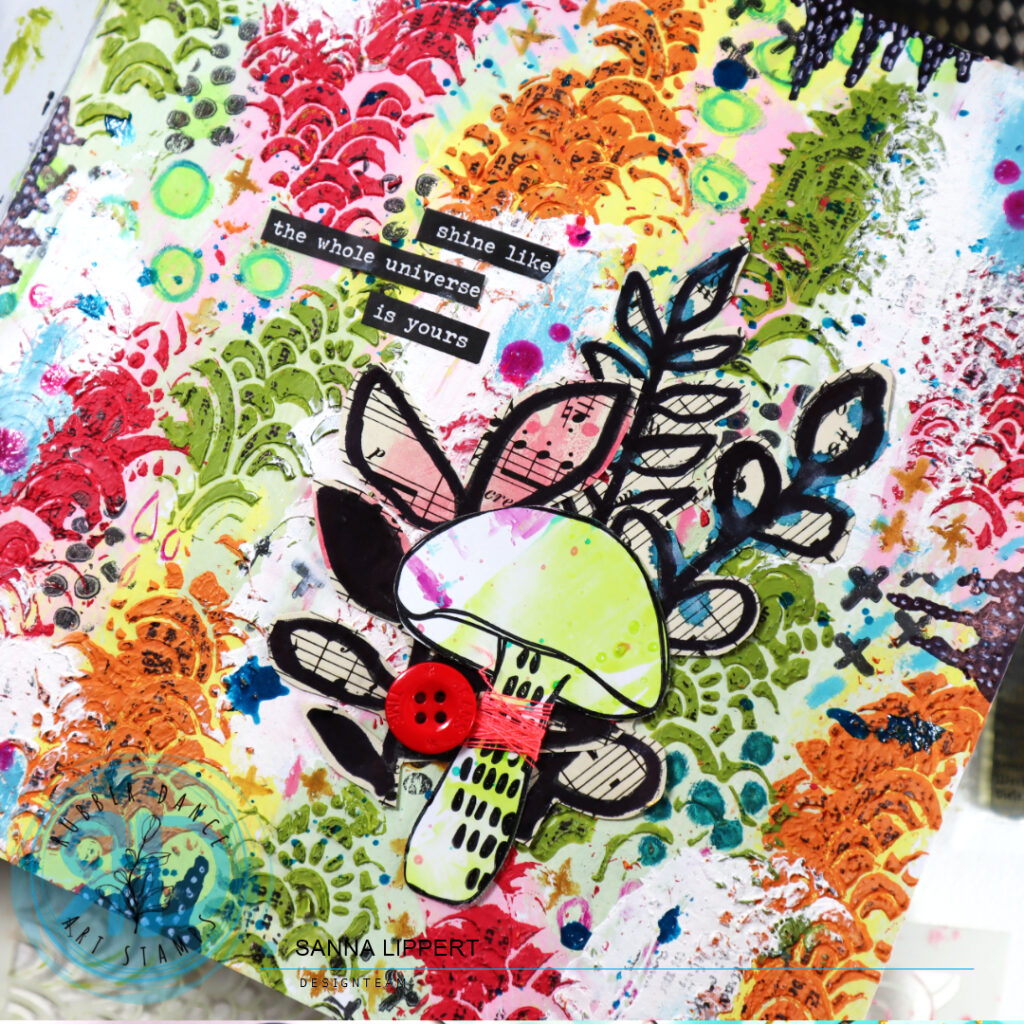
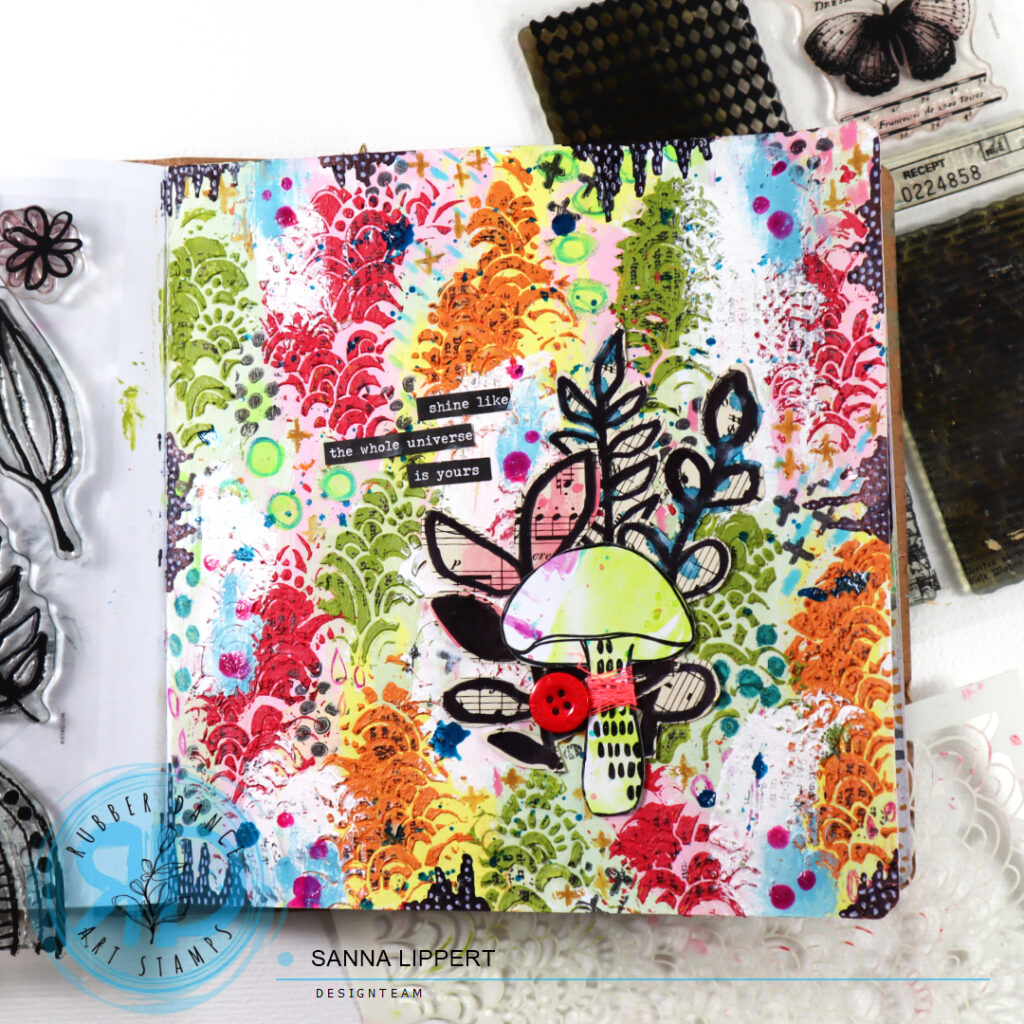
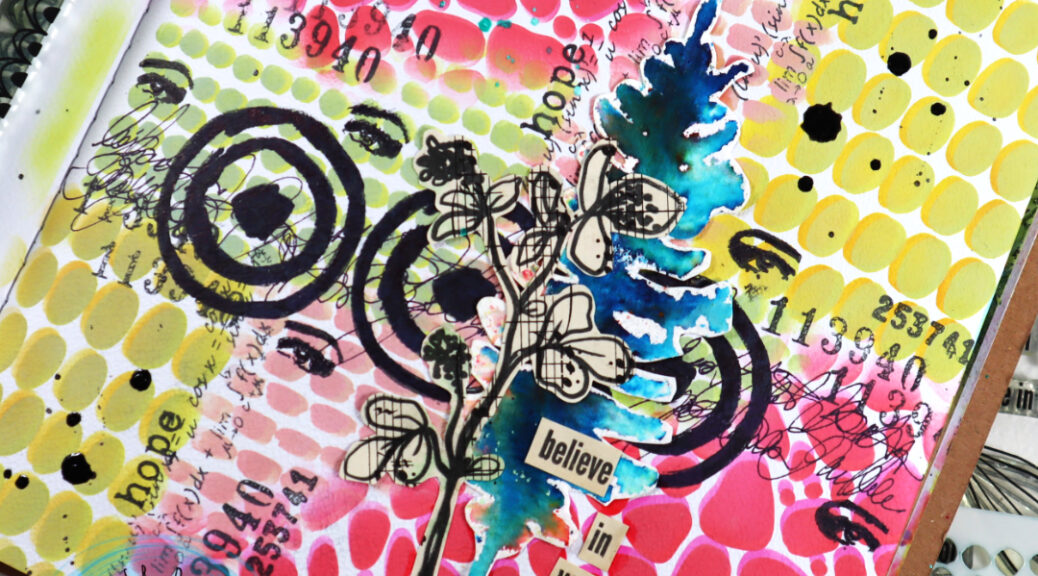
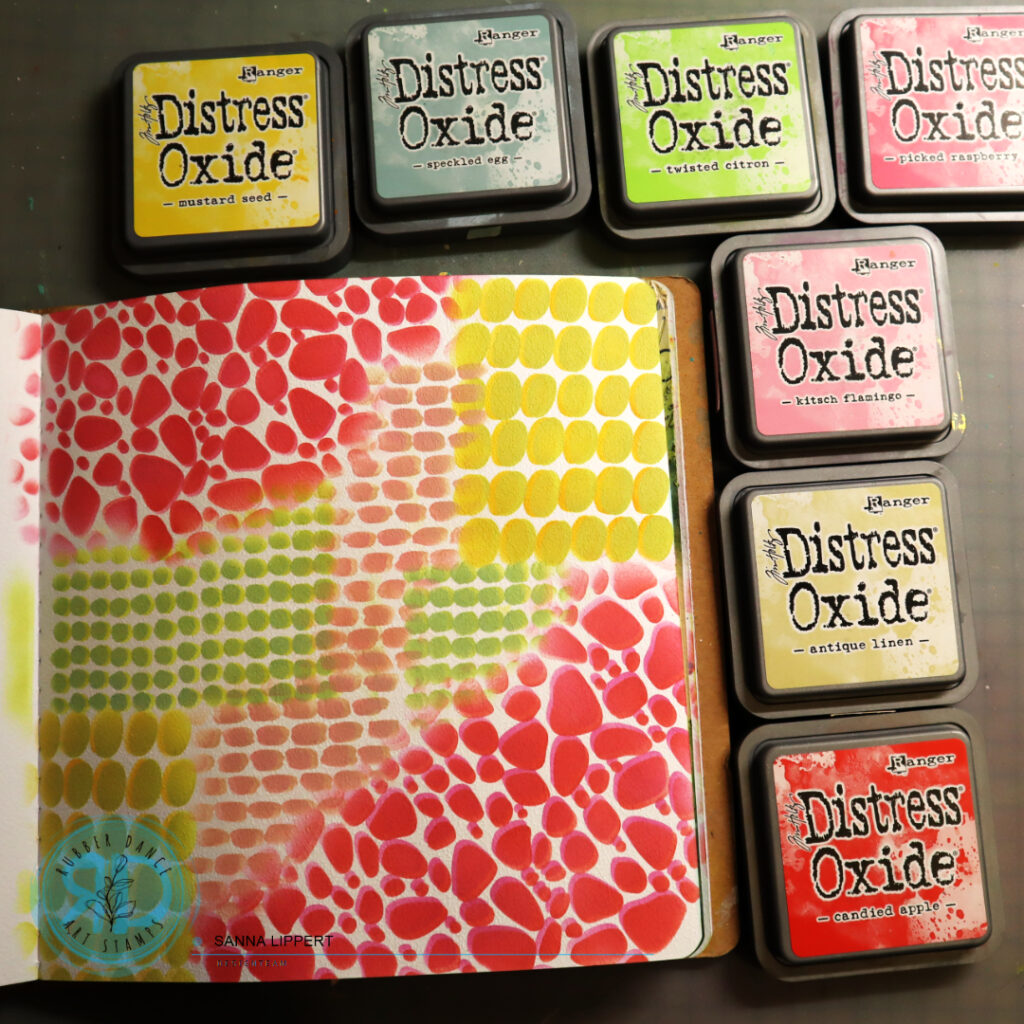
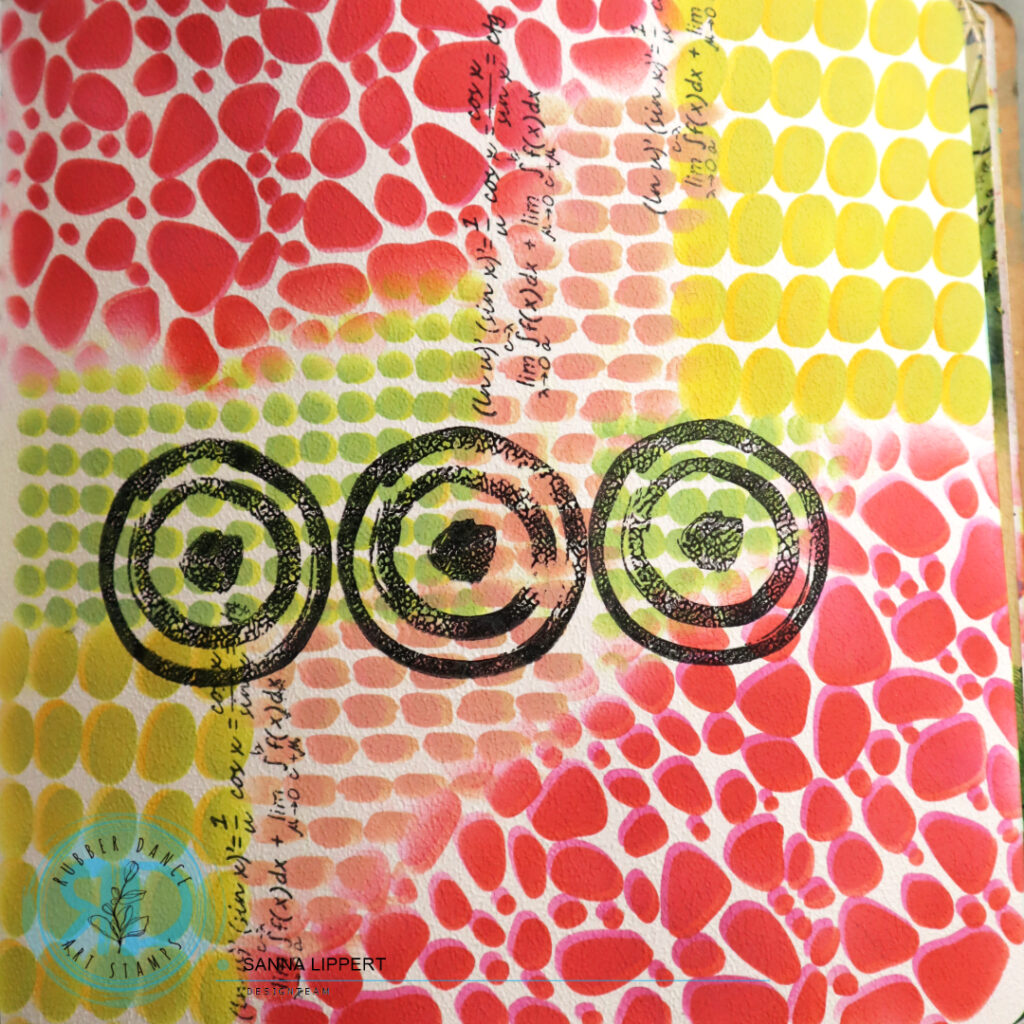
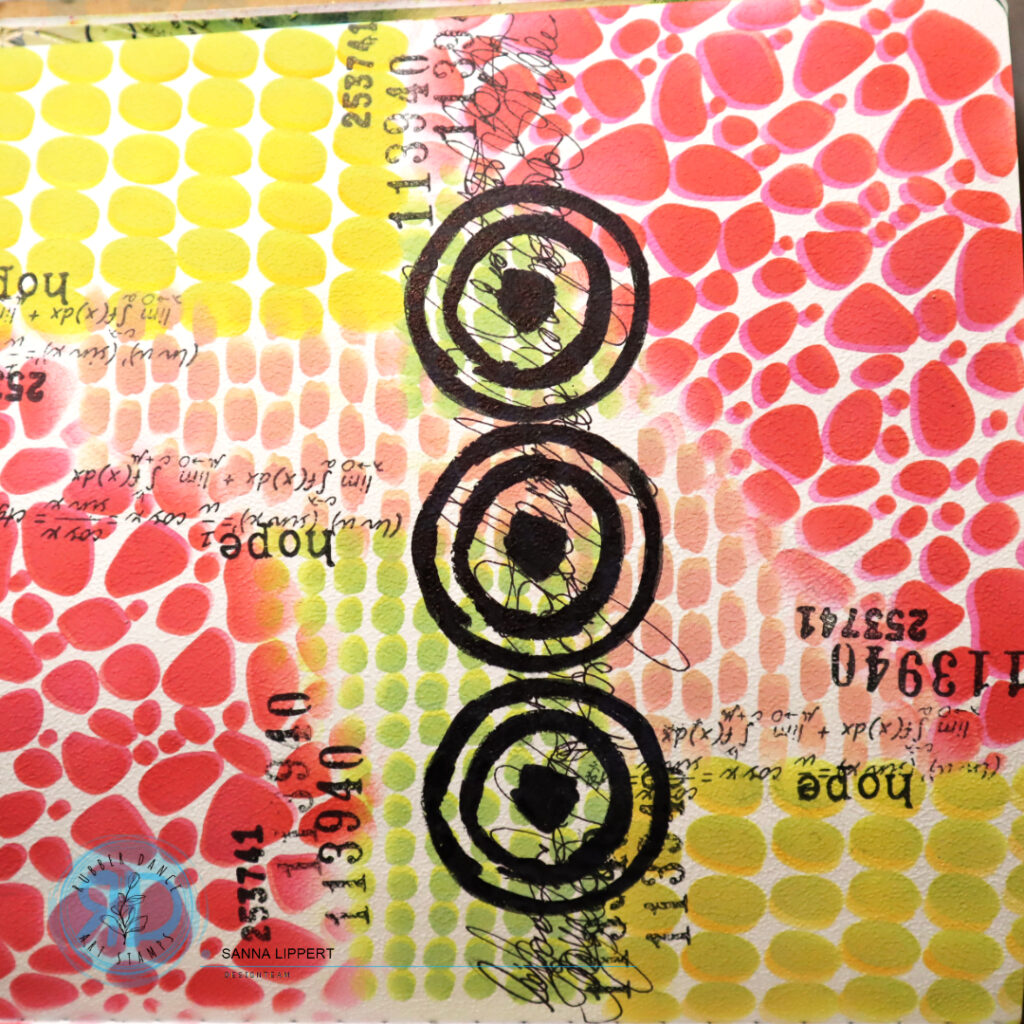
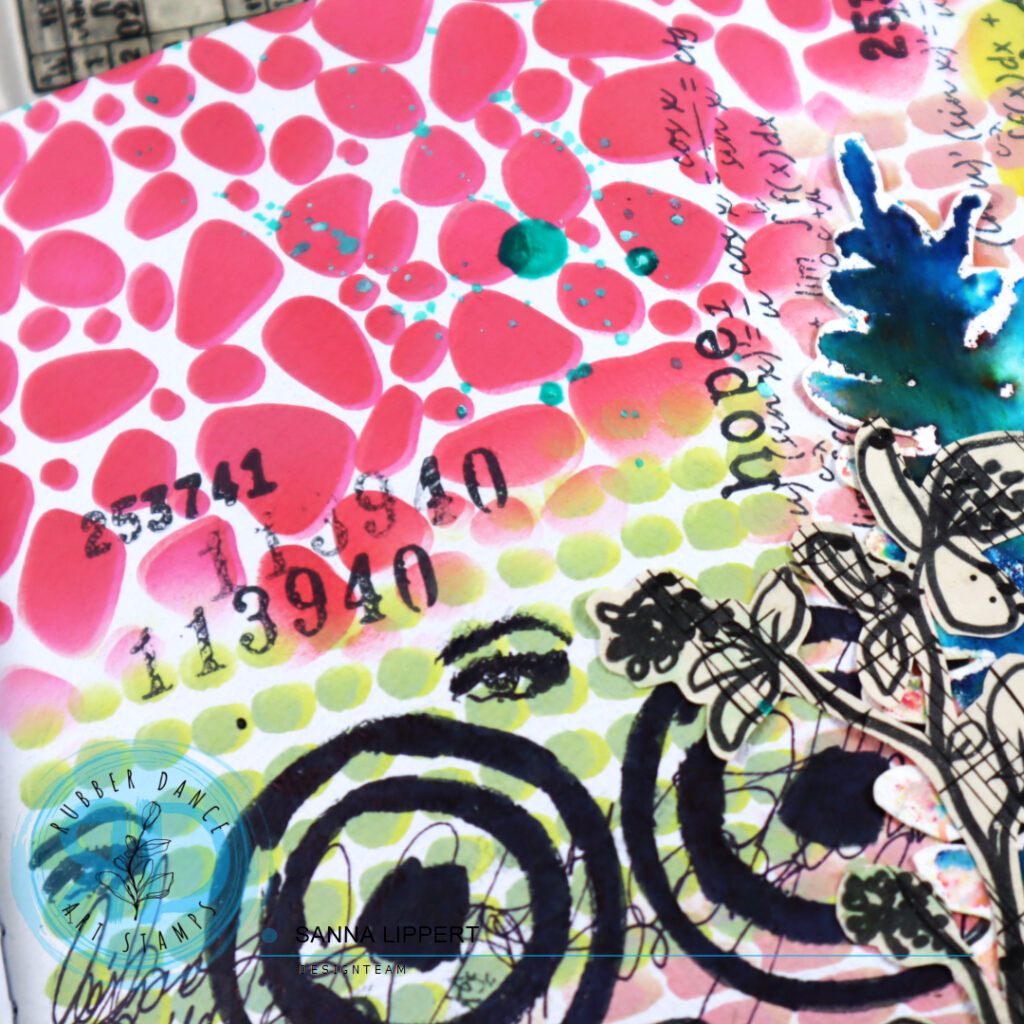
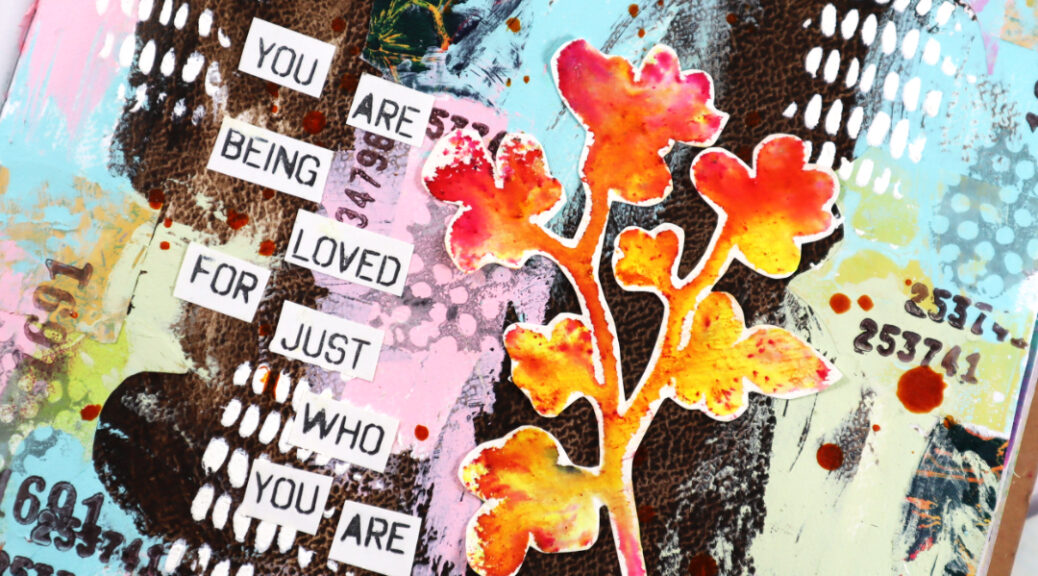
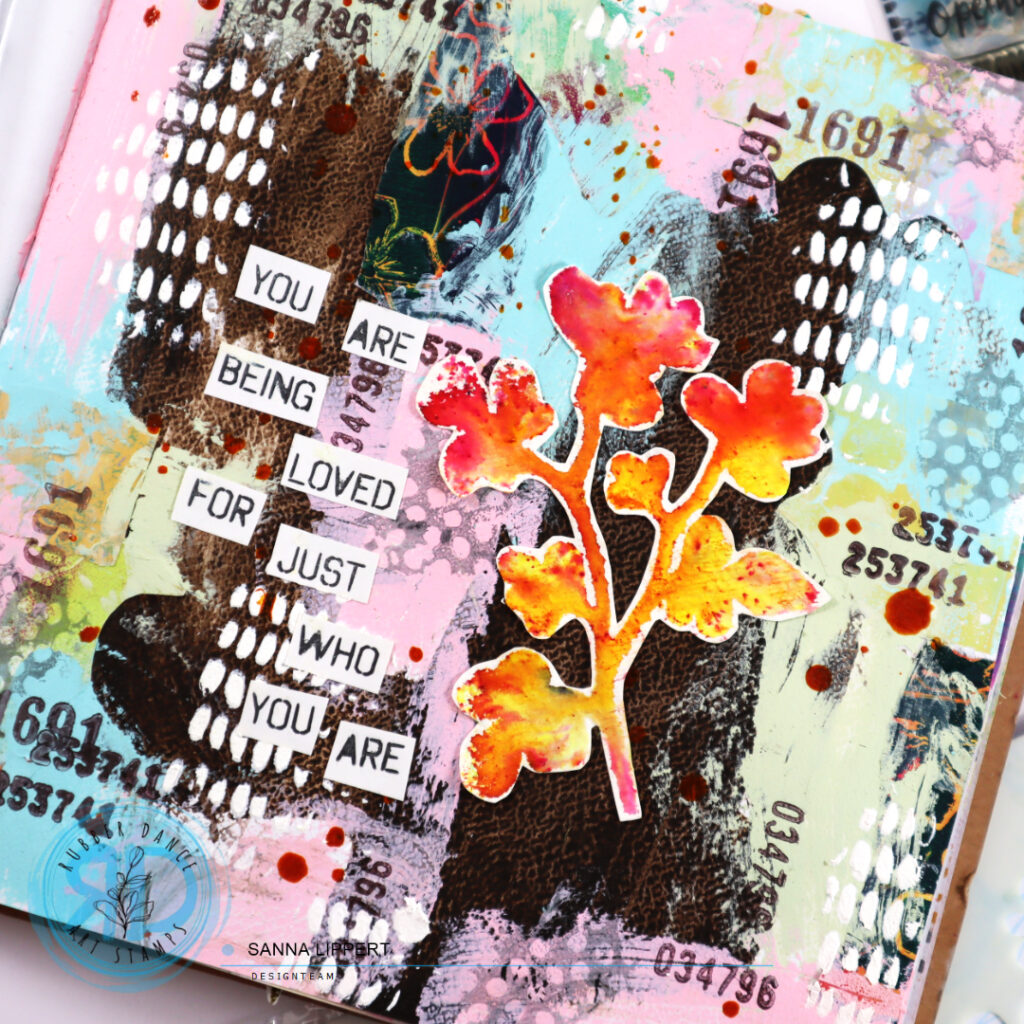
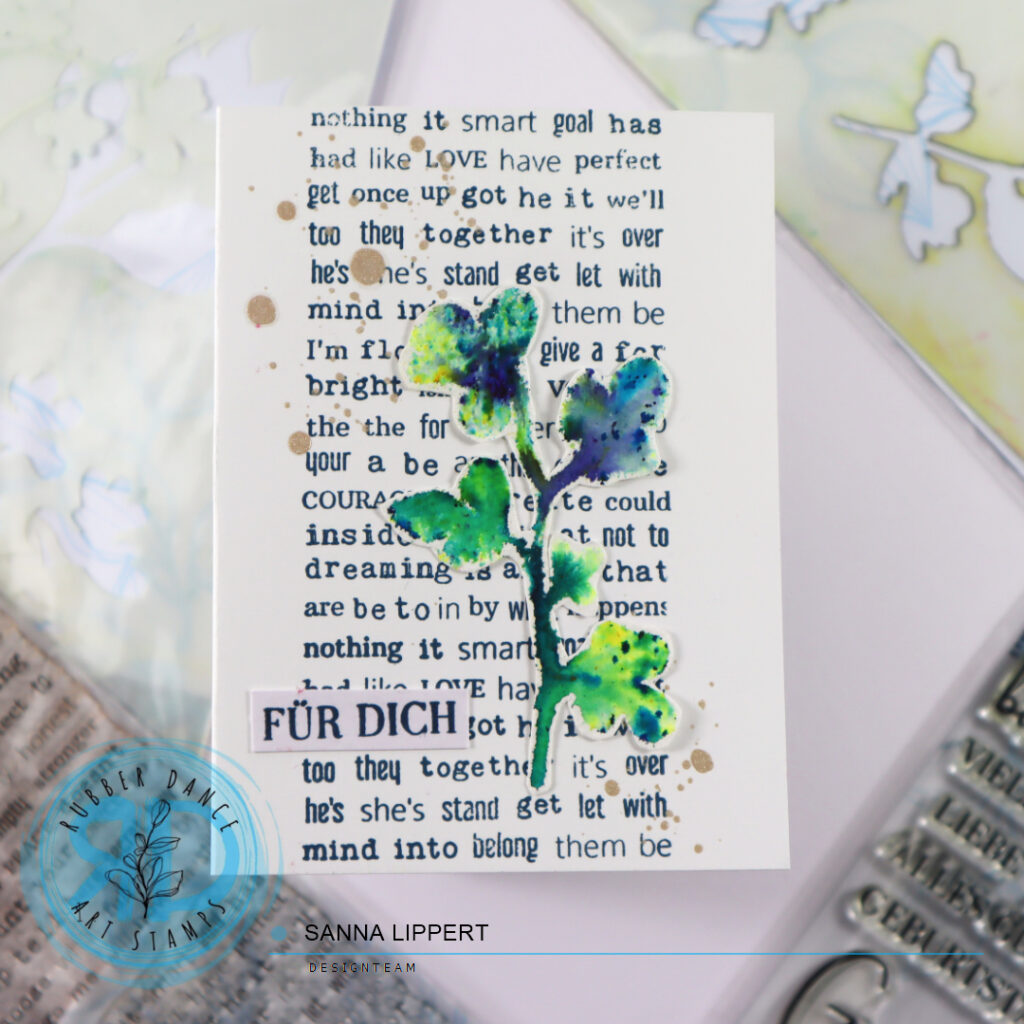
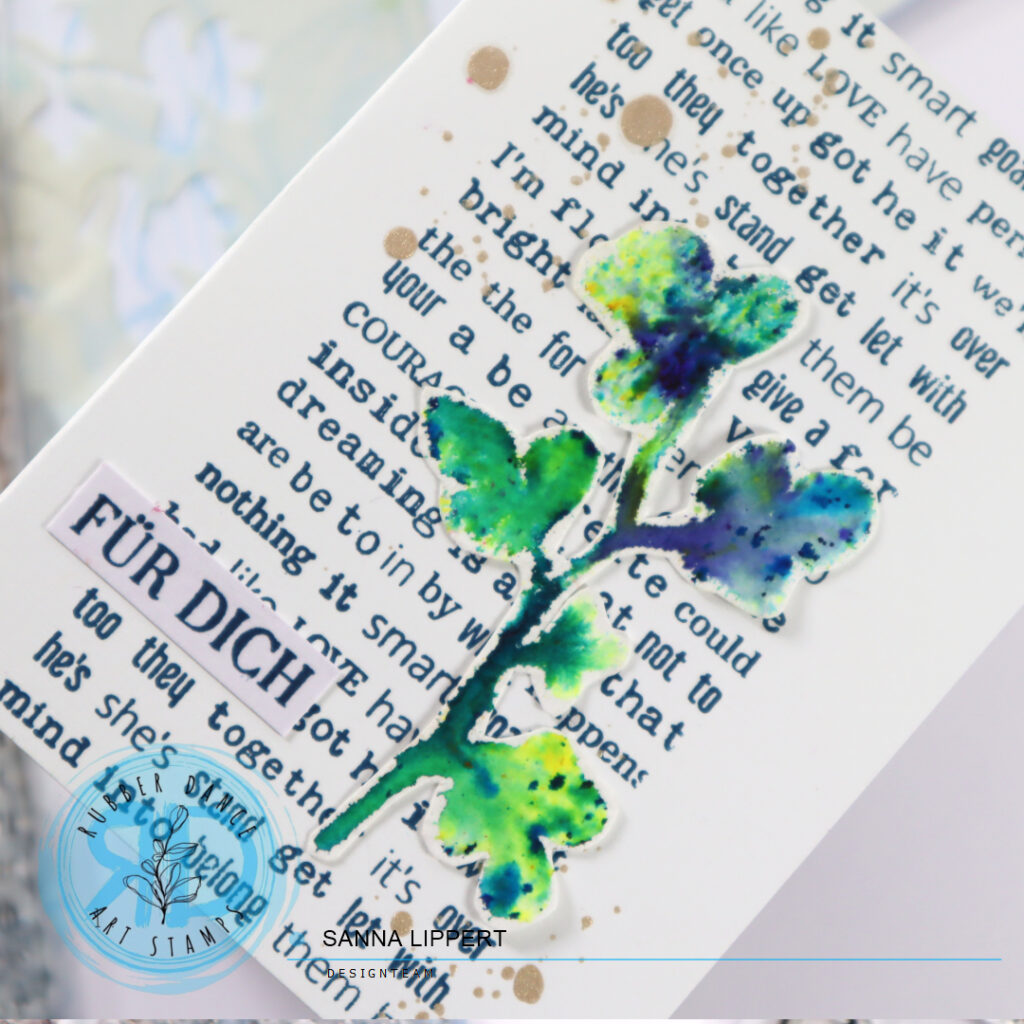
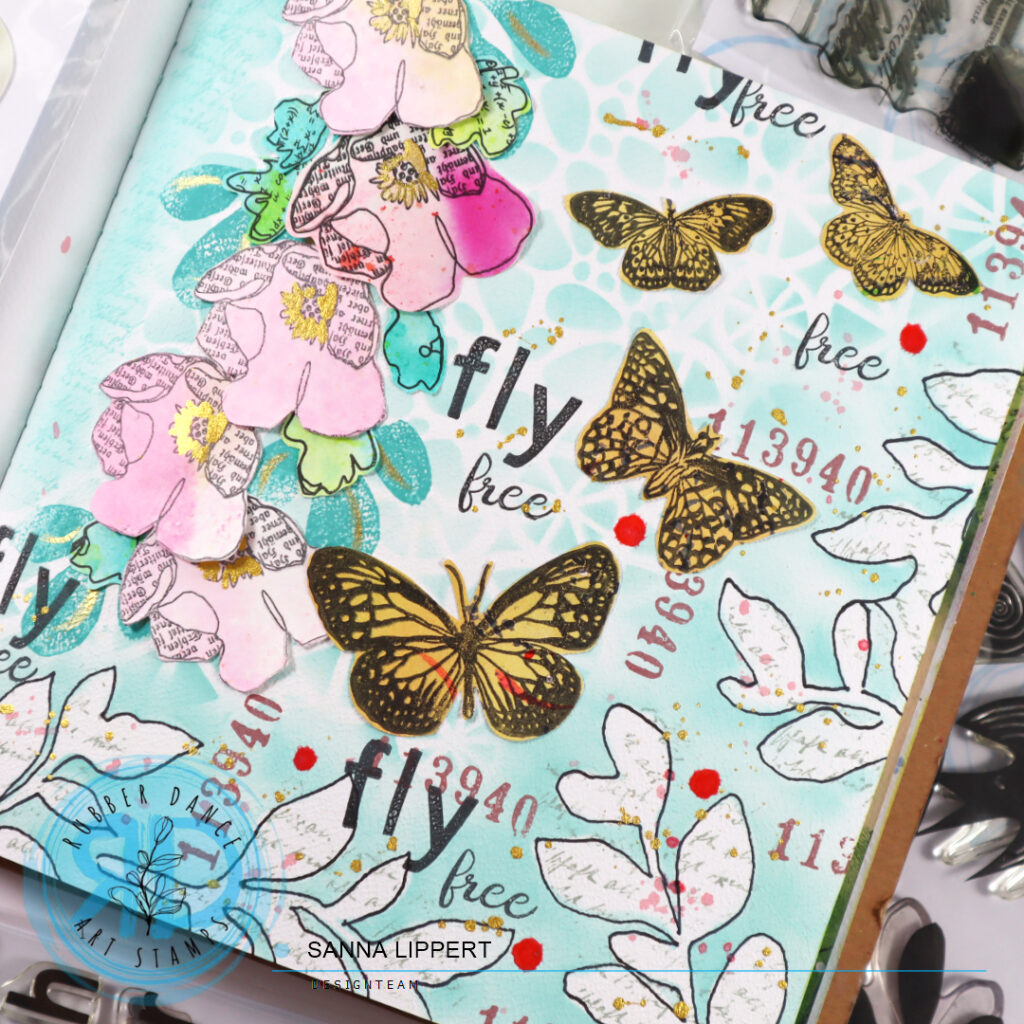
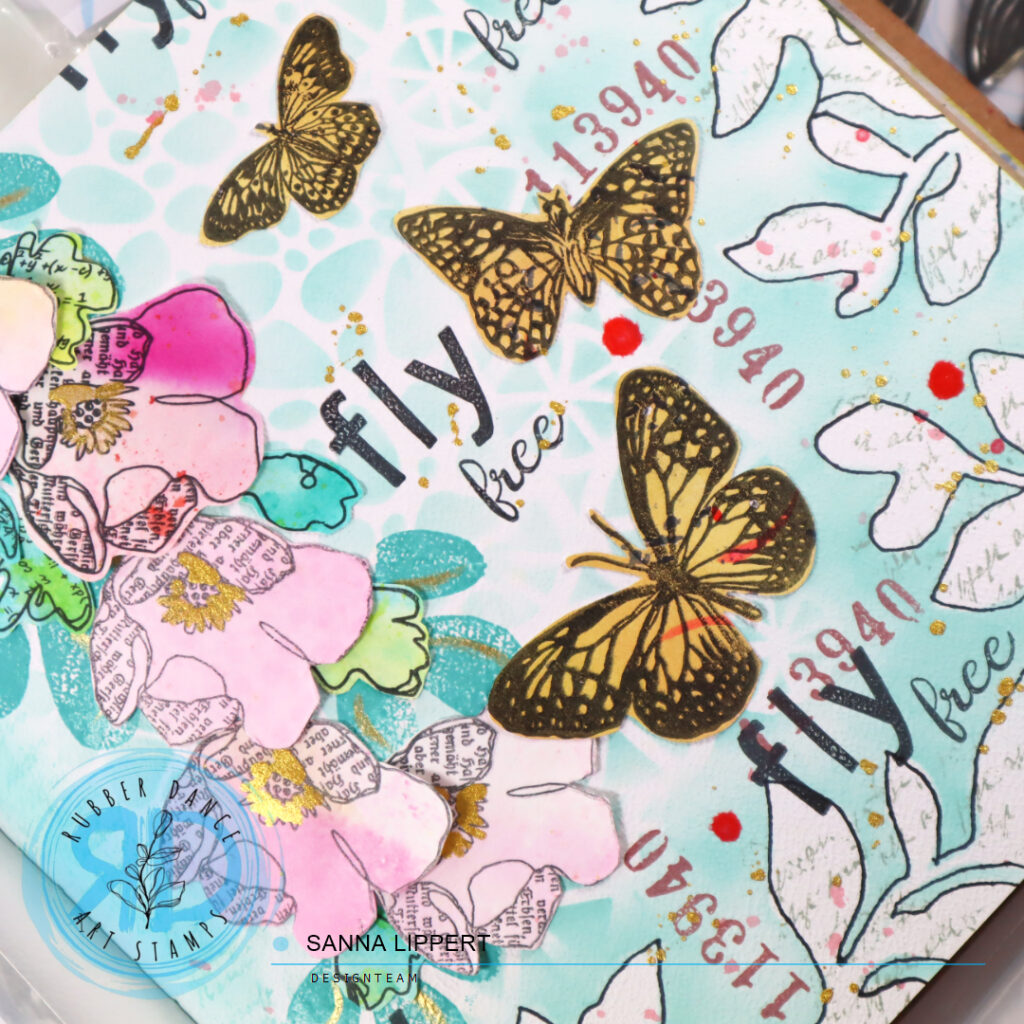
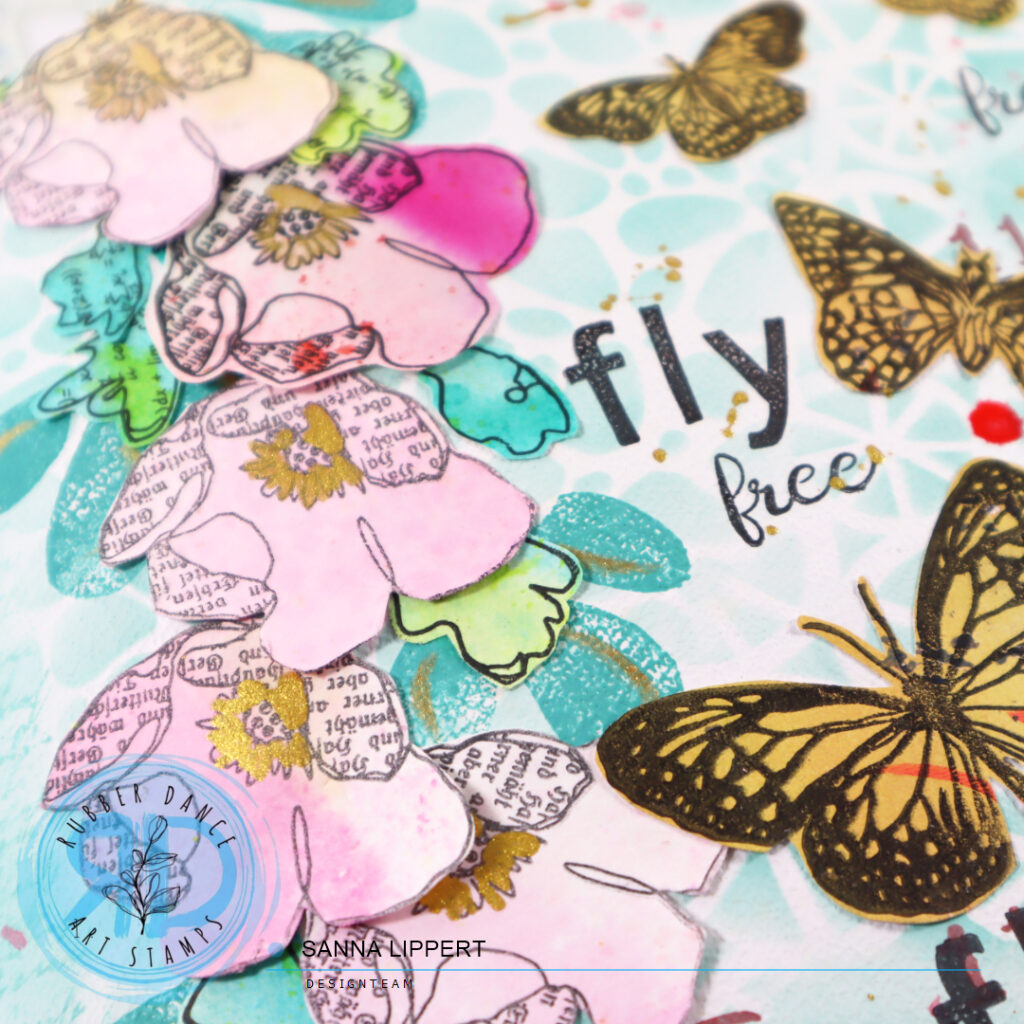
I started off with collage papers I had made using the Cross It stencil with my gelli plate and acrylic paints. I first cut the paper into a size to fit the card bases. After that I took Distress Oxide Inks in two grey tones as well as a turquoise tone and applied ink thru the Scribbles and Organic stencil patterns onto the collage papers. I didn´t fill the whole paper with these patterns, instead I applied bits here and there. That way the original pattern also still shows thru.
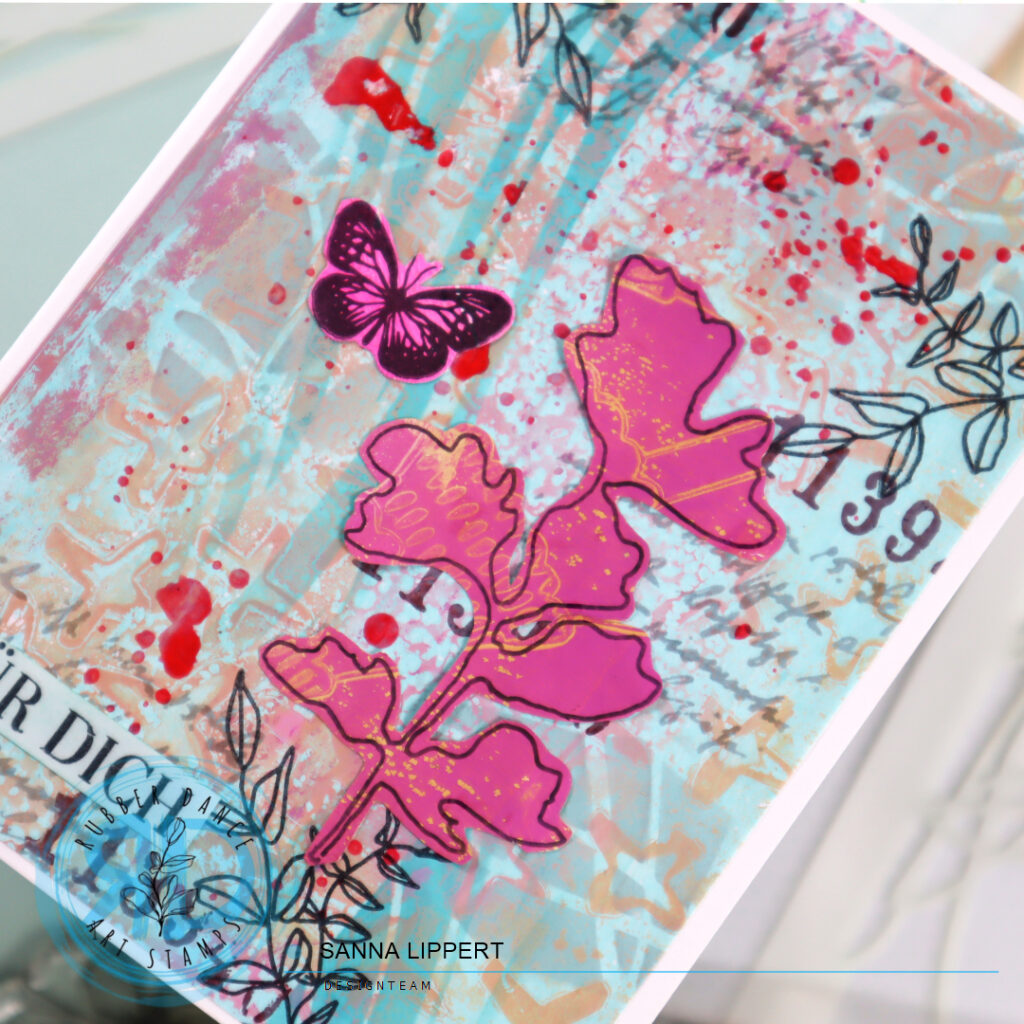
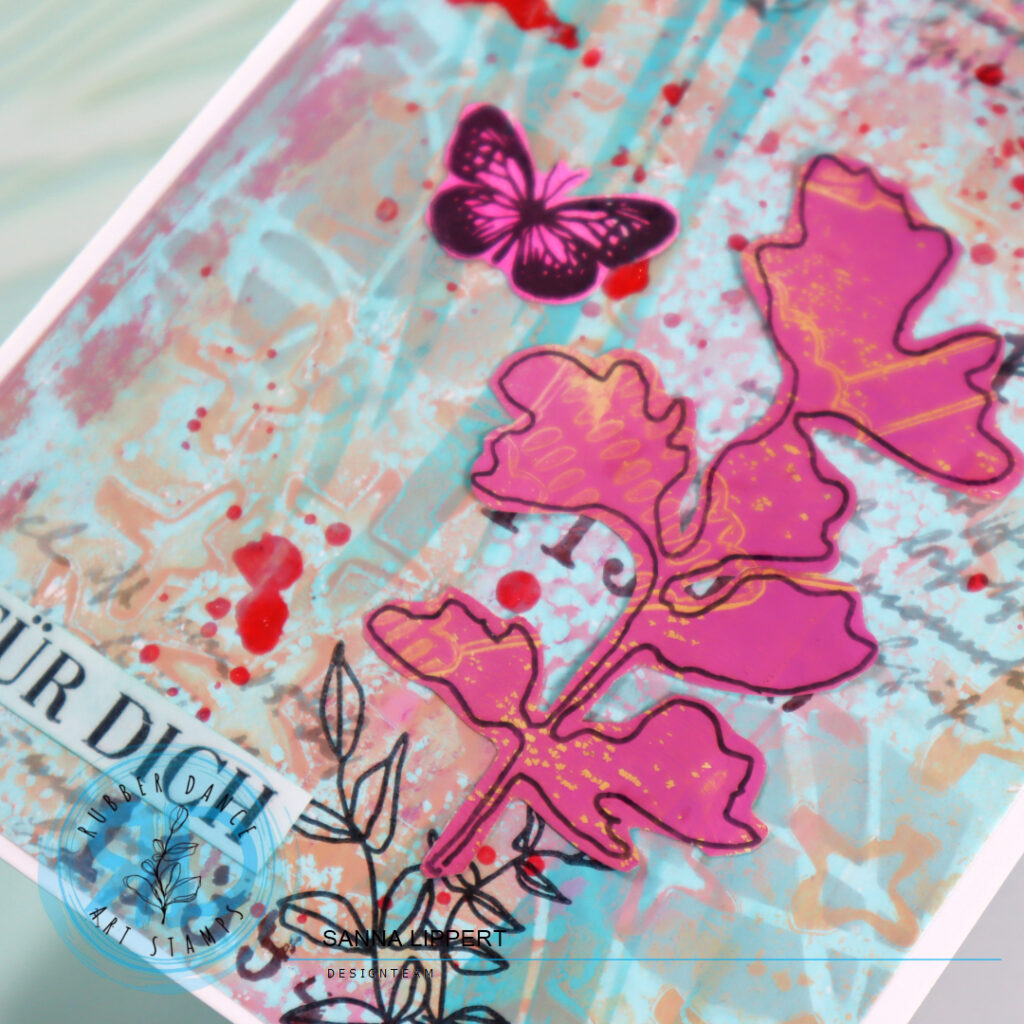
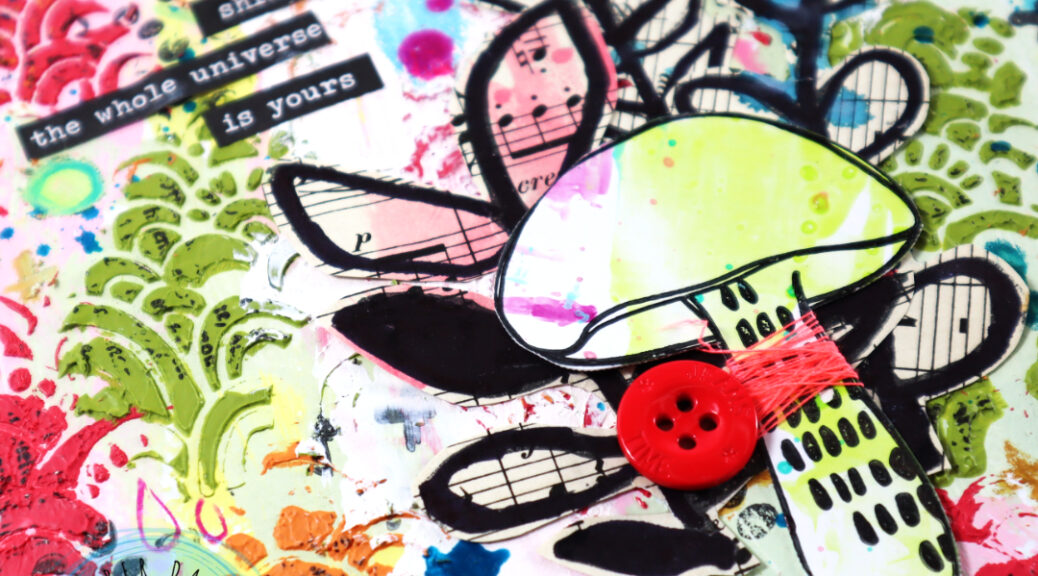
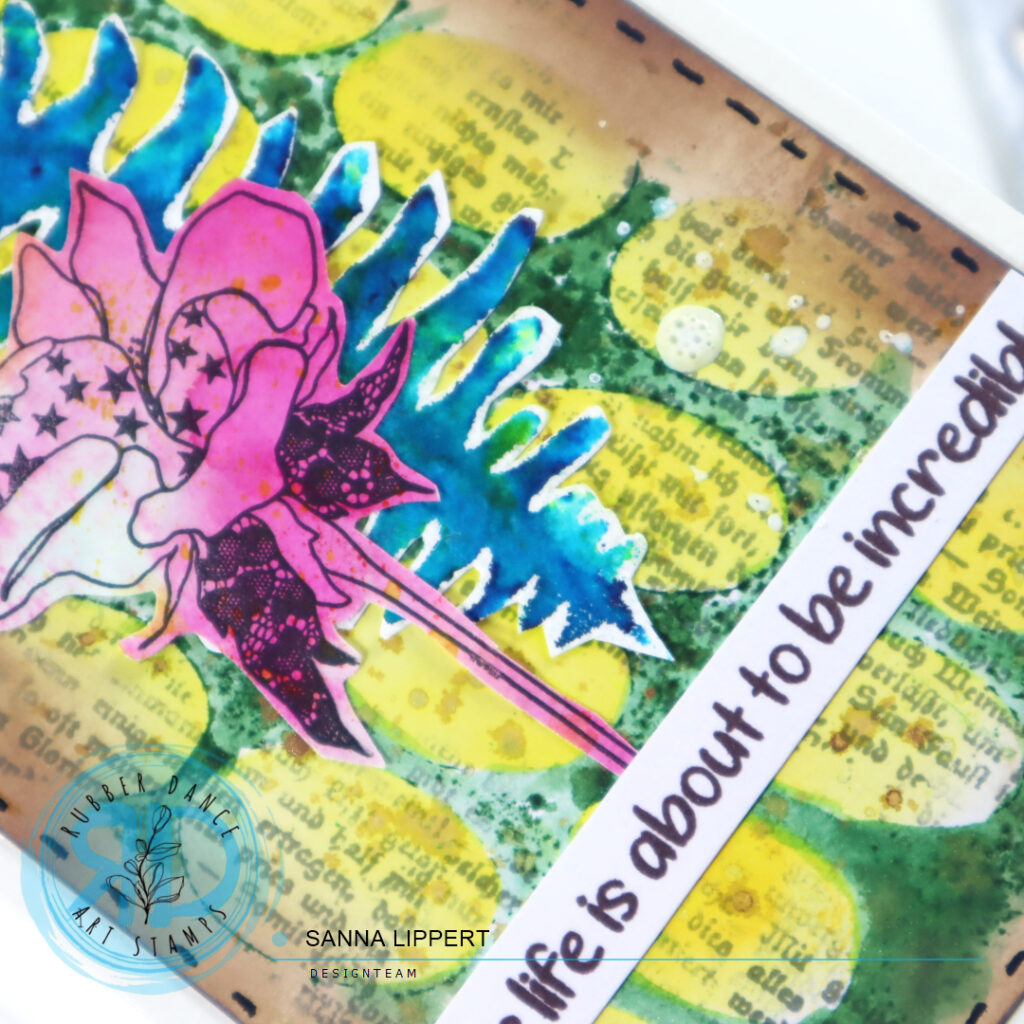
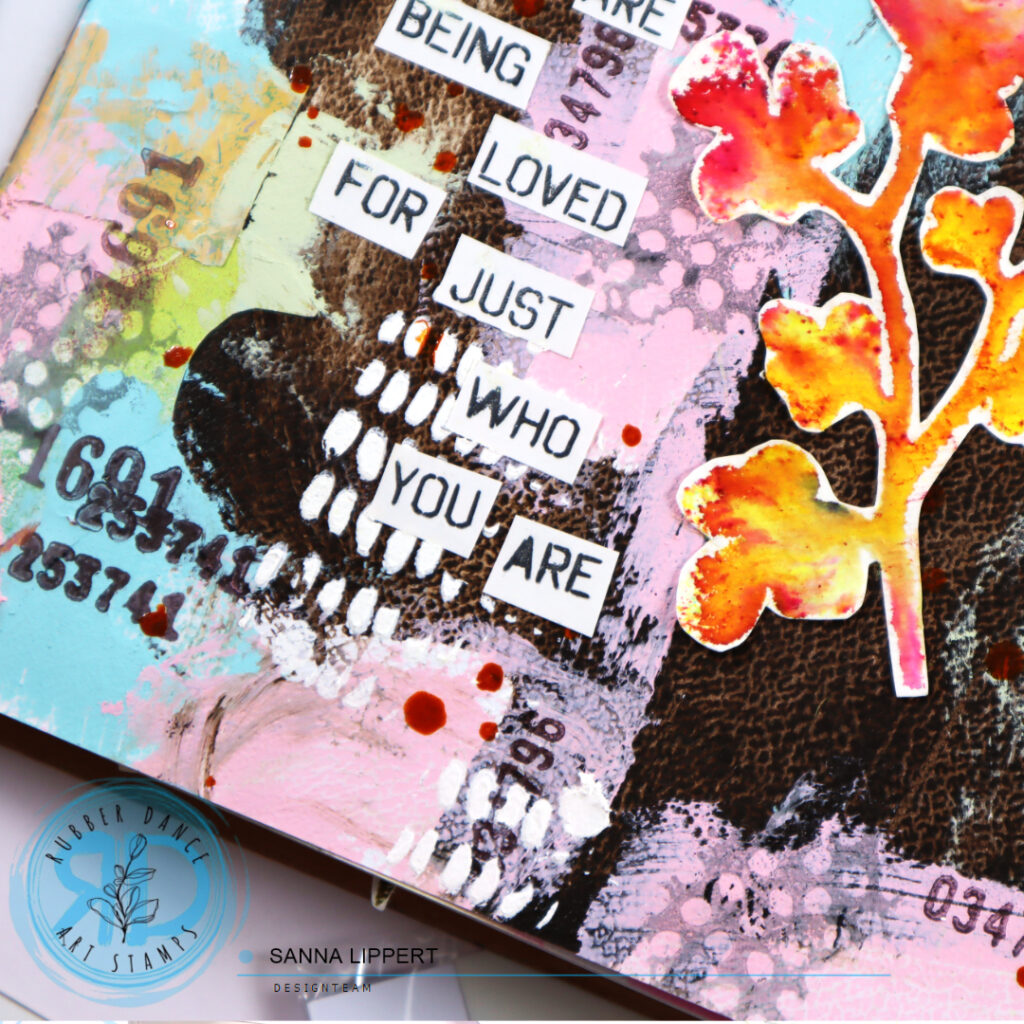
Next I stamped with grey VersaFine ink and the Mix It Up 6 text stamp some patterns to both pieces of paper. I then took the number stamp from the same set and stamped with dark brown ink (also VersaFine ink) next to the previous stamped areas. As the next layer I took the Sketchy Flowers #3 stamp set and stamped only the tiny leaf images with black stamp ink – again next to the previously stamped areas.
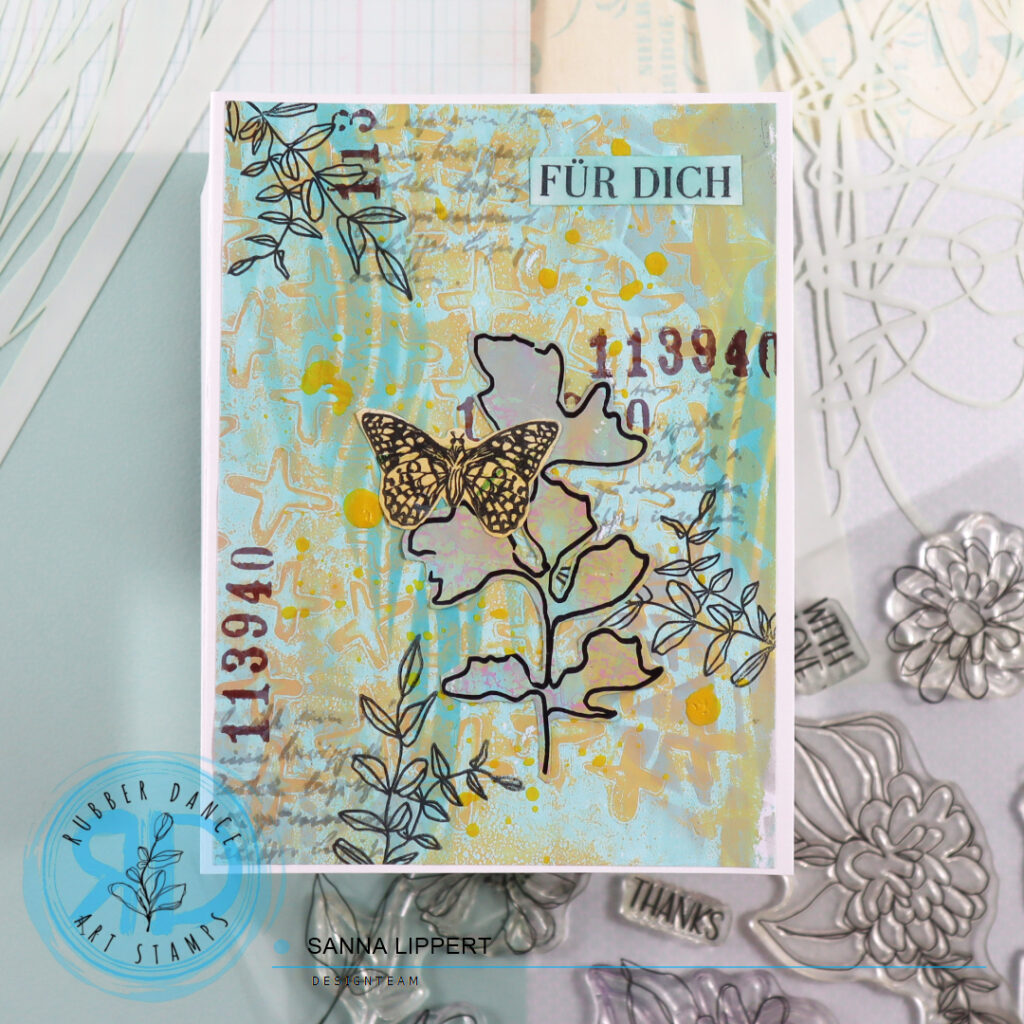
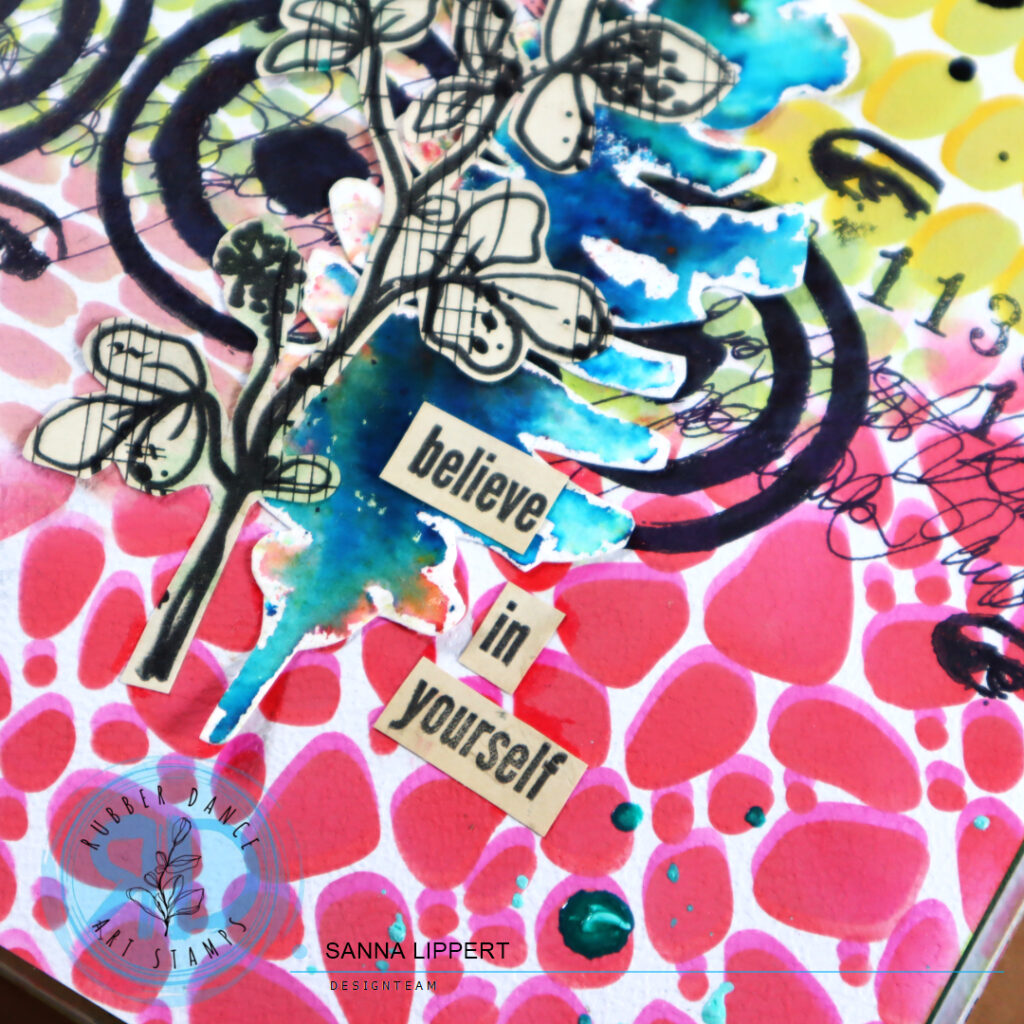
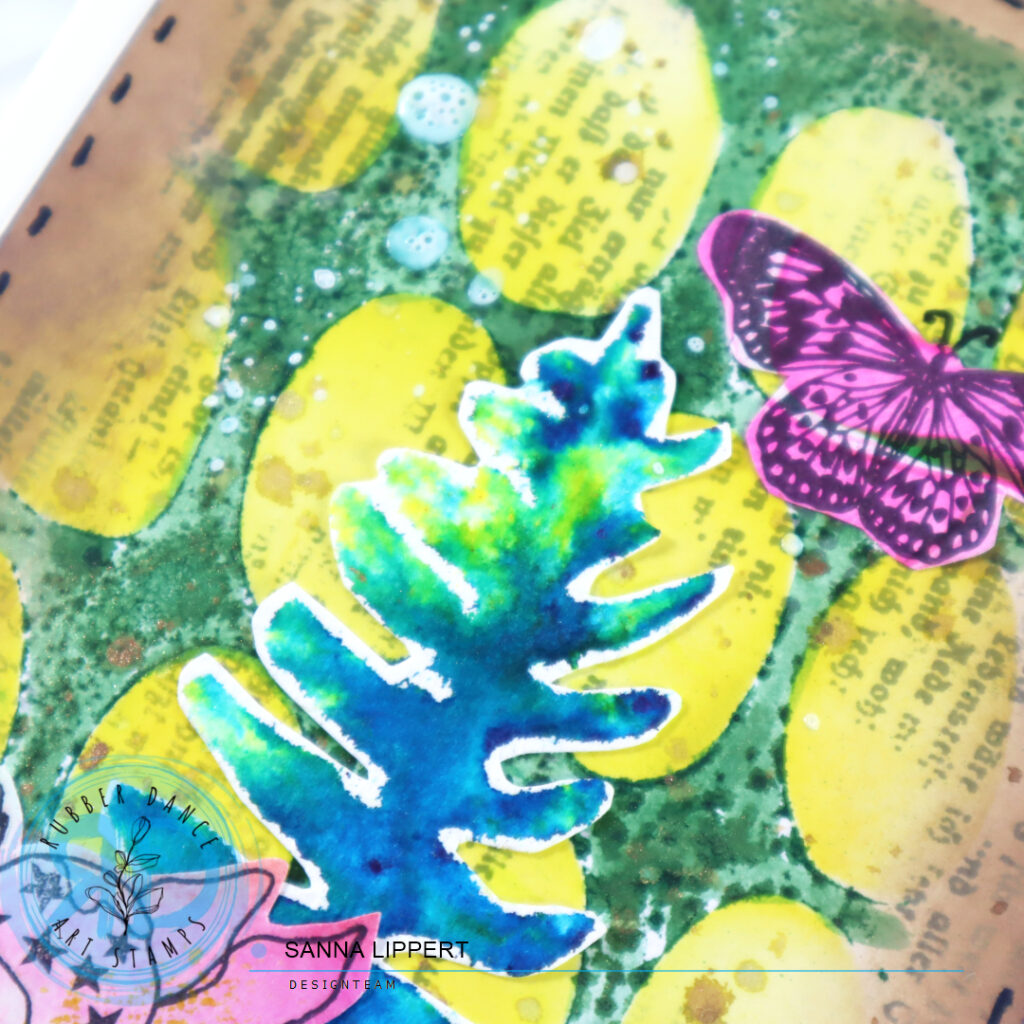
My next layer on the background was Gloss Spray droplets in “lemon” and “blushing”. At this point I let the paper dry a while until adding the focal point elements.
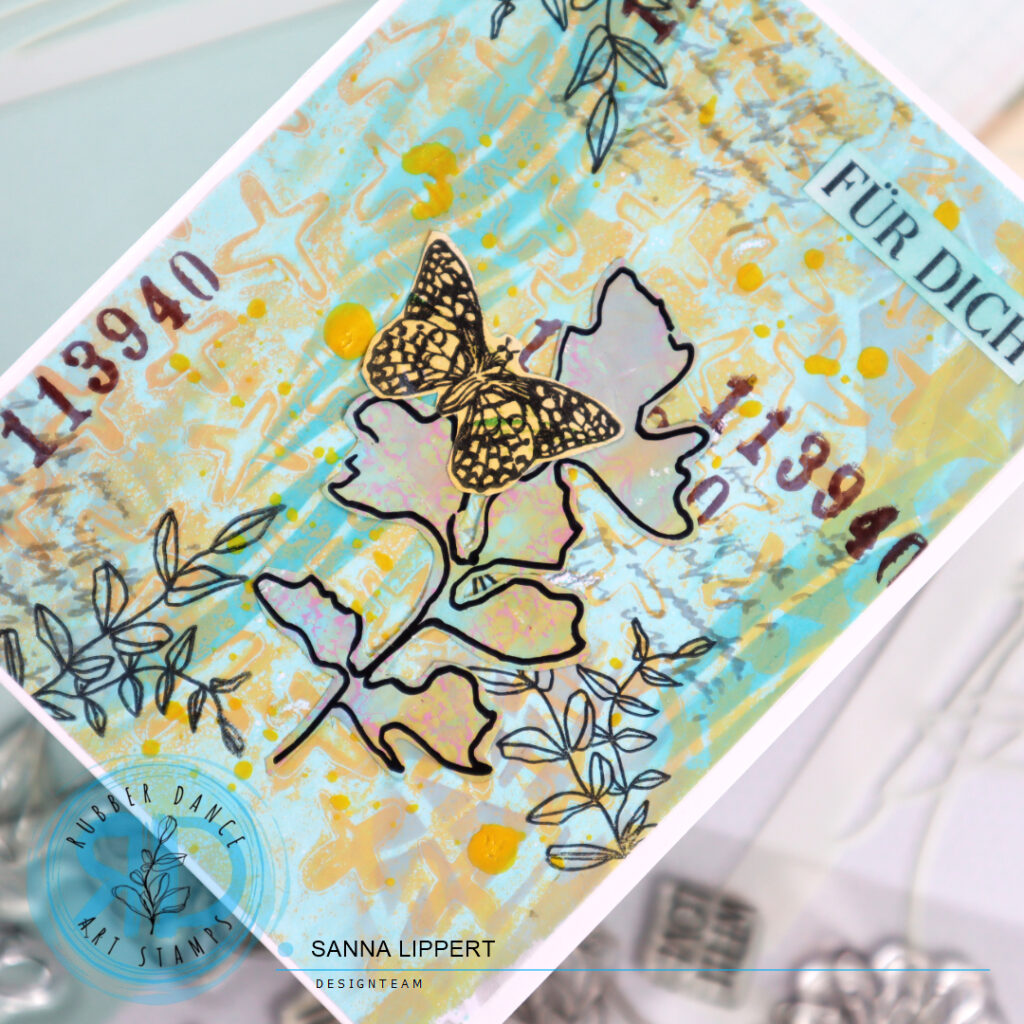
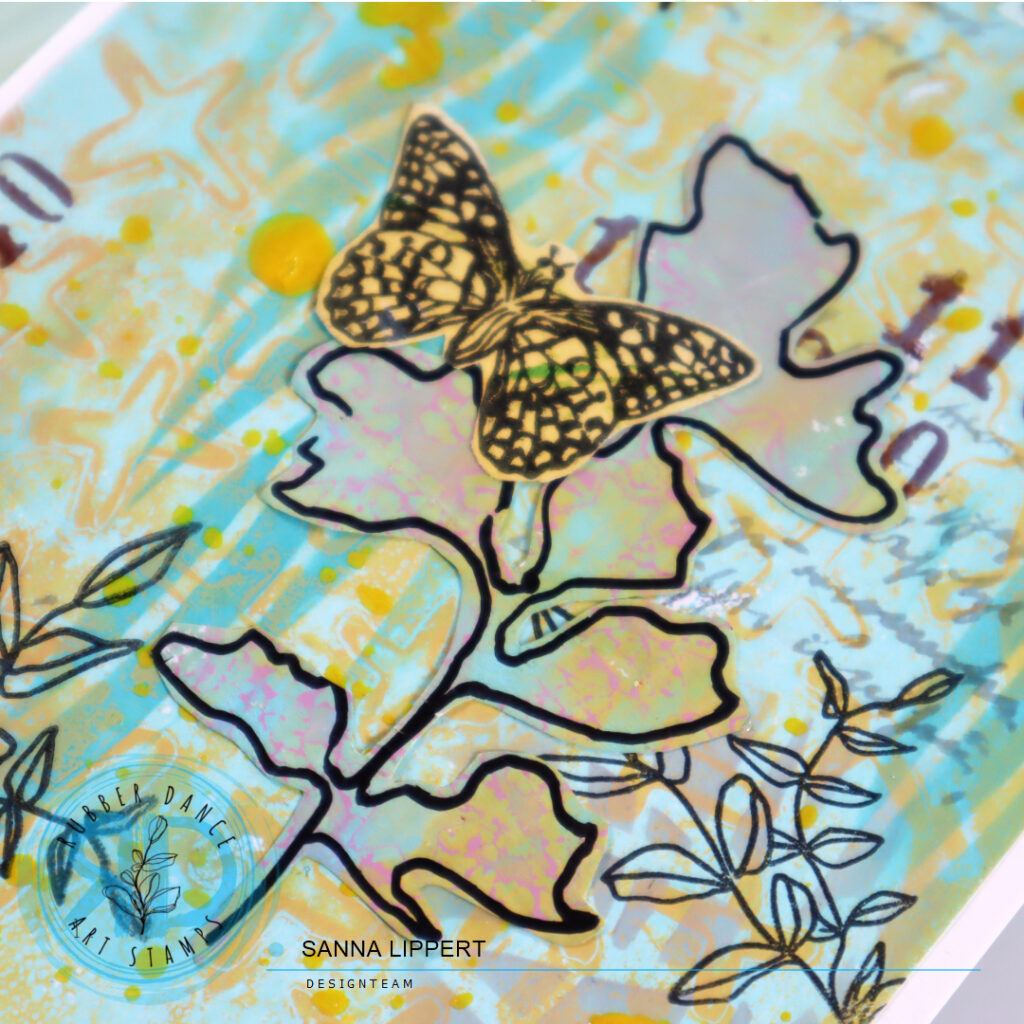
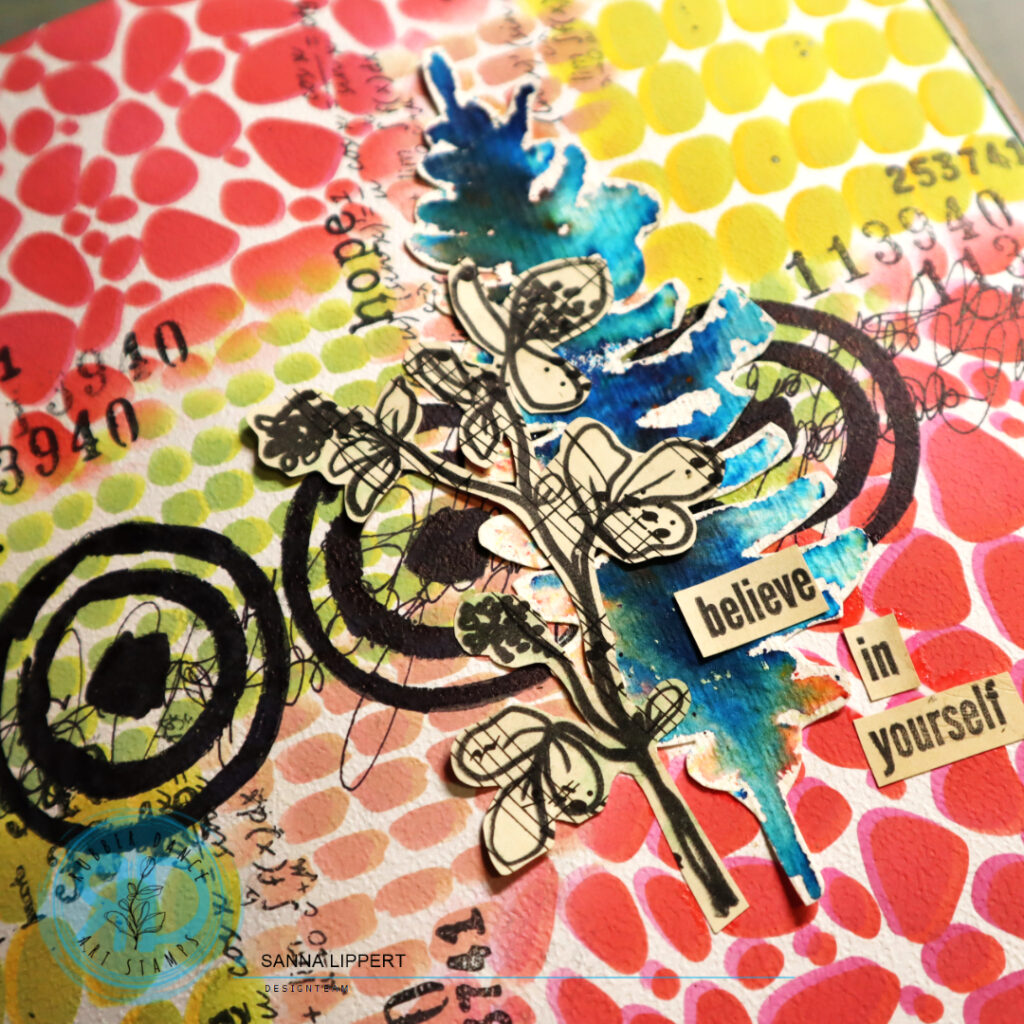
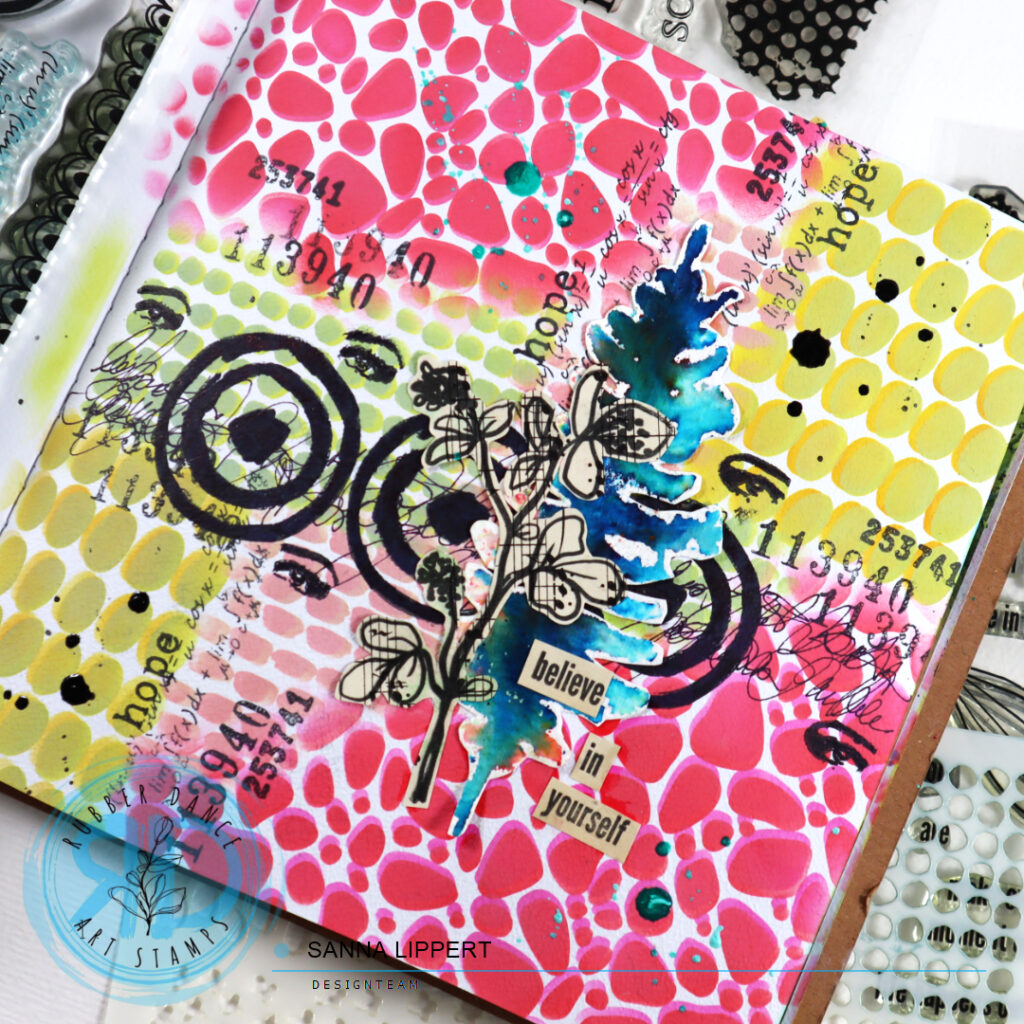
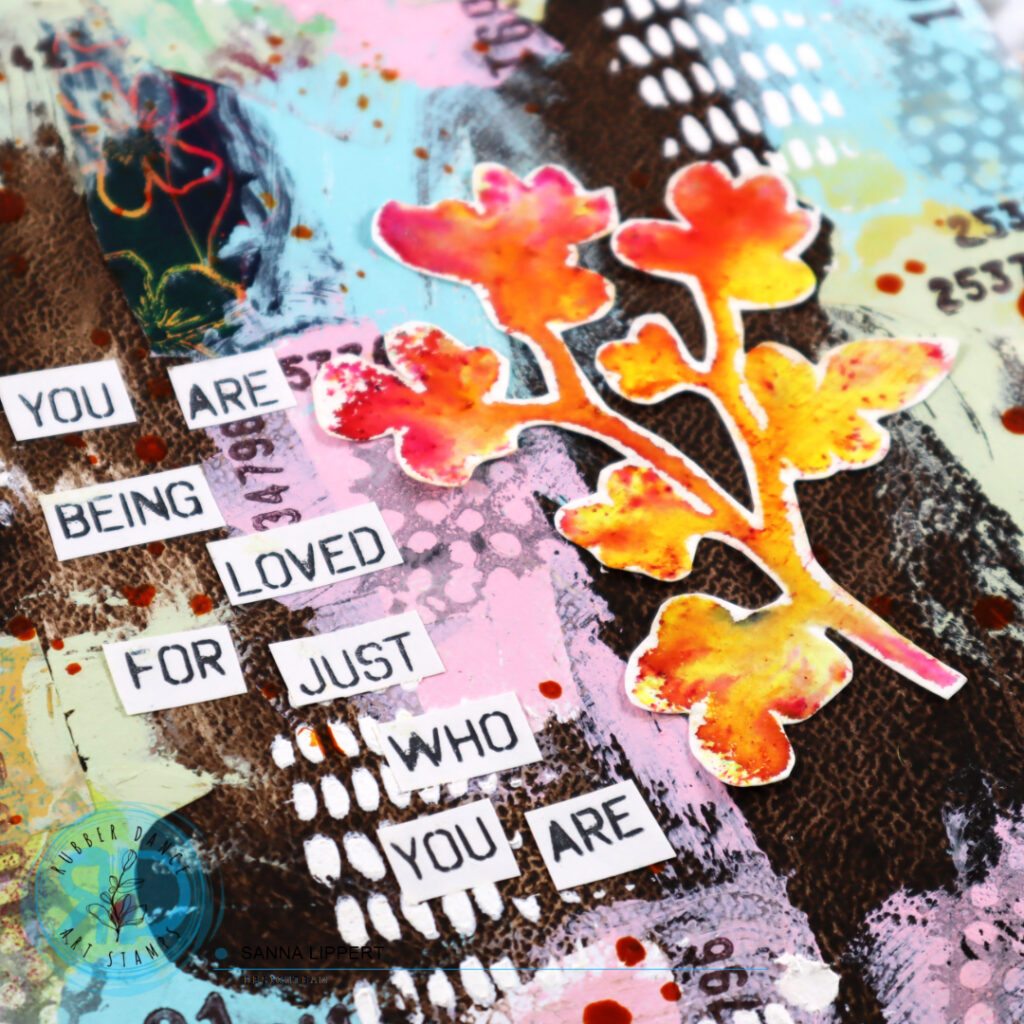
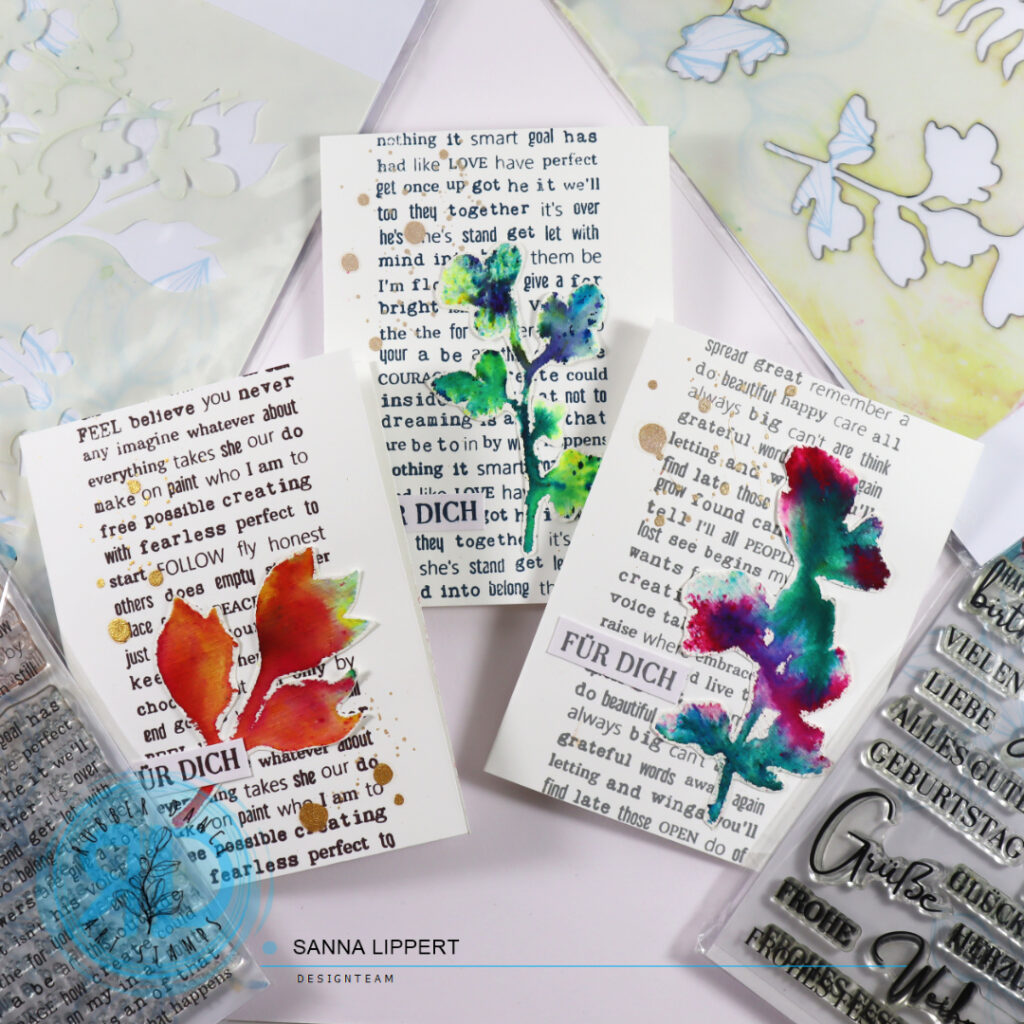
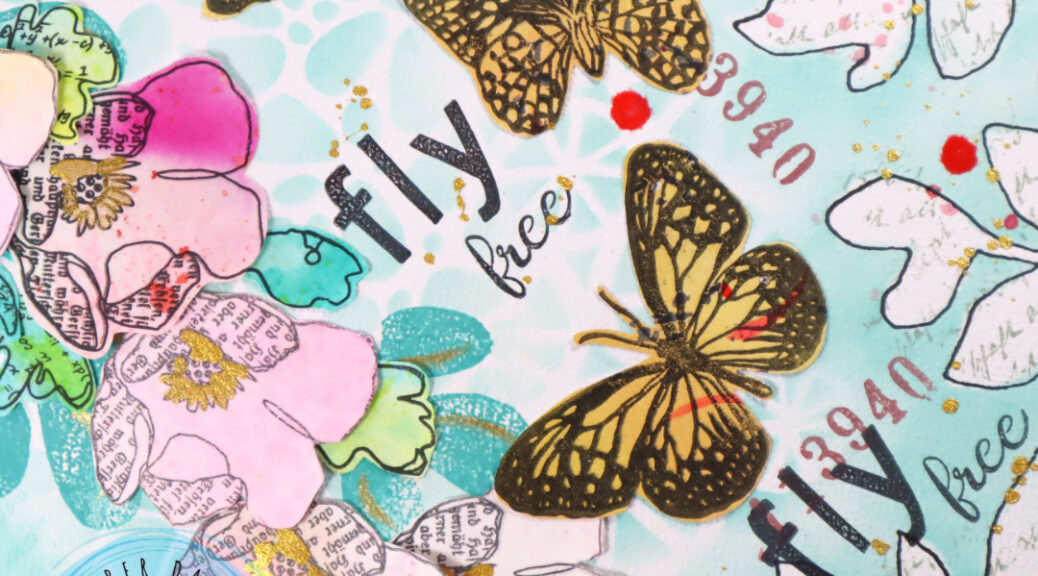
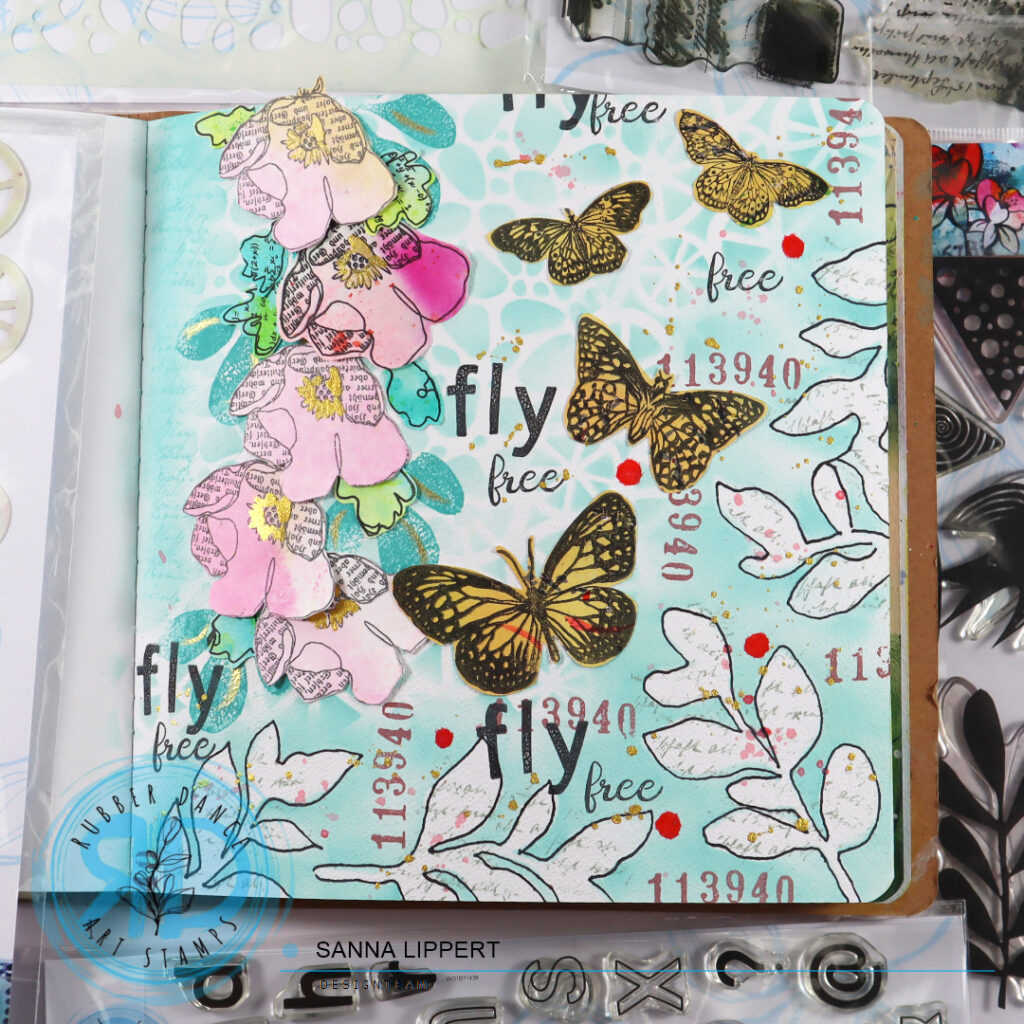
As a focal point I used some collage fodder I had made with the Sketchy Leaves 5 stencil from gelli printed collage papers (see video here). I also added some butterflies (Butterflies and Moths set) that I had created the same way. Finally I stamped a sentiment for each card using the Kartengrüße stamp set. I stamped on white paper first and then wiped light blue ink onto the paper to have a matching color with the card backgrounds.
I also recorded a step-by-step video – hope it inspires you!
I like creating this type of layered cards – what about you? I hope this inspires you to play with your Rubber Dance products!!
xxx, Sanna