Tag Archives: Mini Textures 1 stencil

AJ page with layered stenciling and Distress Oxide Inks – Rubber Dance

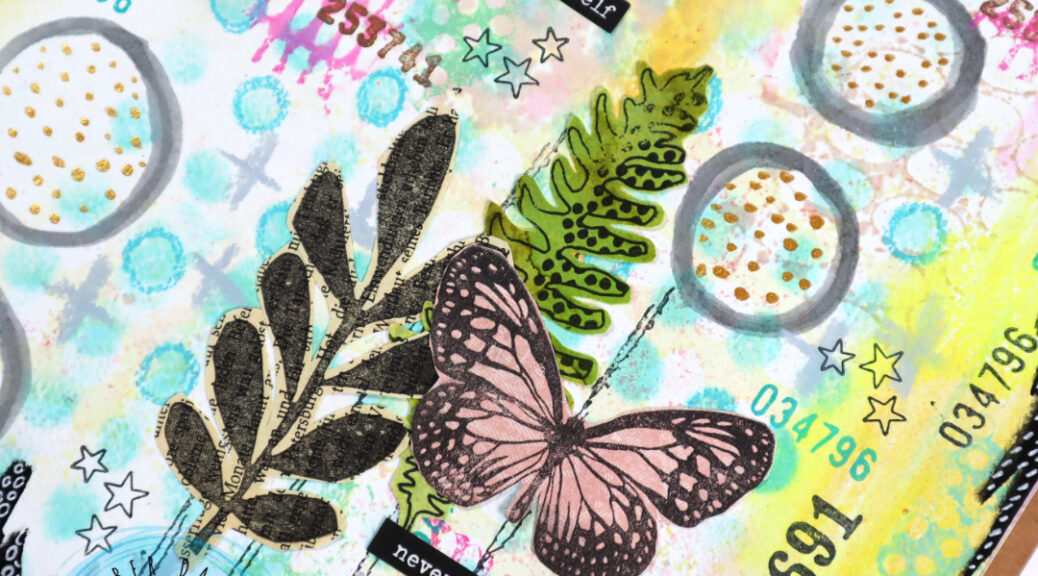
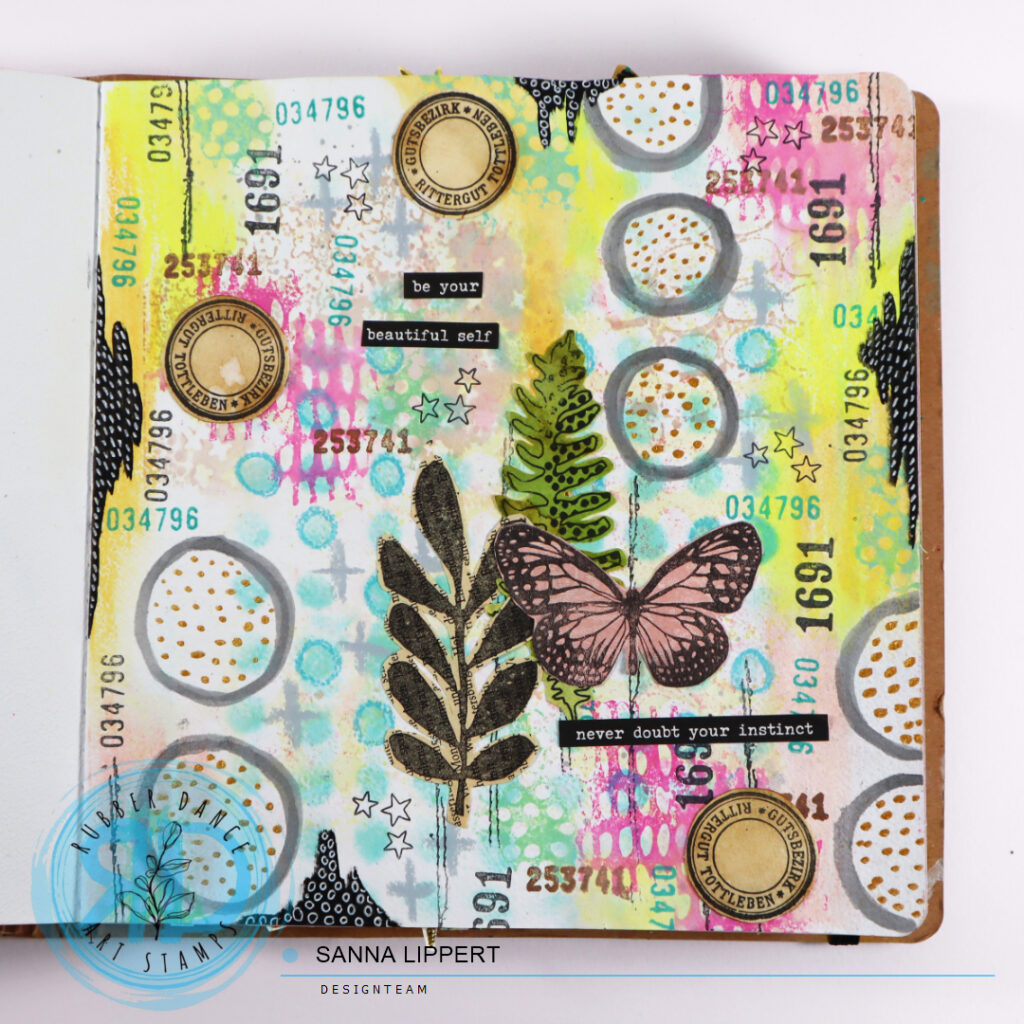
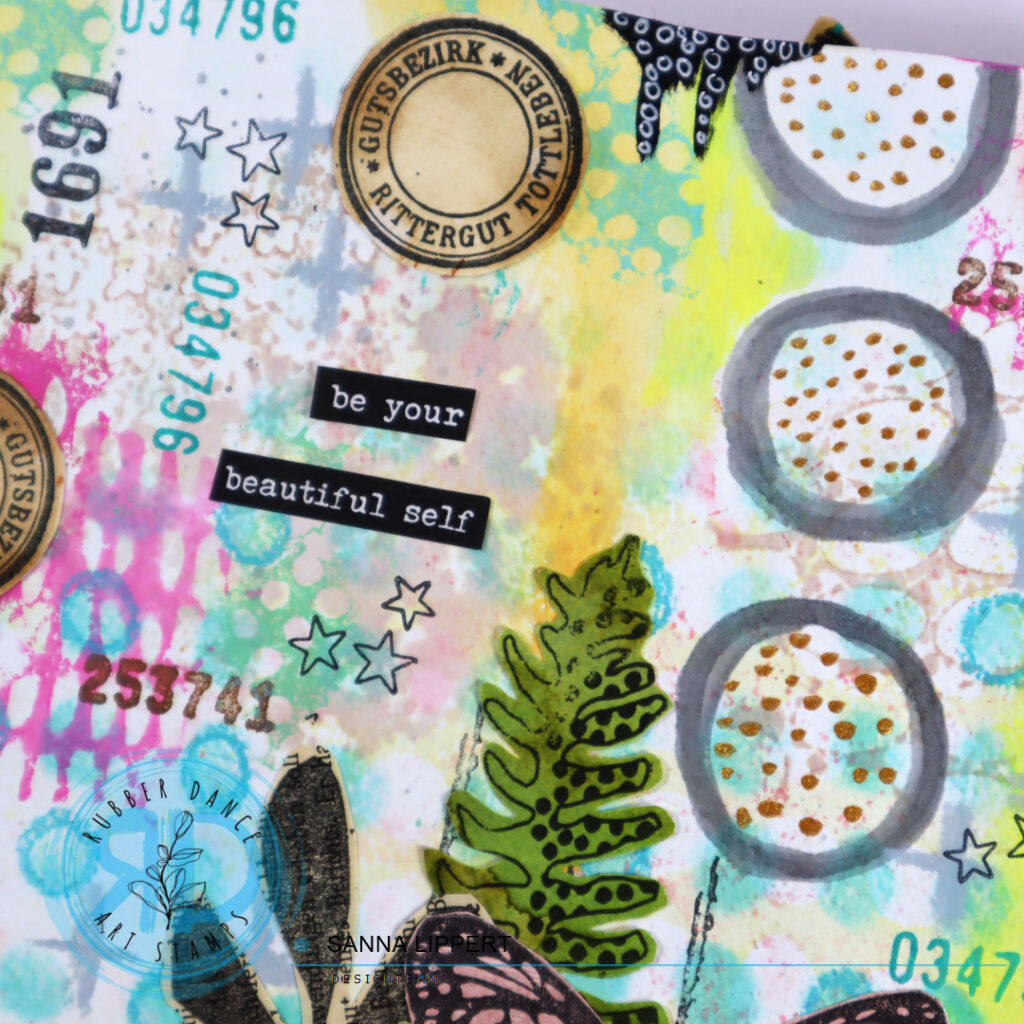
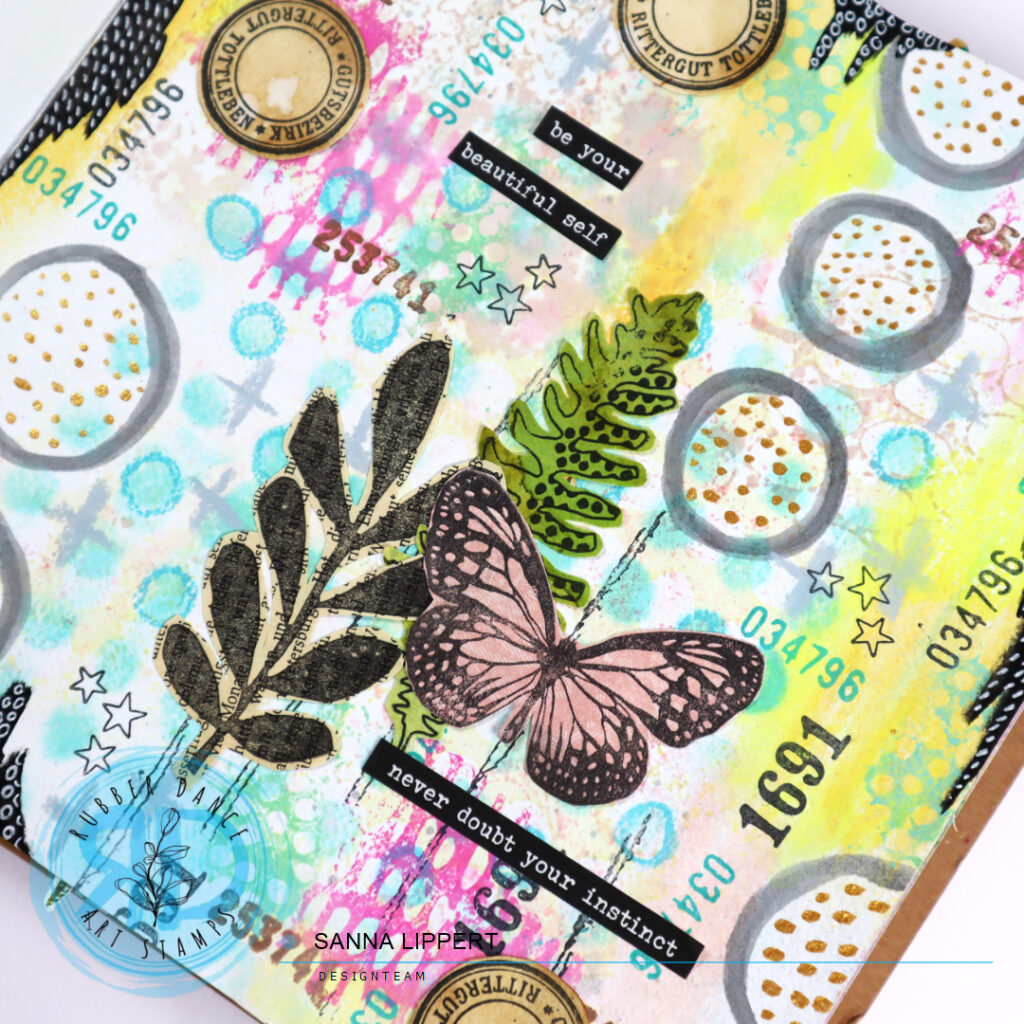
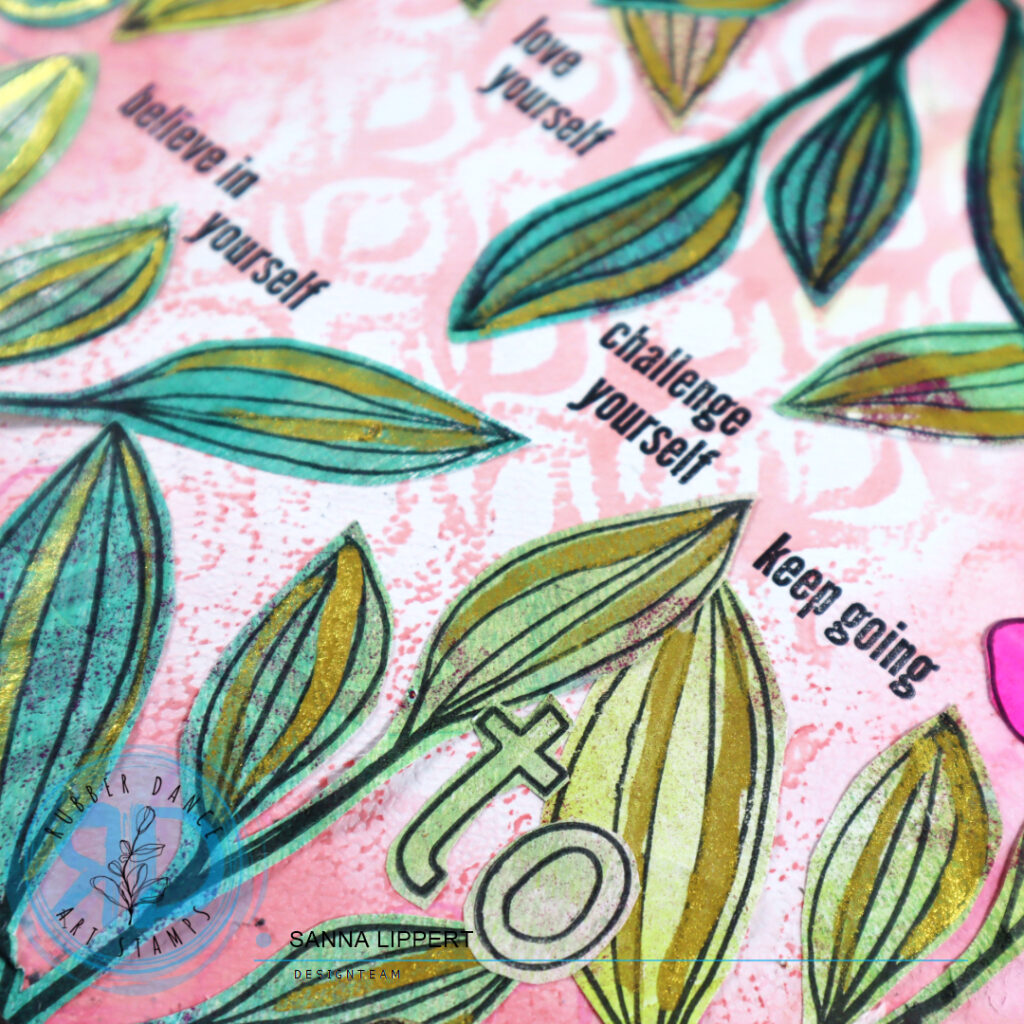
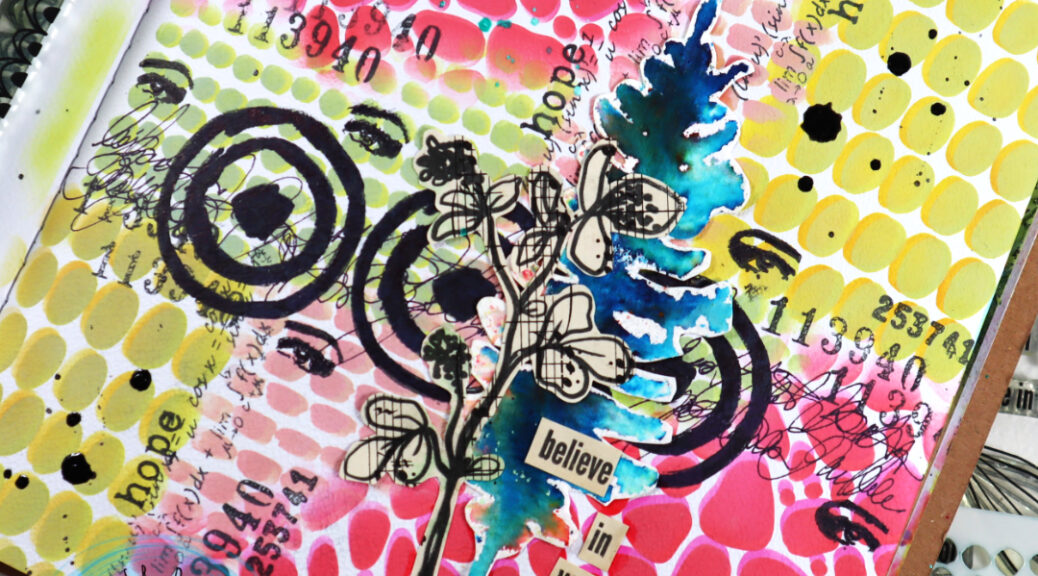
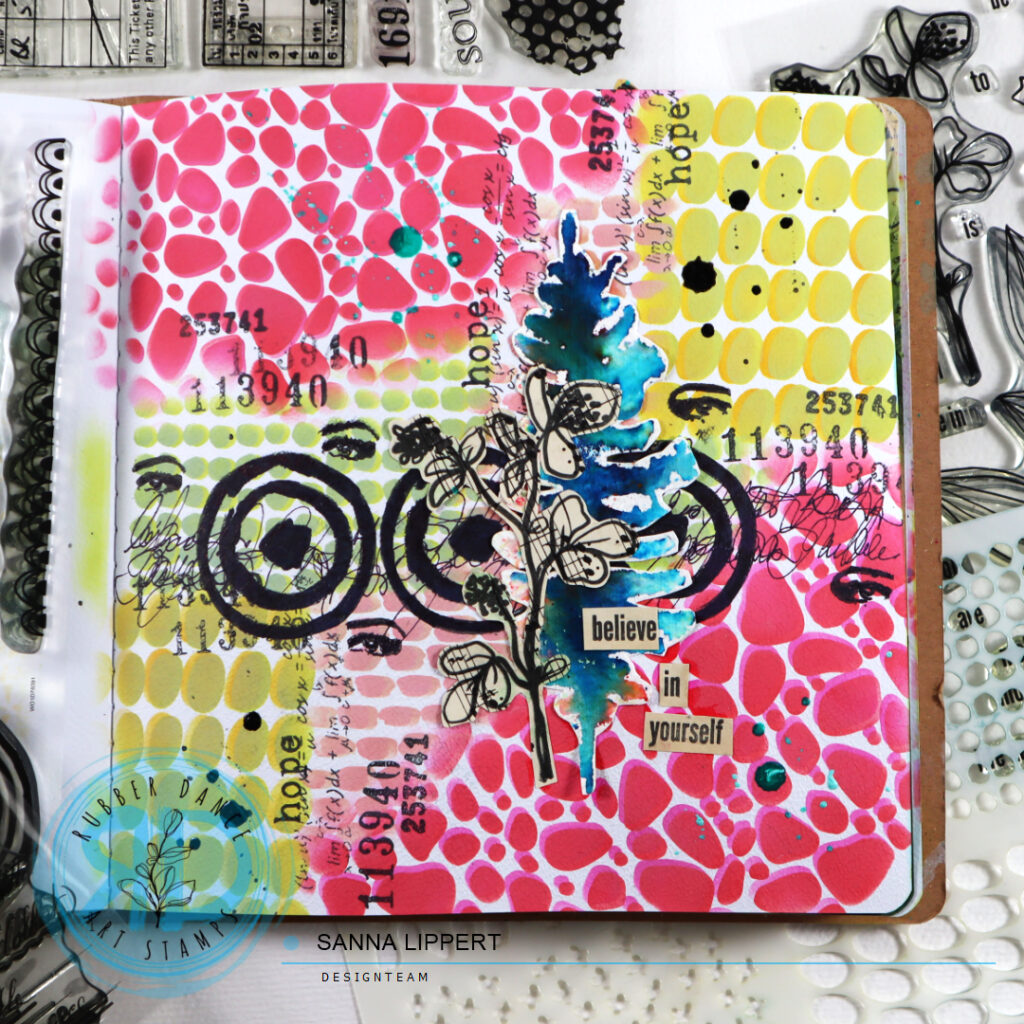
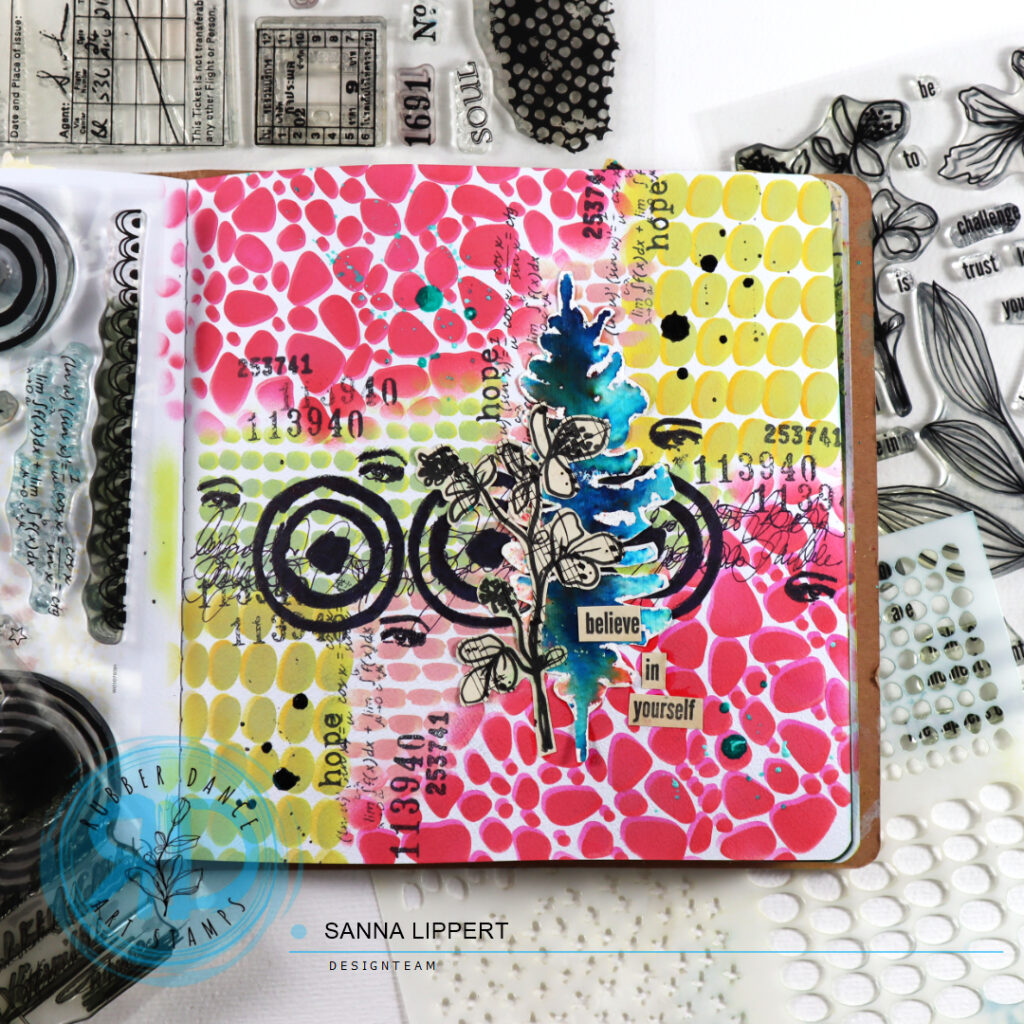
Hello, it´s Sanna here today with a layer stenciled art journal page share. For this project I used the following products: Organic 4 and Mini Textures 1 stencils as well as the Sketchy Leaves 5 stencil in the focal point cluster. The stamps used as a further layer and focal point feature following sets: Mix It Up 7, Mix It Up 4, Collage Leaves 3 and Mix It Up 6.

I started with the following steps:

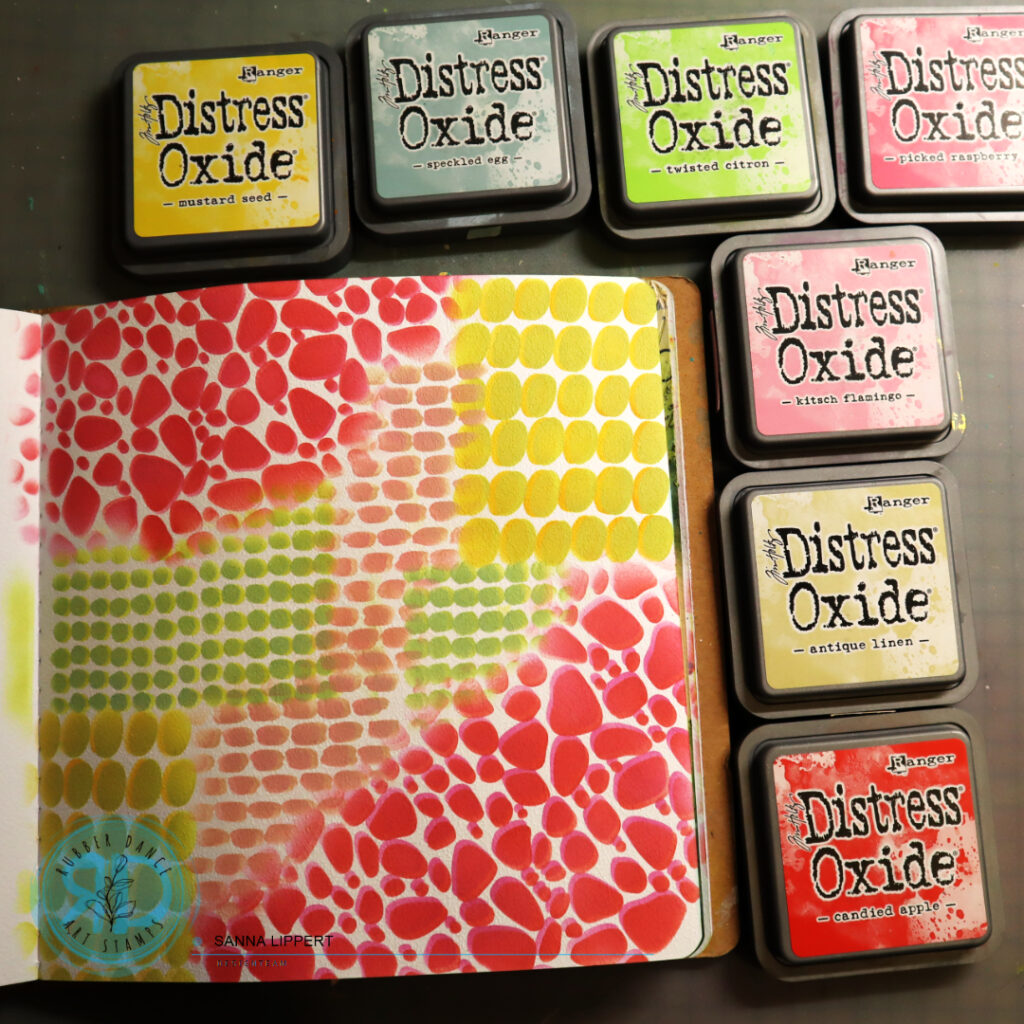
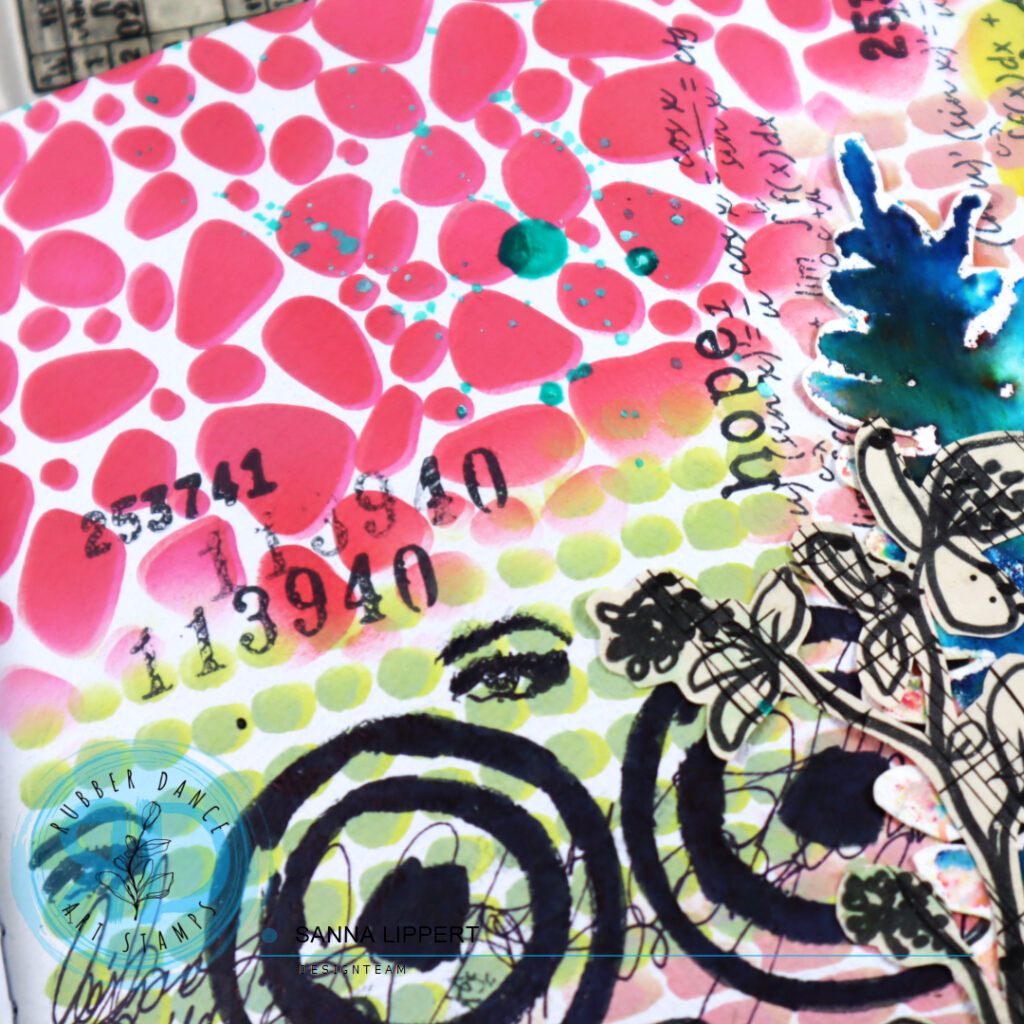
I first inked a lighter toned layer thru the above mentioned stencil onto the page, then slightly moved the stencil to create a 3D-effect and inked over the area with a similar tone, but slithly darker. That creates this really fun effect.

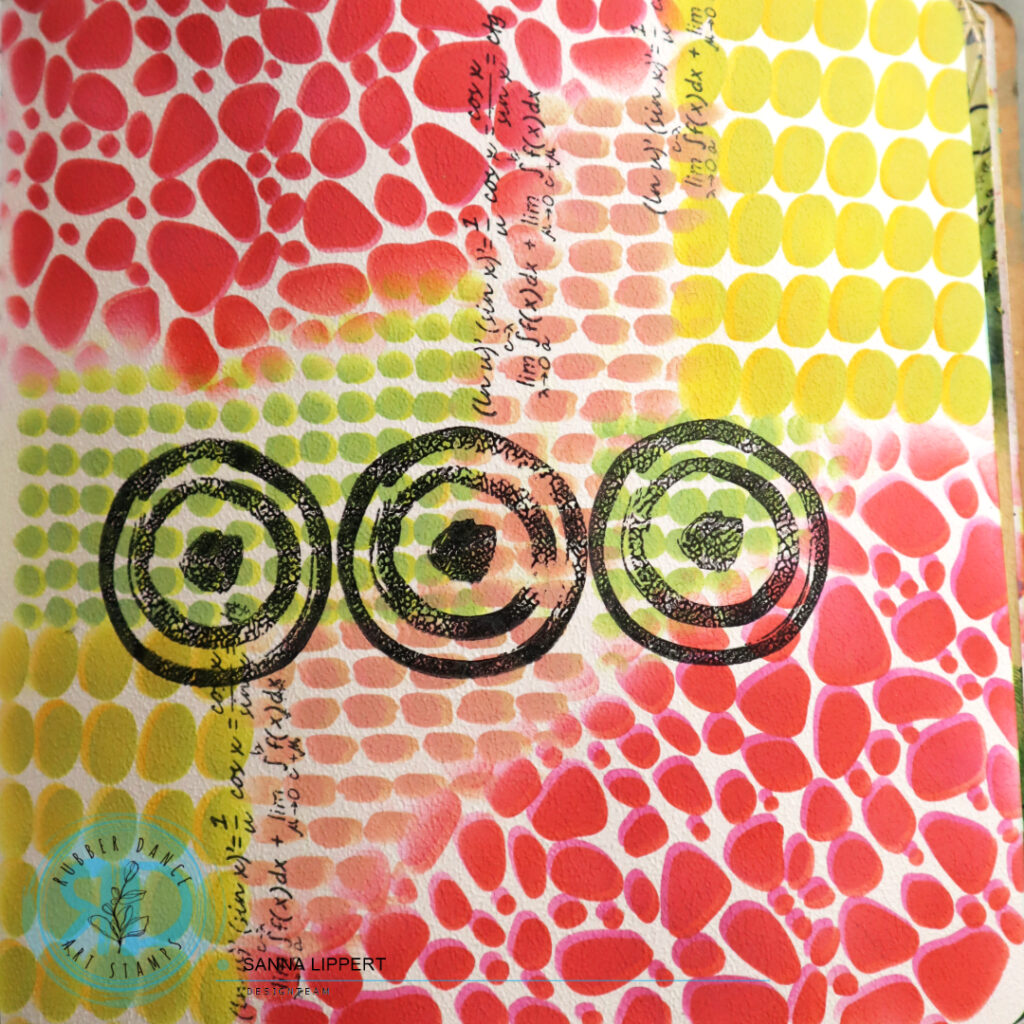
Next I took a black stamp ink and stamped some details with the Mix It Up 4 stamp set.

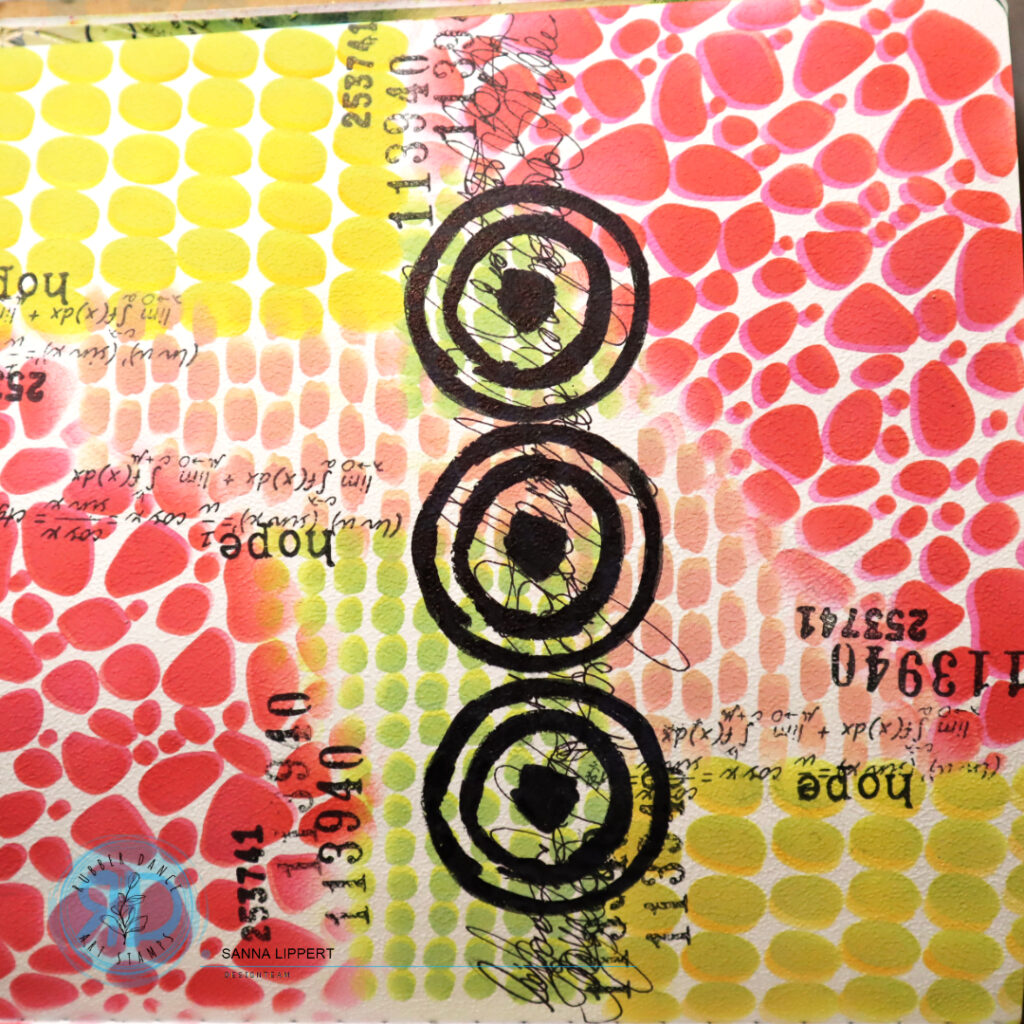
Followed with further stamping with the Mix It Up 6 and Mix It Up 7 stamp sets.

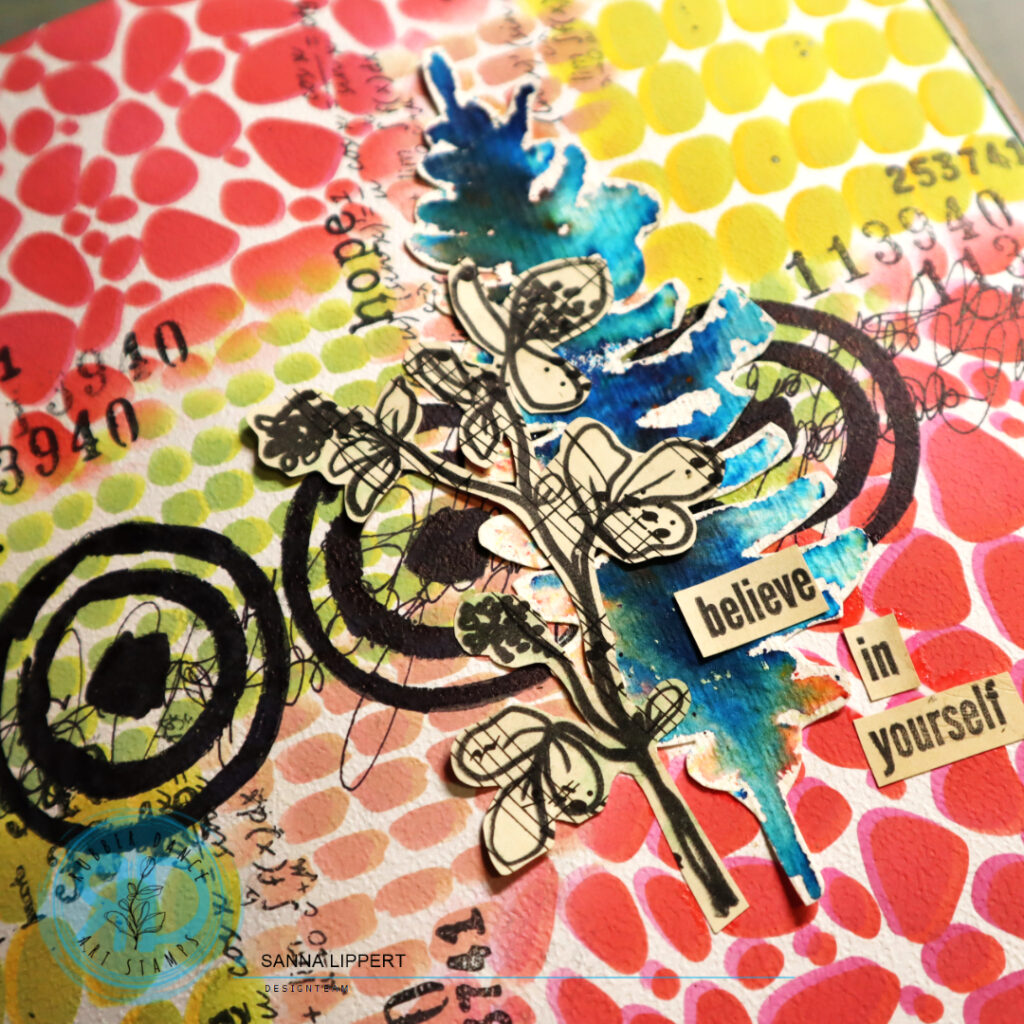
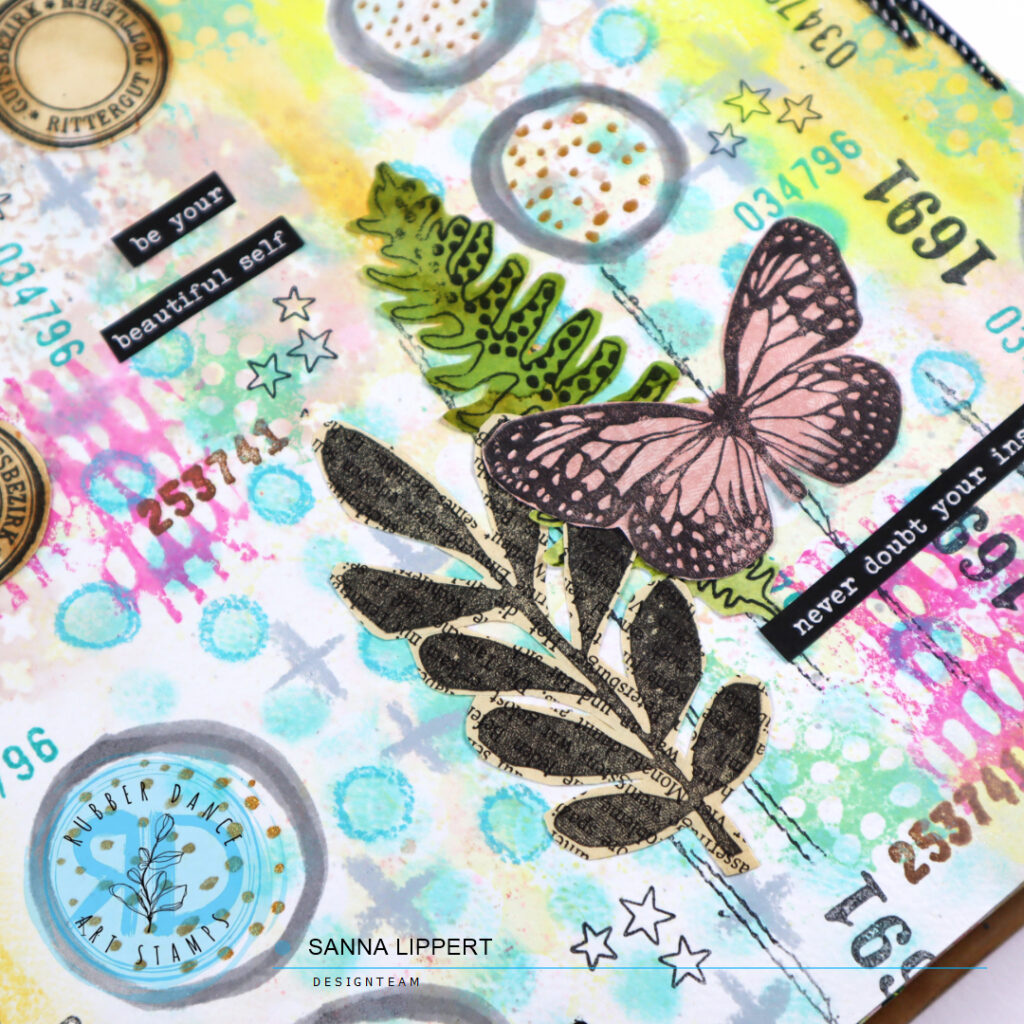
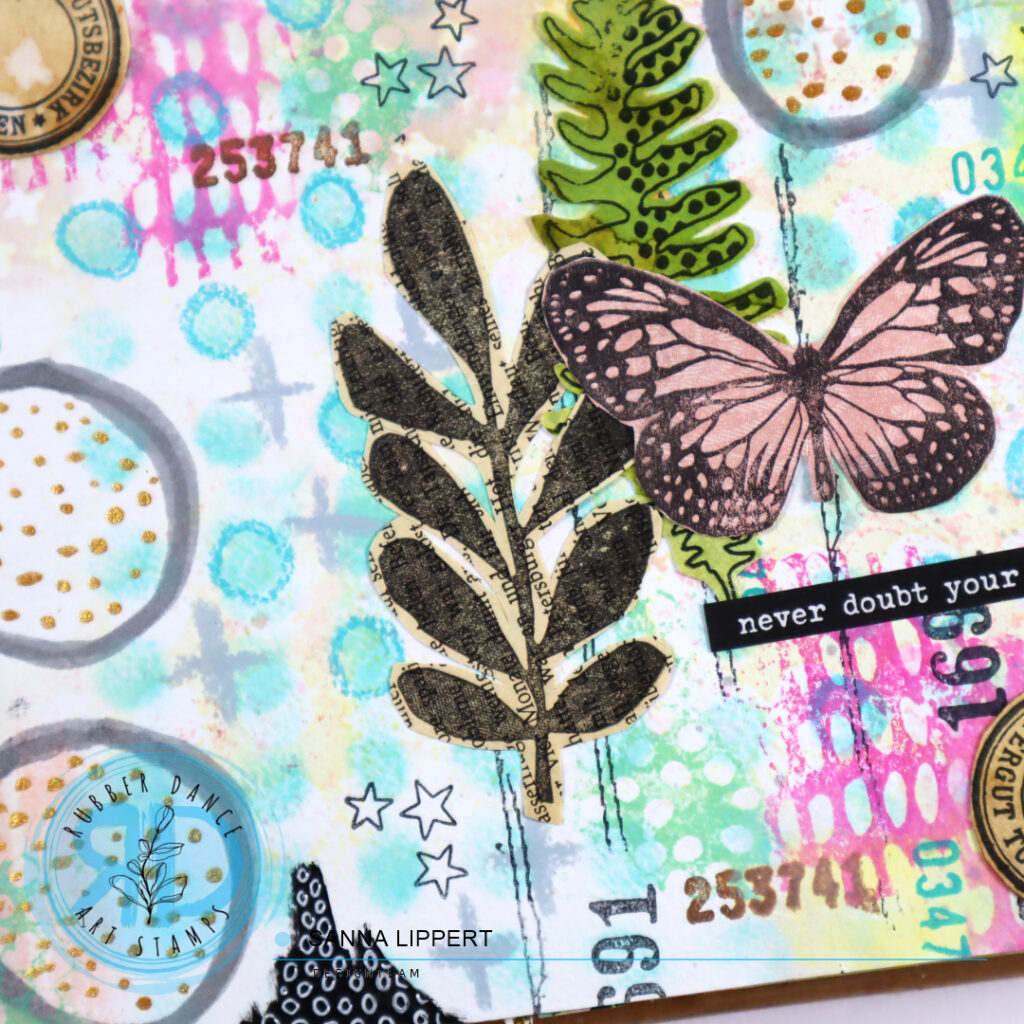
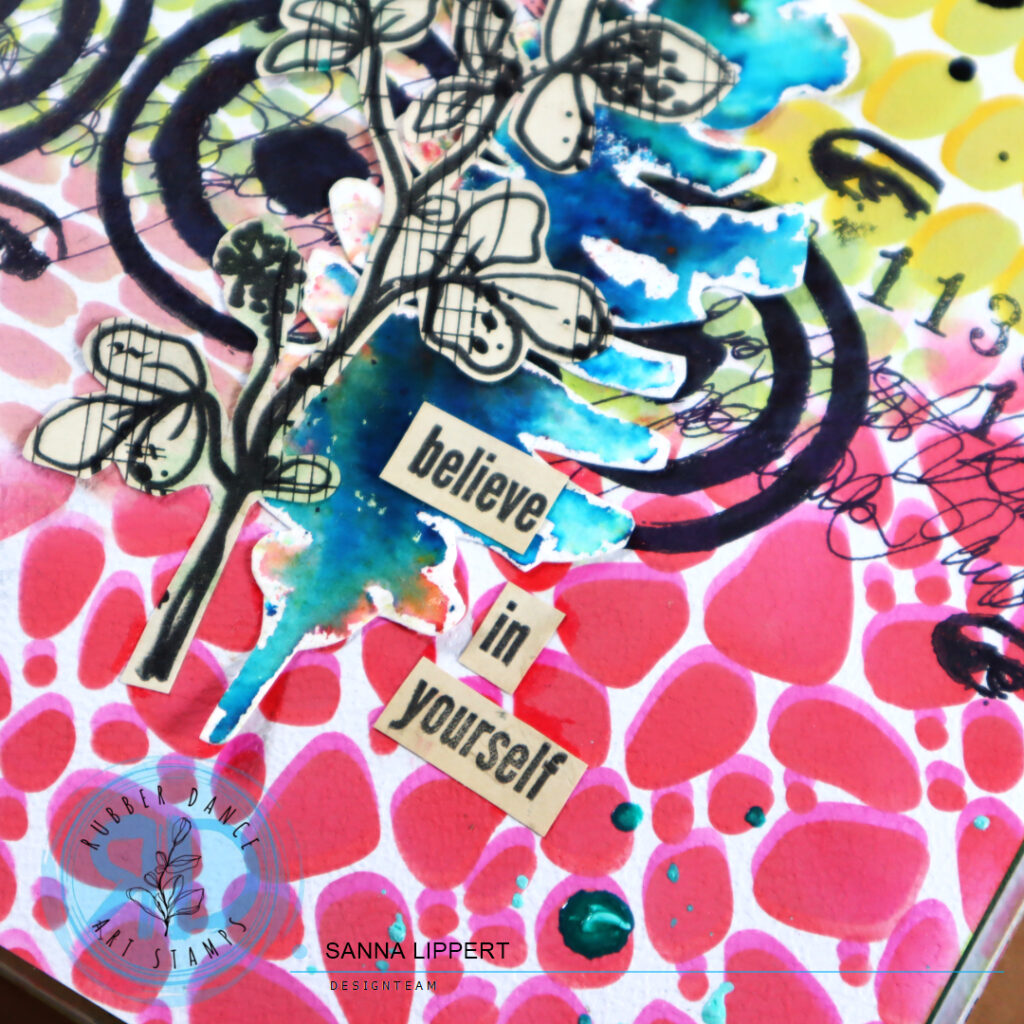
I also added some asemic writing to the background before creating a cluster of elements as a focal point. The blue collage fodder element is a previous make with Sketchy Leaves 5 and Brushos (see details here). The leafy flower is stamped on a music note paper with black ink (using Collage Leaves 3) and then fussy cut. Finally the sentiment was stamped on an old book page with the Collage Leaves 3 stamp set anf fussy cut to fit the page composition.

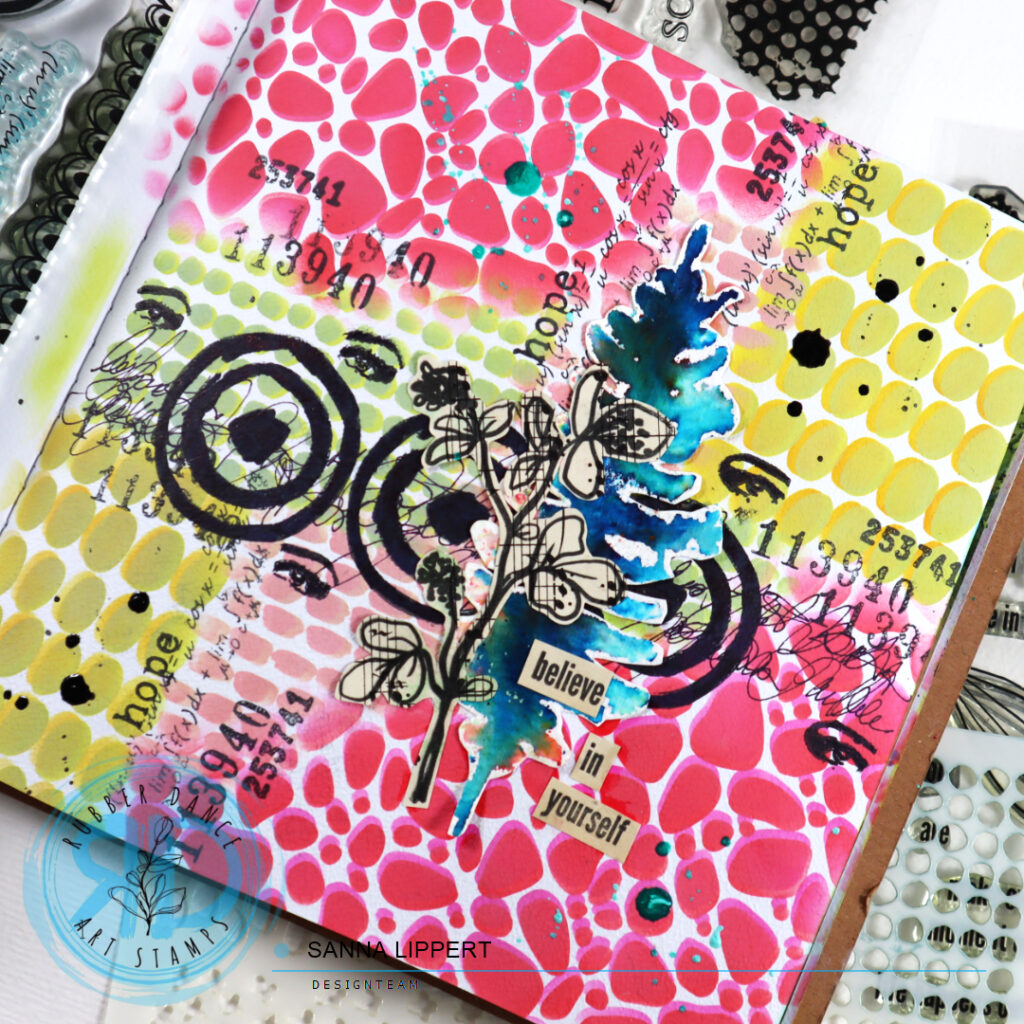
I also added some “turquoise” and “medieval” Gloss Spray droplets as detail and also added some stamped eyes in the process. They are from the Mix It Up 7 stamp set.

I love layering stencils and adding fun details to art journal pages with them. Then mixing some stamping with various stamp sets for contrast make creating art journal pages so much fun! I hope I could inspire you all abit with this page.

Have fun creating with Rubber Dance products!
xxx, Sanna

Layered art journal page – Rubber Dance

Hello, today I have an art journal page share for you. For this page I used the Doodle Flowers 2, Butterflies and Moths, Mix It Up 5, Mix It Up 7, Carved Collection 6, Stitching Borders and Mix It Up 4 stamp sets as well as Dotted 1 and Mini Textures 1 stencils.

I started by wiping residue ink from the Dotted 1 stencil onto the background and pressing another layer of residue brown ink from the Mini Textures 1 stencil around the first pattern. Next I grabbed some Neocolor II crayons and applied various yellow and light pink tones to the page. After that I grabbed a selection of pink, green, brown and turquoise Distress Oxide Inks and used the various stamps to add details and layers to the background.

I also painted some circles onto the page and filled those with golden pigment dots. Next I added contrast with a black stamp ink by adding stamped stars and numbers as well as stitching. I then clustered a few collage fodder pieces together (leaves and butterfly) and adhered those on place. I also had a few “diy vintage labels” left over, so I adhered a few onto the page. For finishing touches I added two sentiment stickers and created black areas with an acrylic marker and detailed those with a white gel pen.

This was a really fun one to make! Have you tried this idea of freely adding plenty of layers and seeing where the page takes you?
xxx, Sanna

“Note to self” Art Journal Page process – Rubber Dance

Hello, it´s my turn to share a project over at Rubber Dance blog today. I am up with an art journal page share. For this page I used the Ornament 1 and Mini Textures 1 stencils. For stamping I used Doodle Flowers 2, Collage Leaves 3 and A to Z stamp sets. I wanted to create an inspirational page and this is what I came up with:

My starting point was the inked Ornament 1 stencil which I sprayed with water mist and then pressed onto the journal page. Next I blended two tones of pink Distress Oxide Ink around the edges and white areas. After that I took the darker pink tone and stamped some leaf patterns onto the inked area, followed with light grey stamping.

I had a green toned collage paper ready and stamped with Collage Leaves 3 stamp set and black ink some leaves onto it. After that I fussy cut them and was ready to adhere them to my journal page. On top of the leaves I added a few Doodle Flowers 2 collage fodder images that I had previously made.

Then I decorated with leaves with golden pigment details. Next I stamped some inspirational words into the middle with the Collage Leaves 3 stamp set. For finishing touches I added a hand stamped title using the rest of my collage paper and the A to Z stamp set.

I also recorded a process video for you to watch – hope you enjoy!

Have fun creating!!
xx, Sanna

Full Deck Challenge 50/2025 – wonky house

Hello! This is my take on the 2025 ShanoukiArt Full Deck Challenge number 50: wonky house.

On the background I´ve again used collage papers gifted to me by Yuna. On top some Neocolor II crayon and Dina Wakley Gloss Spray in white. The bottom paper is stenciled with a Rubber Dance stencil and modeling paste.

I hand drew the wonky house and fussy cut it. The title was a coincidence, because one of Yuna´s collage papers had it written on it. So I fussy cut that and used it as my title.

Here is the process video:

This was the hardest one for more of the deck challenges. I just could not figure out what to do with “wonky house”. So this is all I came up with.
Come back for the next one in a few days!
xx, Sanna

Full Deck Challenge 42/2025 – feathers

Hello and happy Wednesday! Here is my take on the ShanoukiArt Full Deck Challenge 42/2025 – feathers.

I started by using the plain orange paper (used it on my previous deck card too) on the background with an old book paper scrap. On top of that I added some Distress Oxide ink in walnut stain thru the new Rubber Dance stencil “Mini Textures 1“. Next I added a layer of Dina Wakley Gloss Spray in “marine”.

The feathers that I used as a focal point are from the previous deck cards collage paper bit. So in a way the feathers are also a carry over item. My constant is a date stamp. I also again added some stamped words and a button to finish the deck card. Here is the process video:

See you again next week with another take!
xx, Sanna