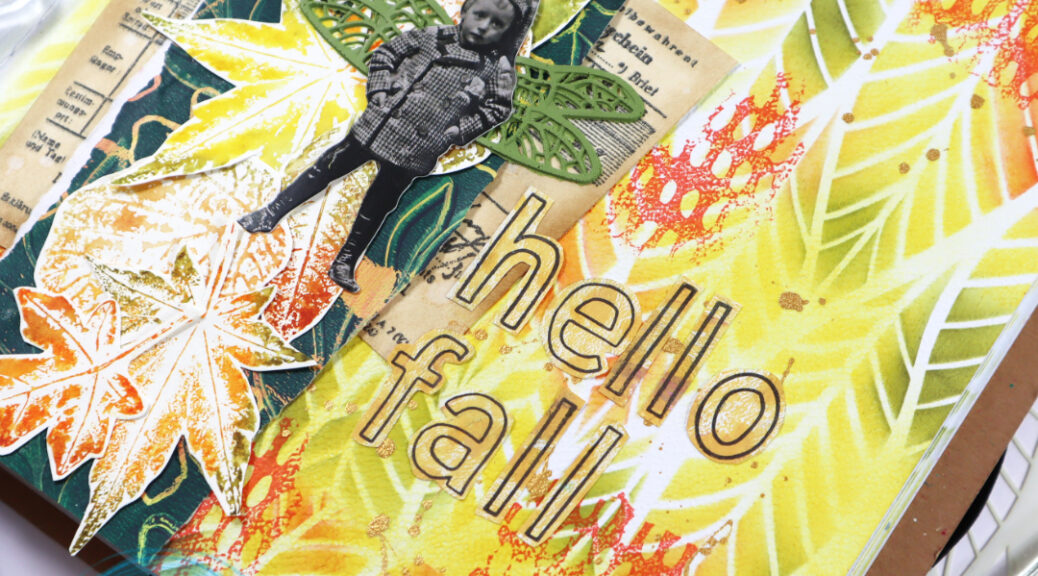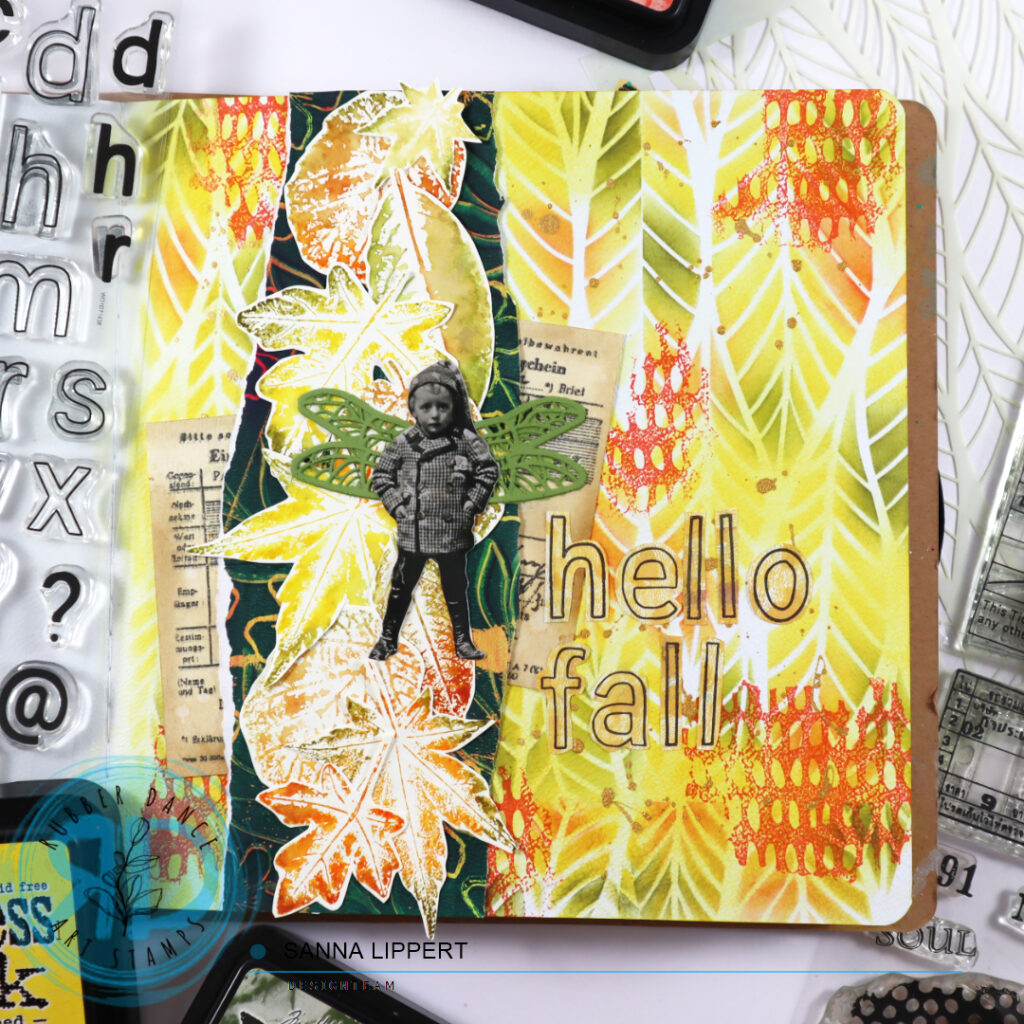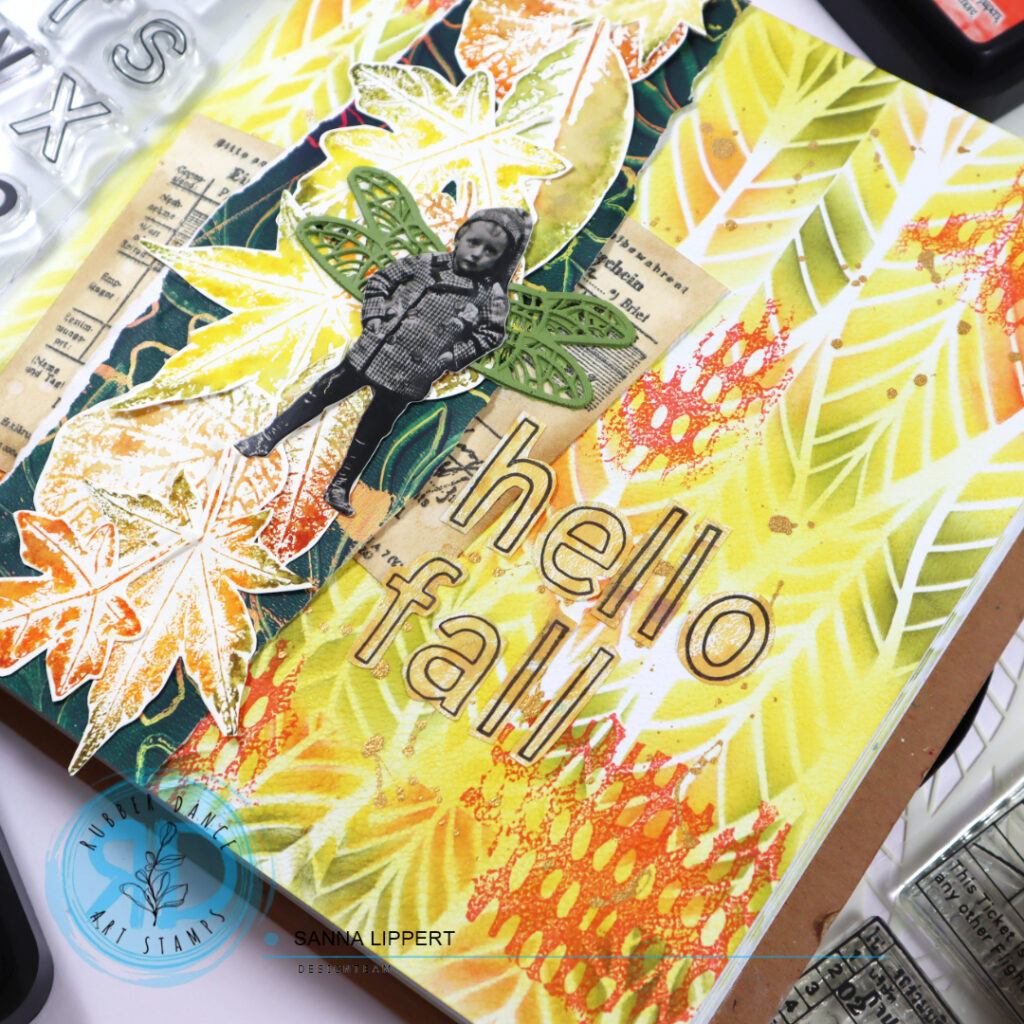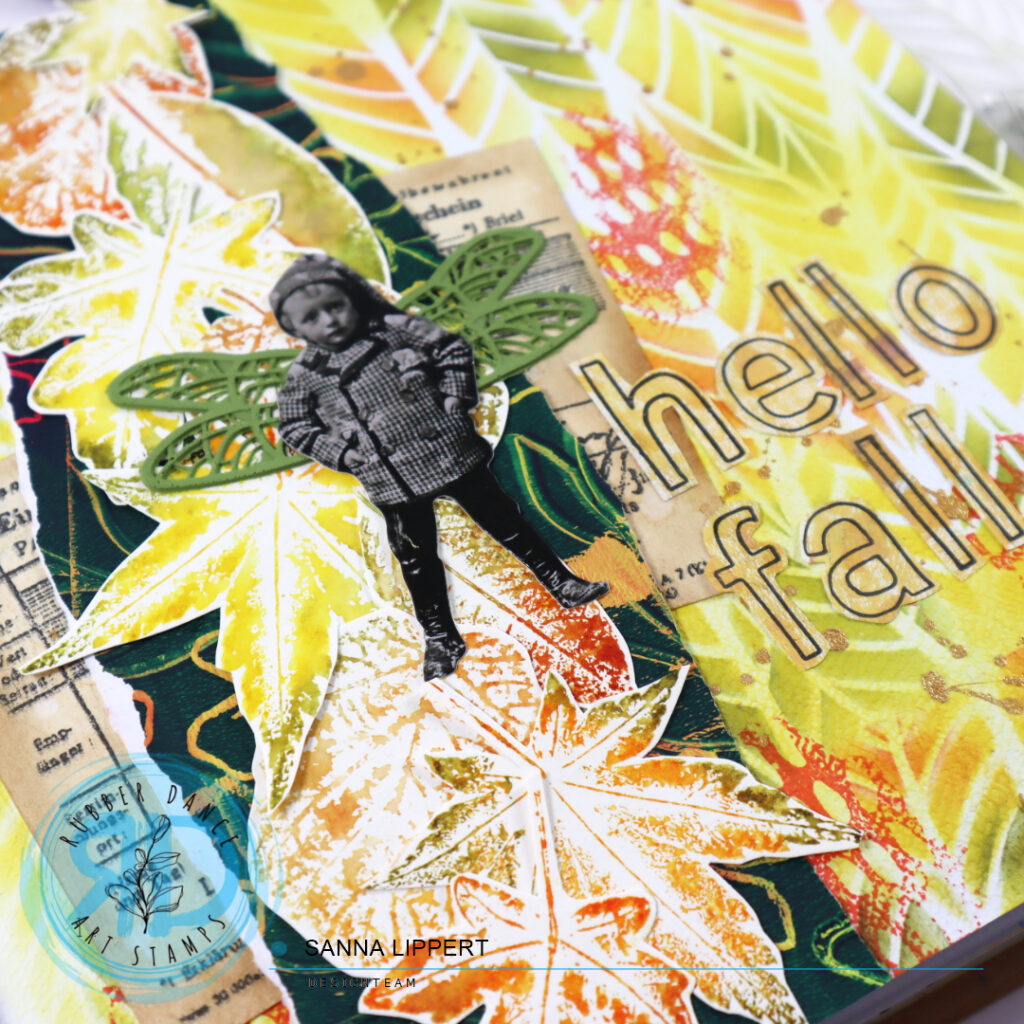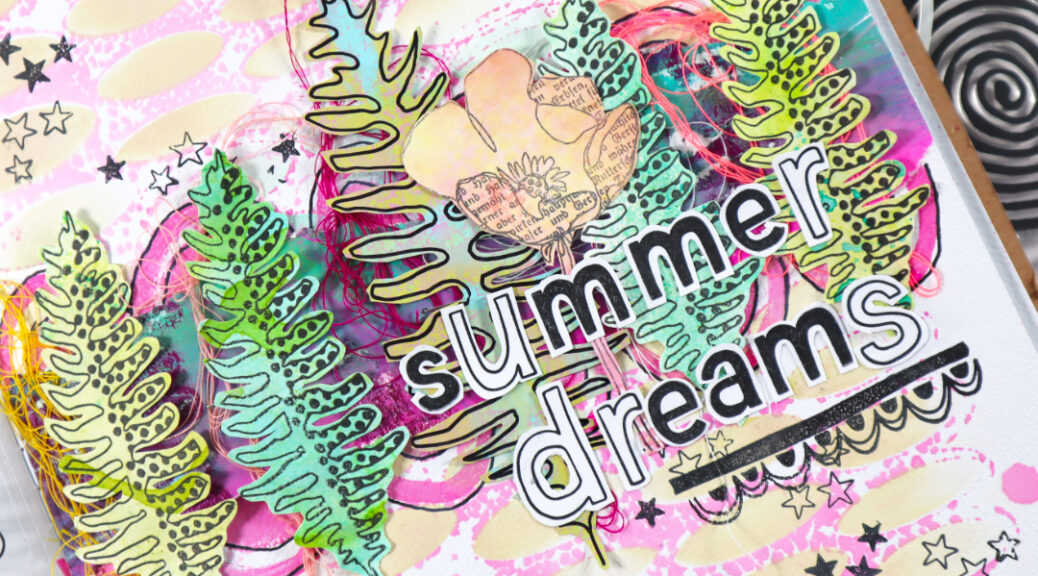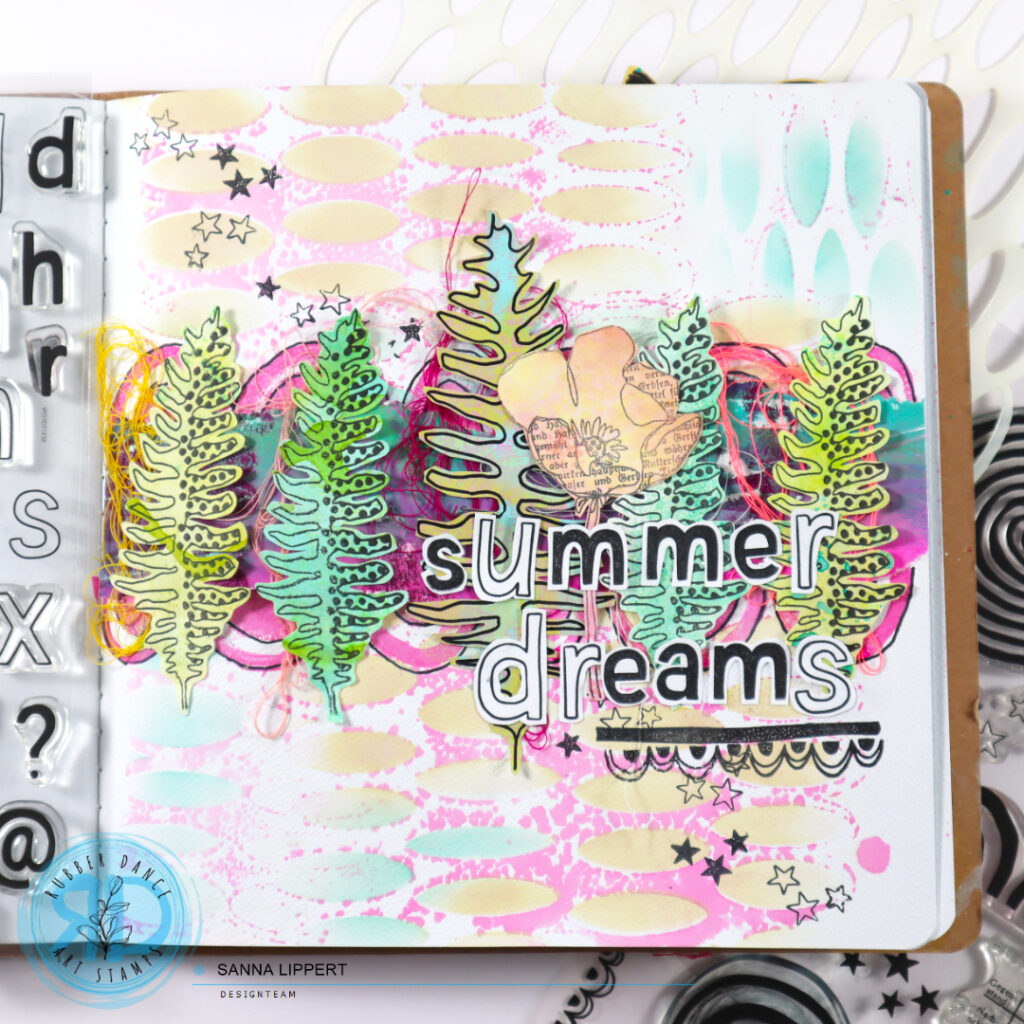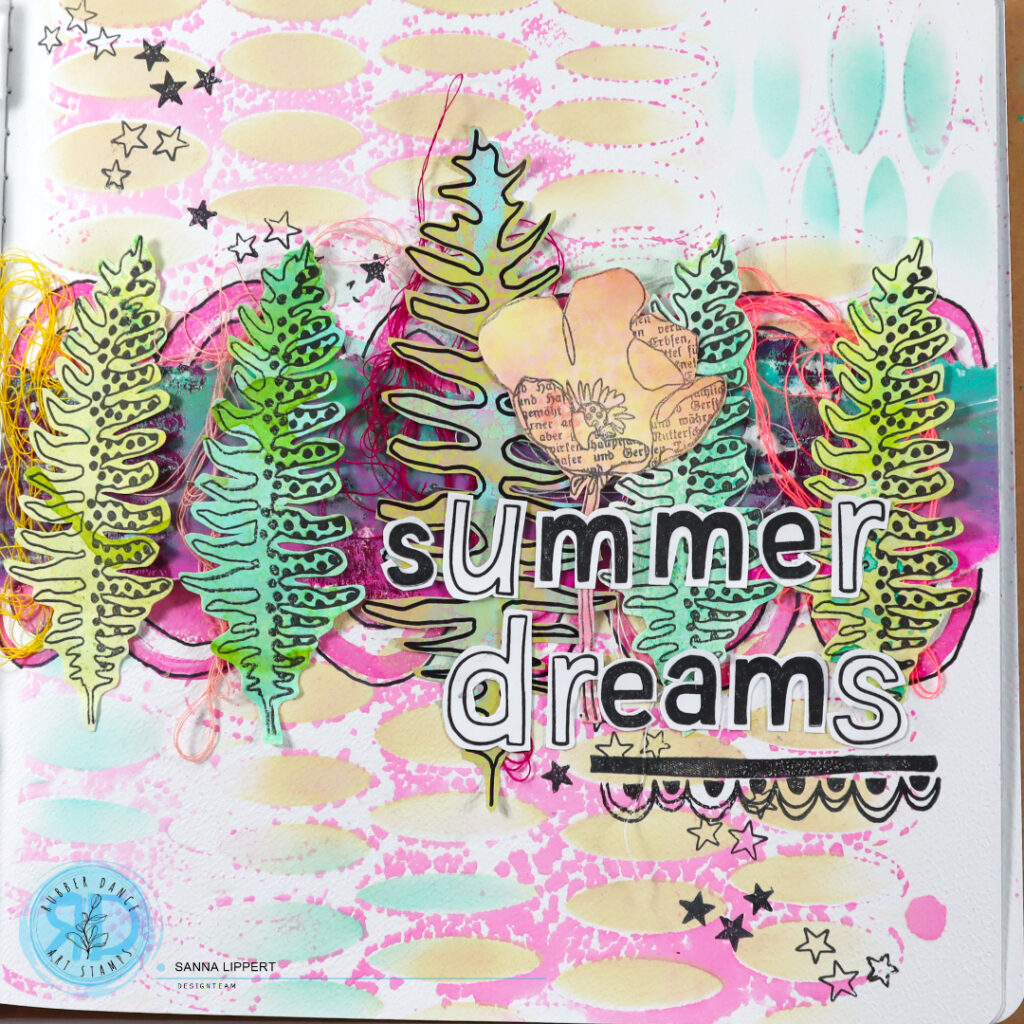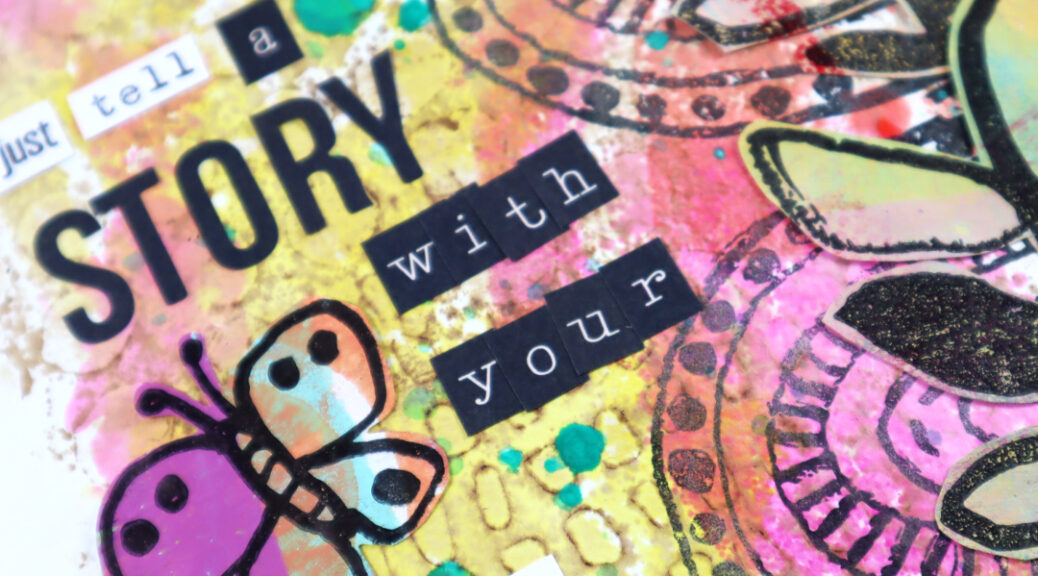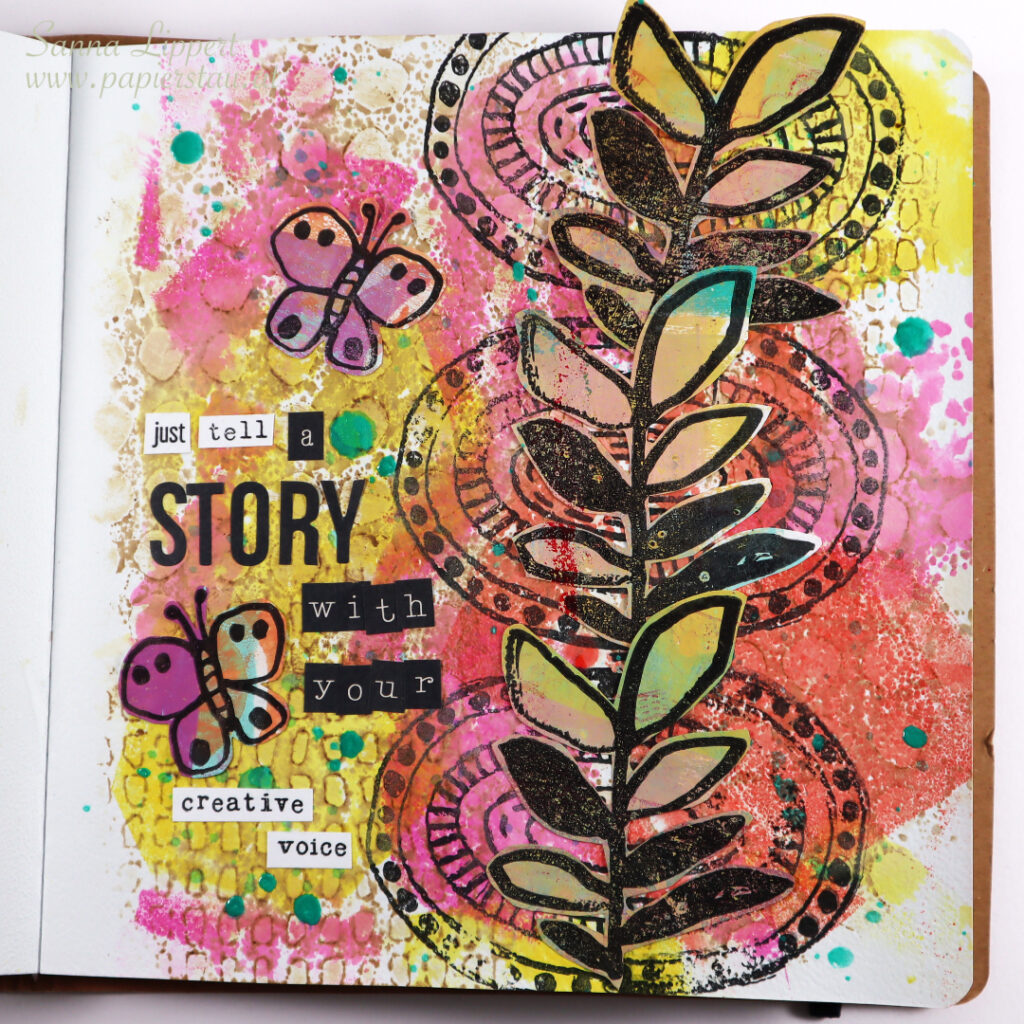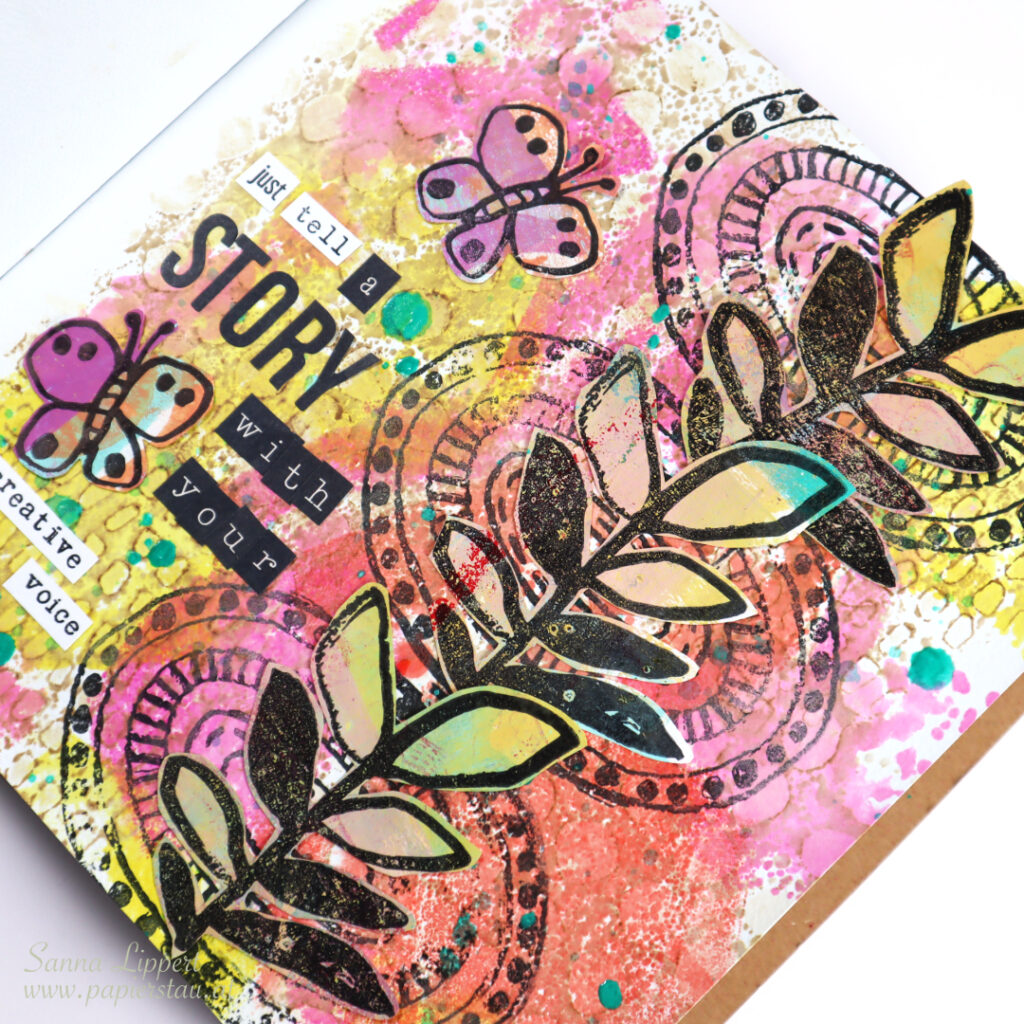
Hello, it´s my turn to share a project over at Rubber Dance blog today. I am up with an art journal page share. For this page I used the Ornament 1 and Mini Textures 1 stencils. For stamping I used Doodle Flowers 2, Collage Leaves 3 and A to Z stamp sets. I wanted to create an inspirational page and this is what I came up with:
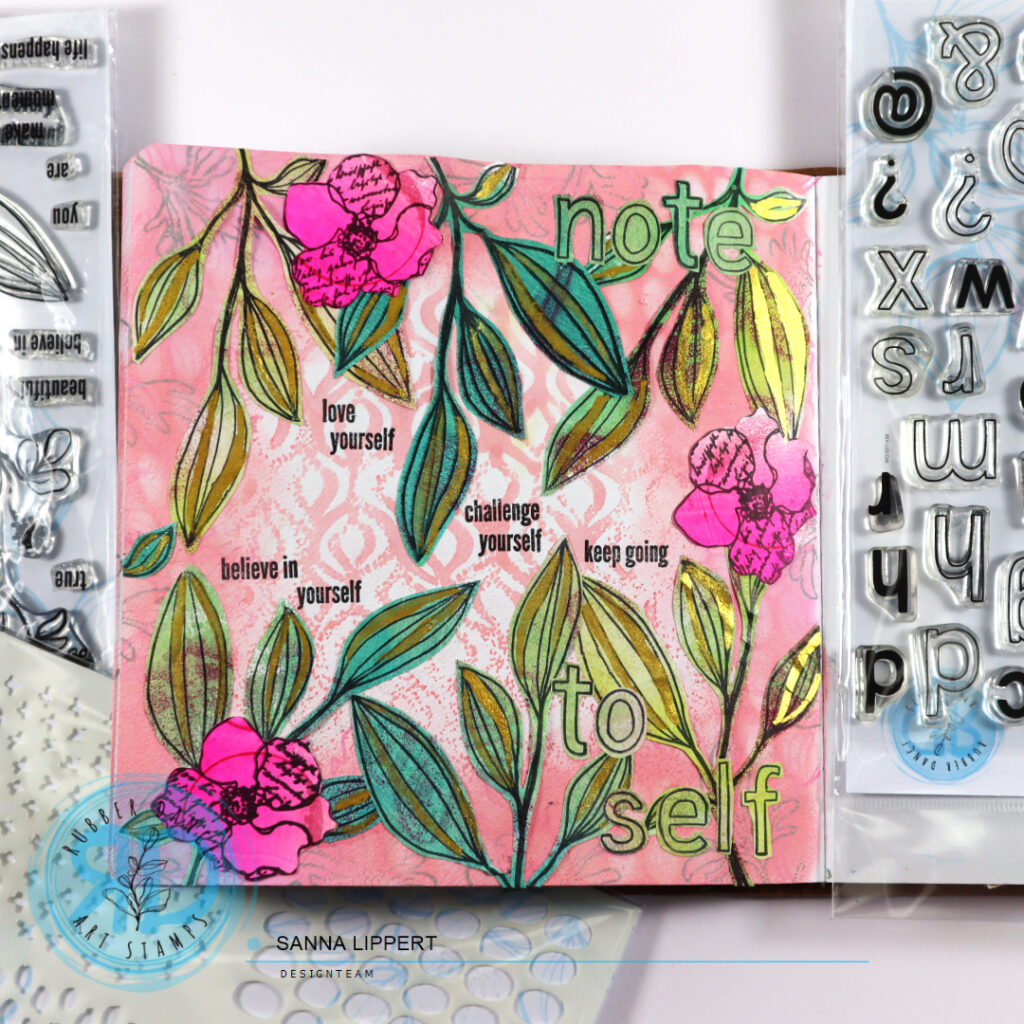
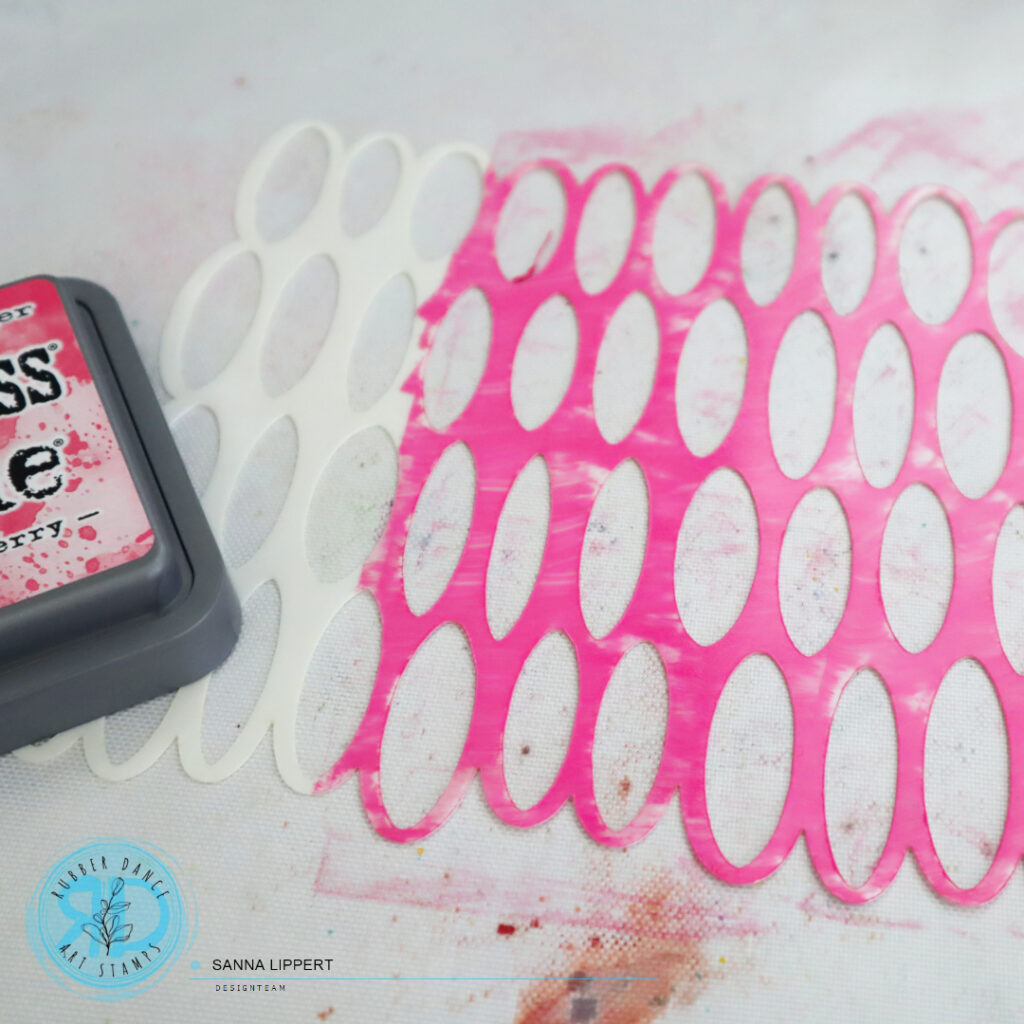
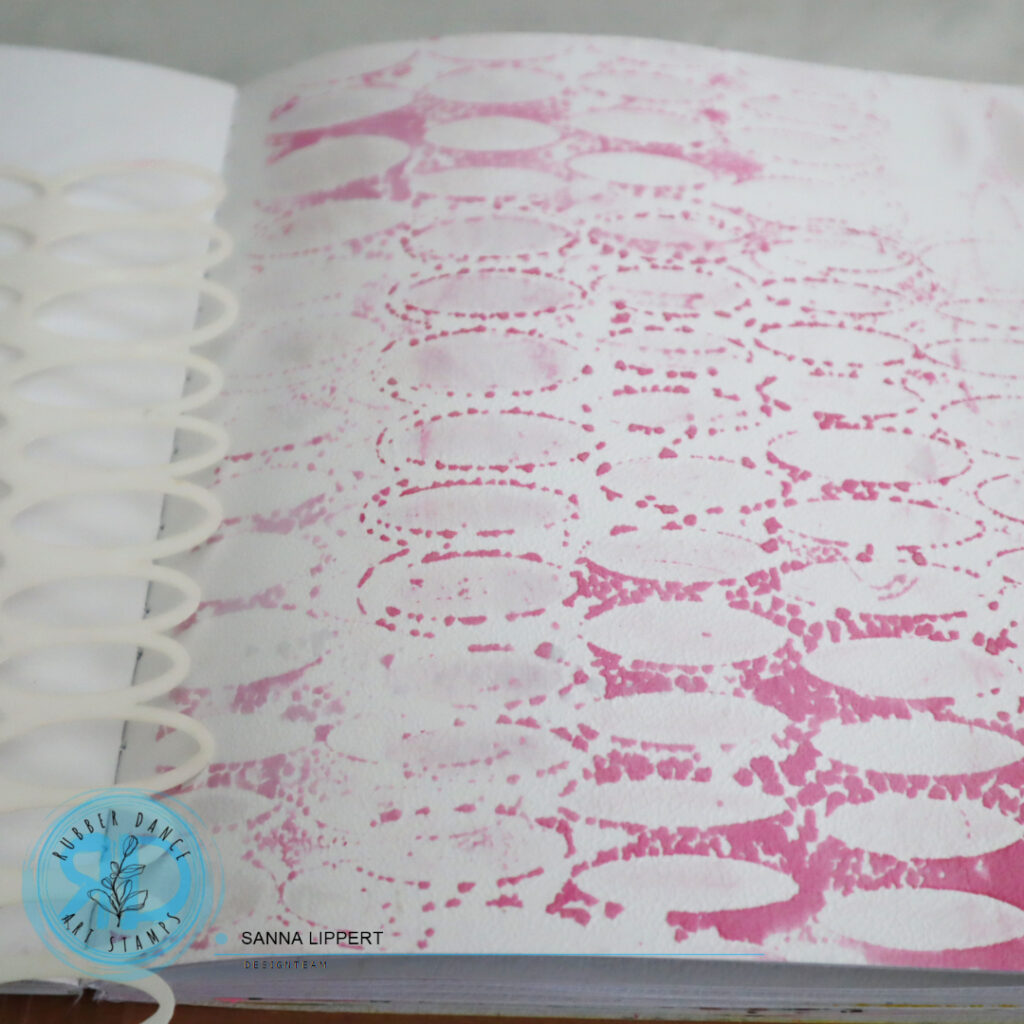
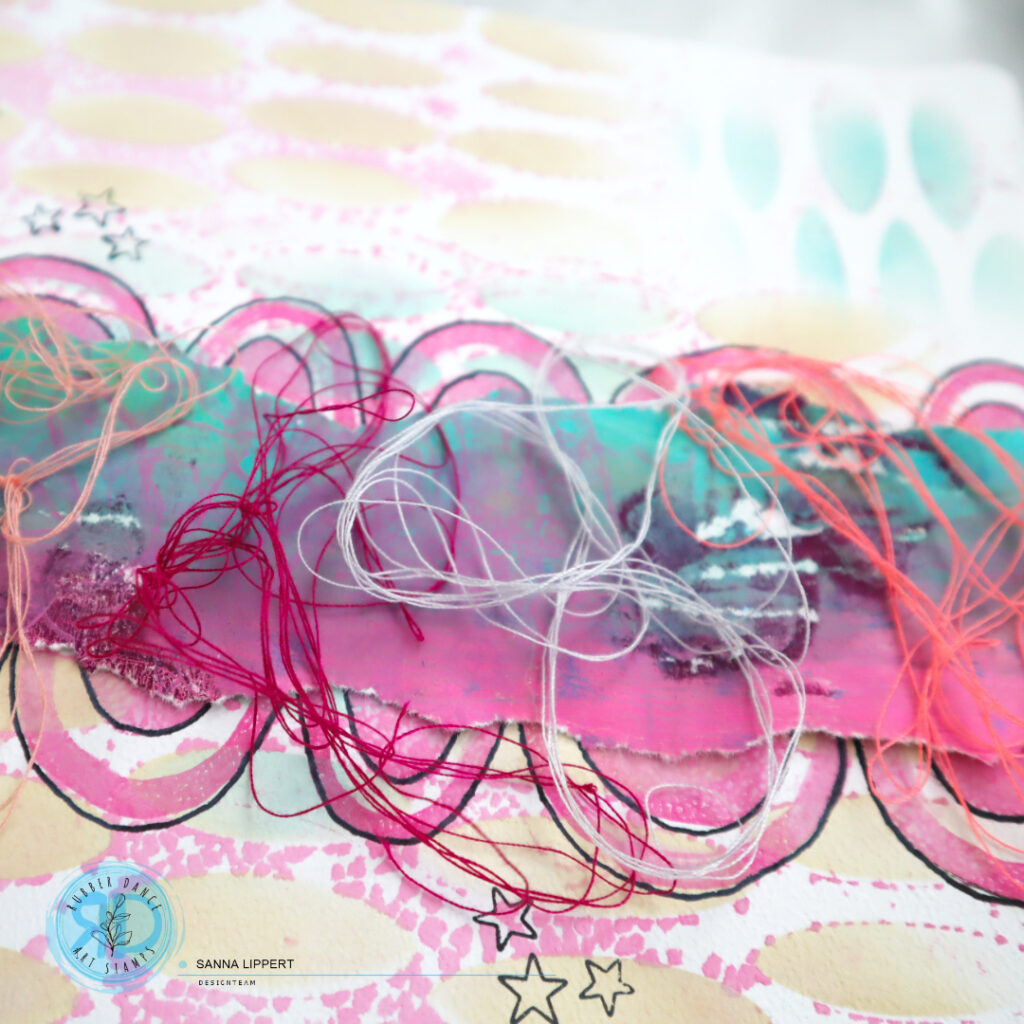
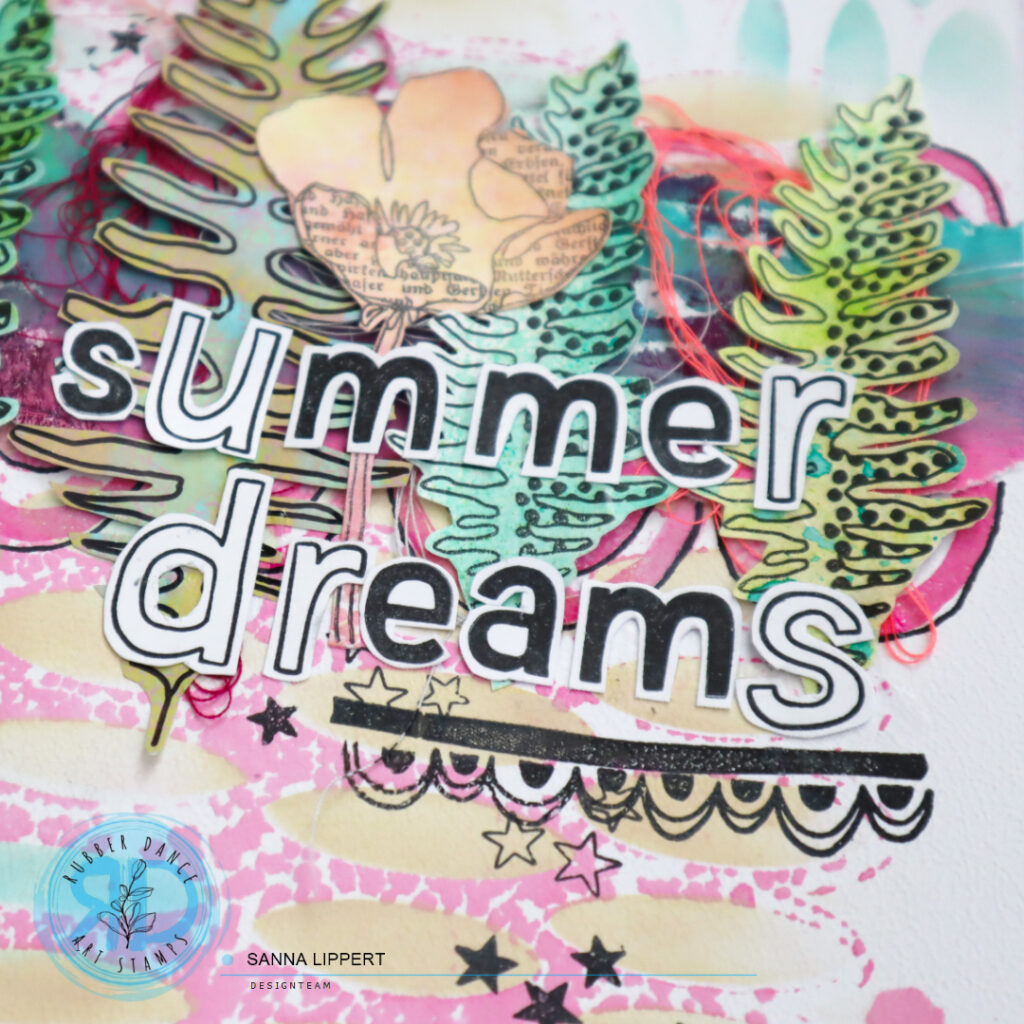
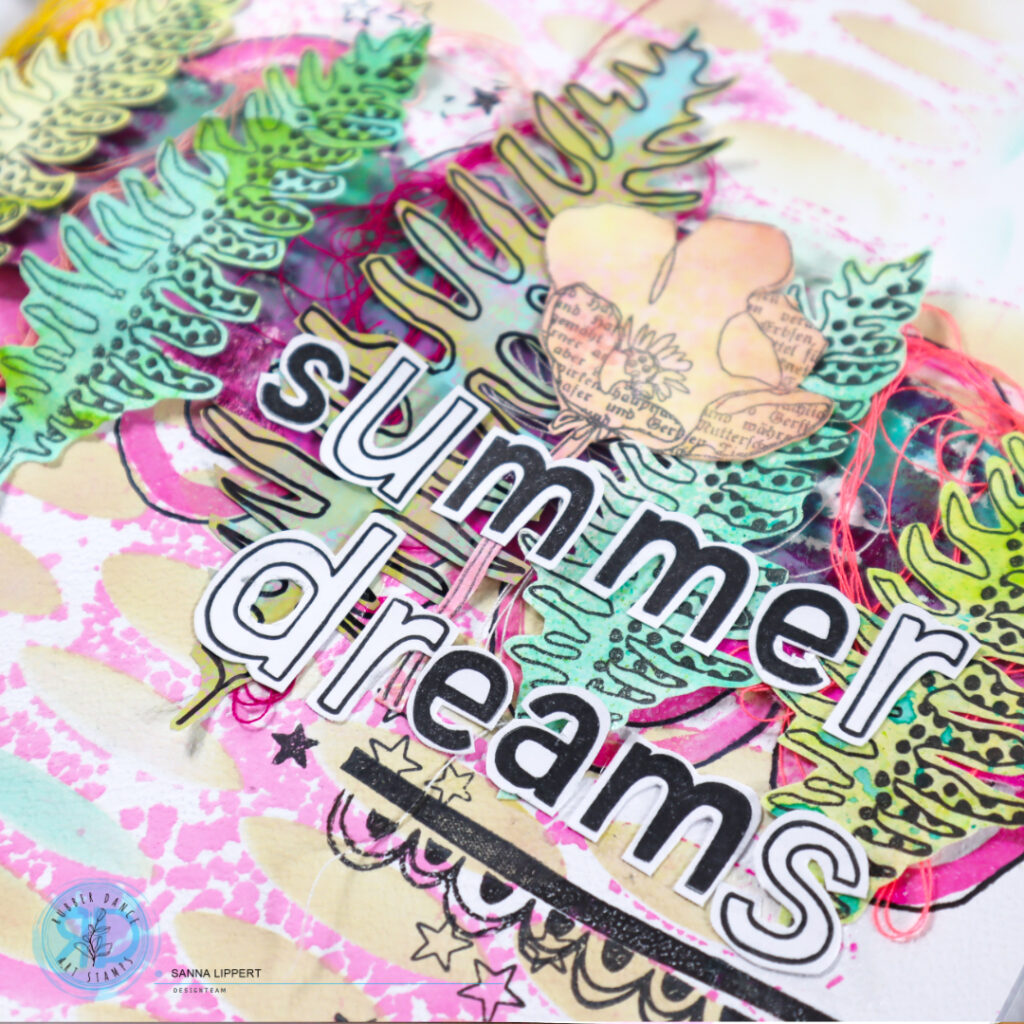
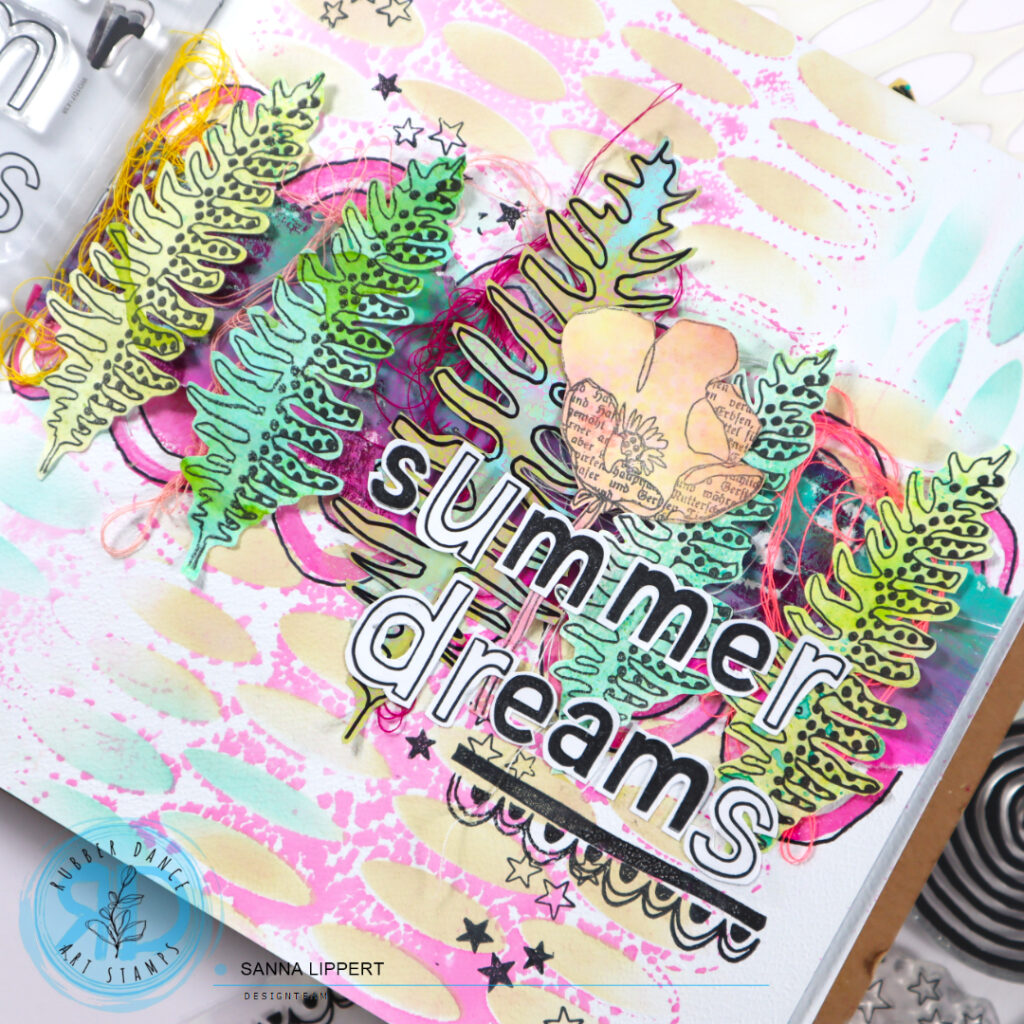
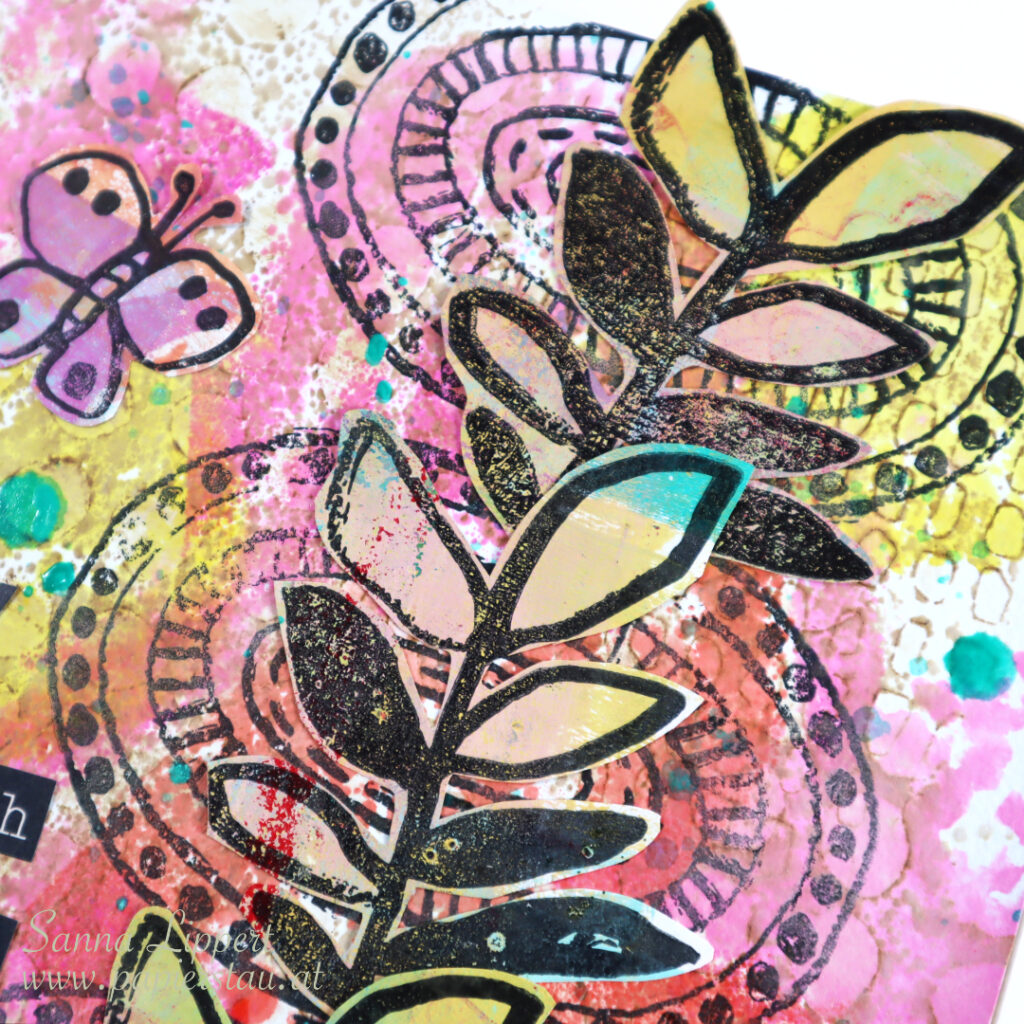
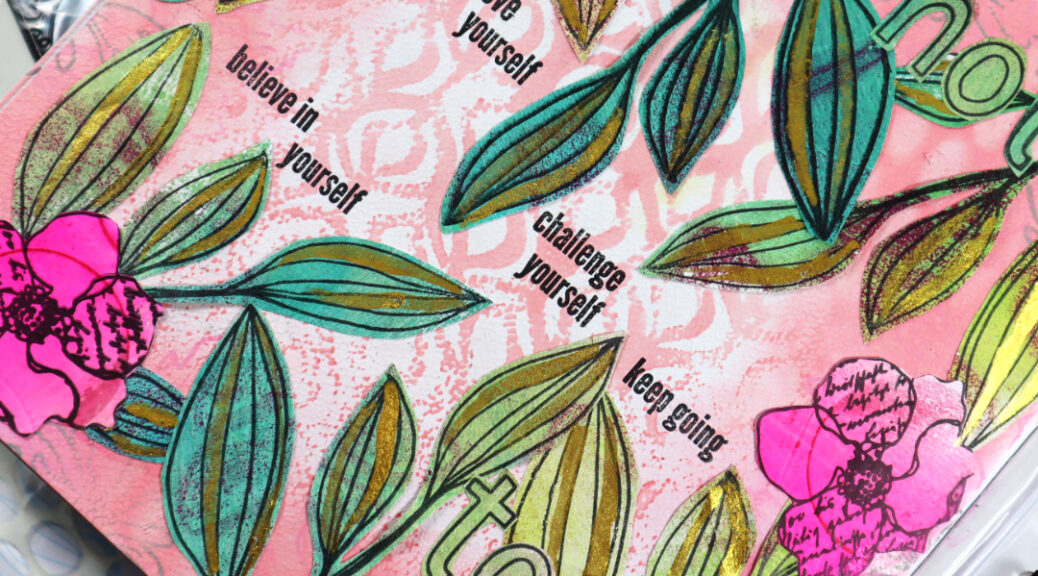
My starting point was the inked Ornament 1 stencil which I sprayed with water mist and then pressed onto the journal page. Next I blended two tones of pink Distress Oxide Ink around the edges and white areas. After that I took the darker pink tone and stamped some leaf patterns onto the inked area, followed with light grey stamping.

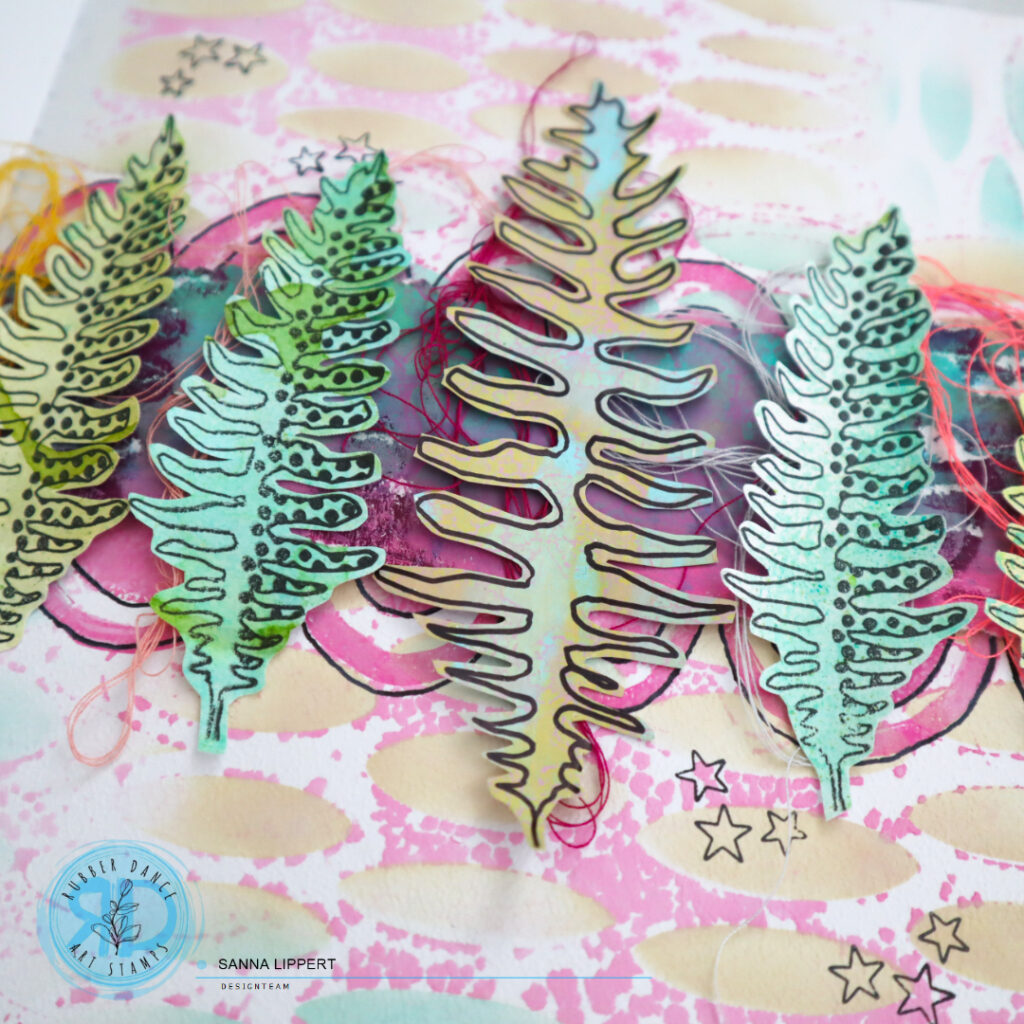
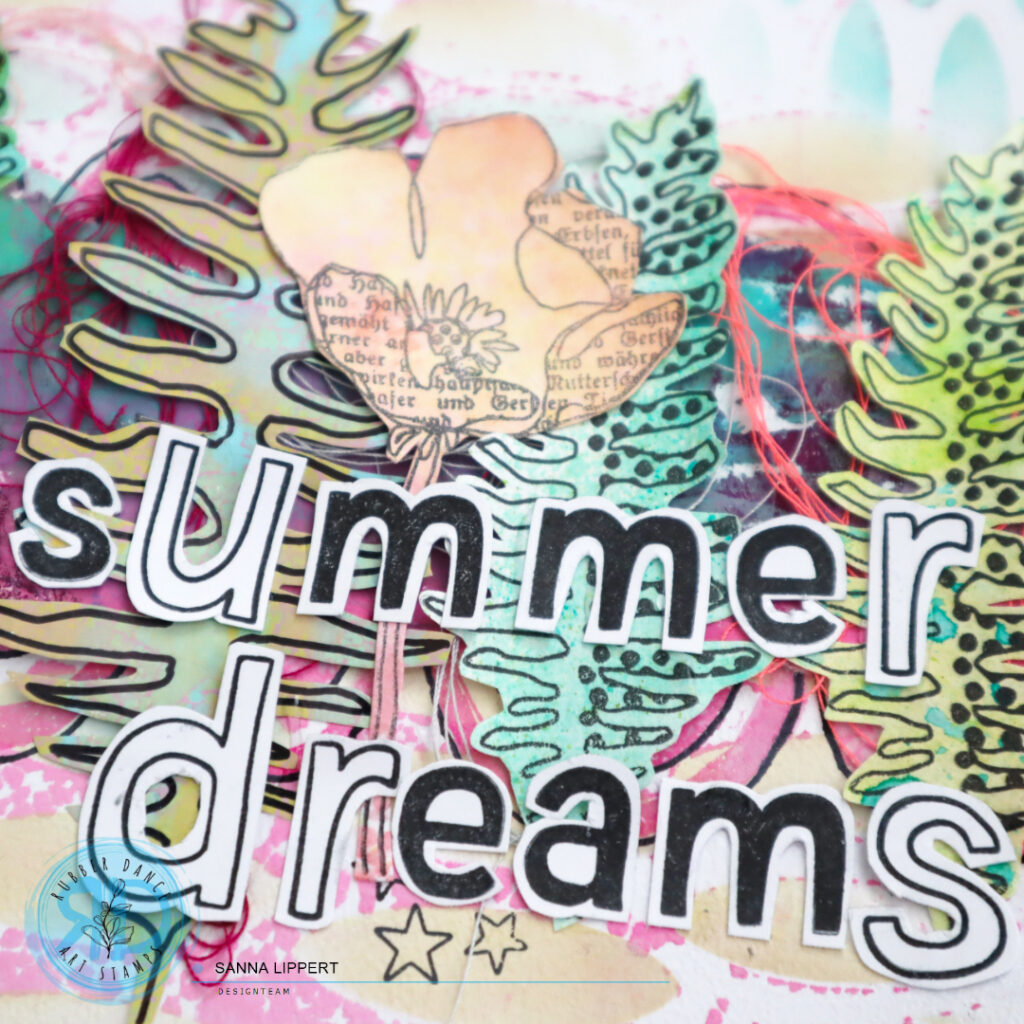
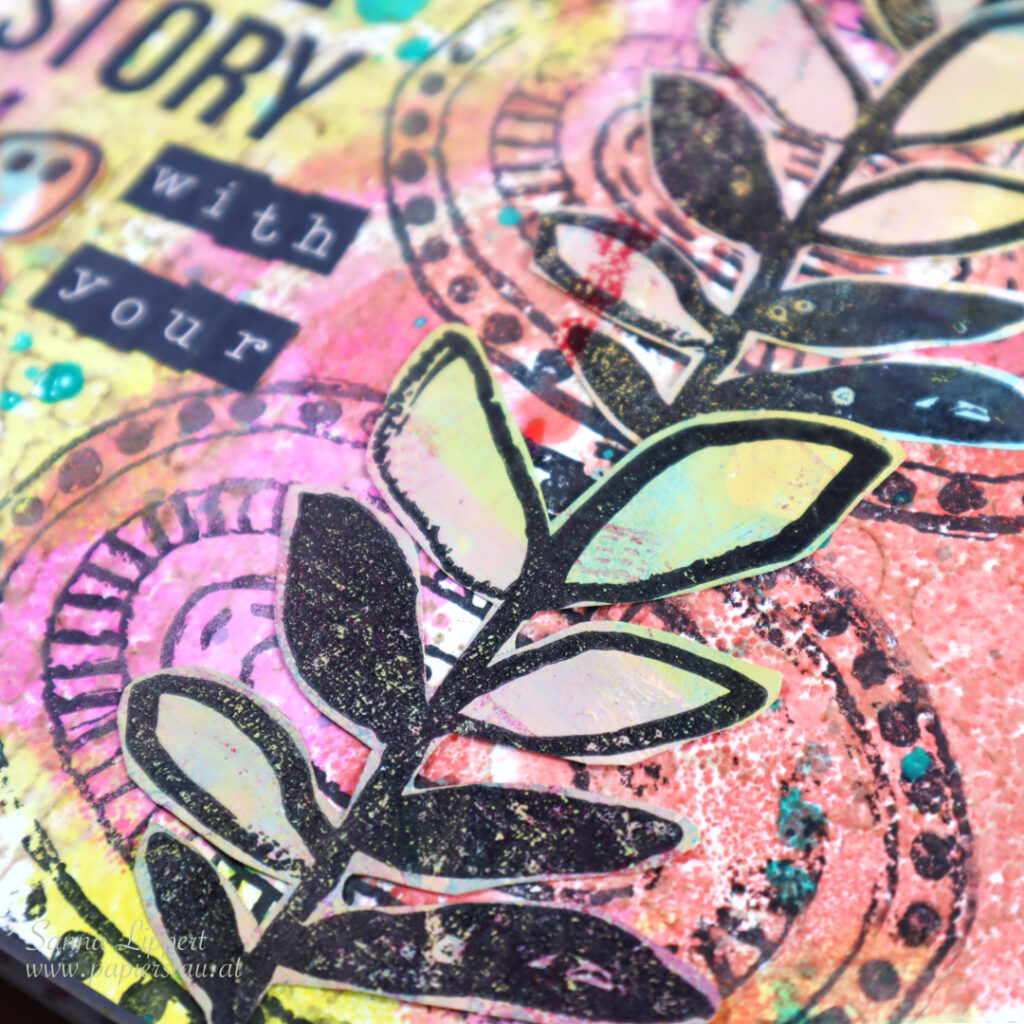
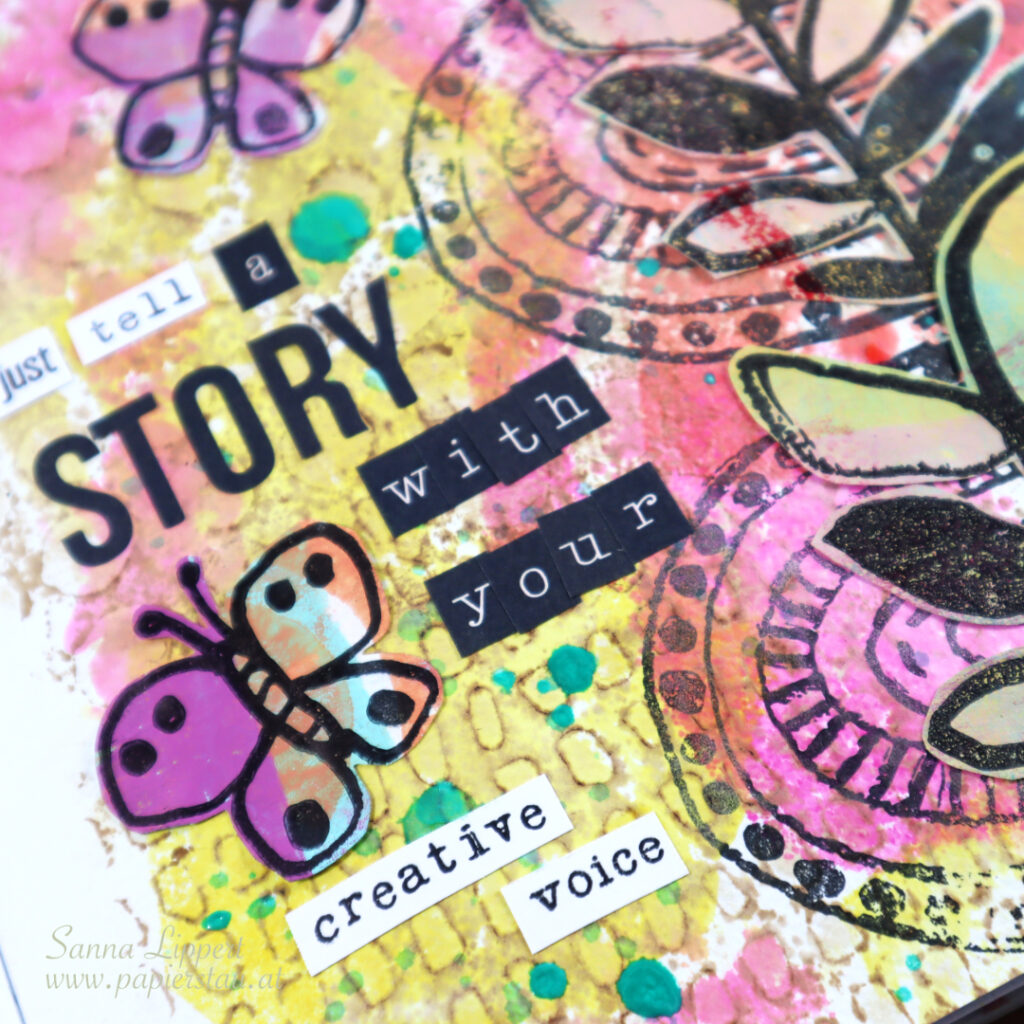
I had a green toned collage paper ready and stamped with Collage Leaves 3 stamp set and black ink some leaves onto it. After that I fussy cut them and was ready to adhere them to my journal page. On top of the leaves I added a few Doodle Flowers 2 collage fodder images that I had previously made.
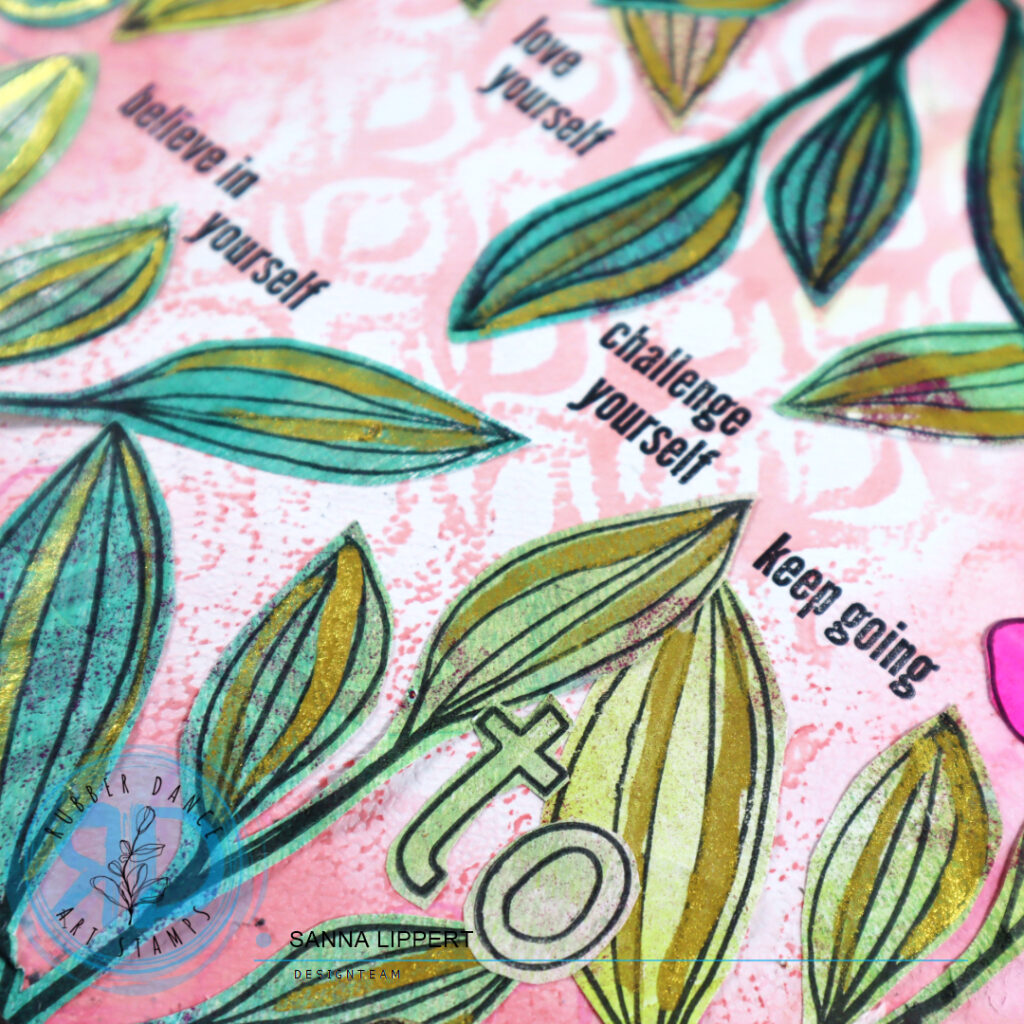
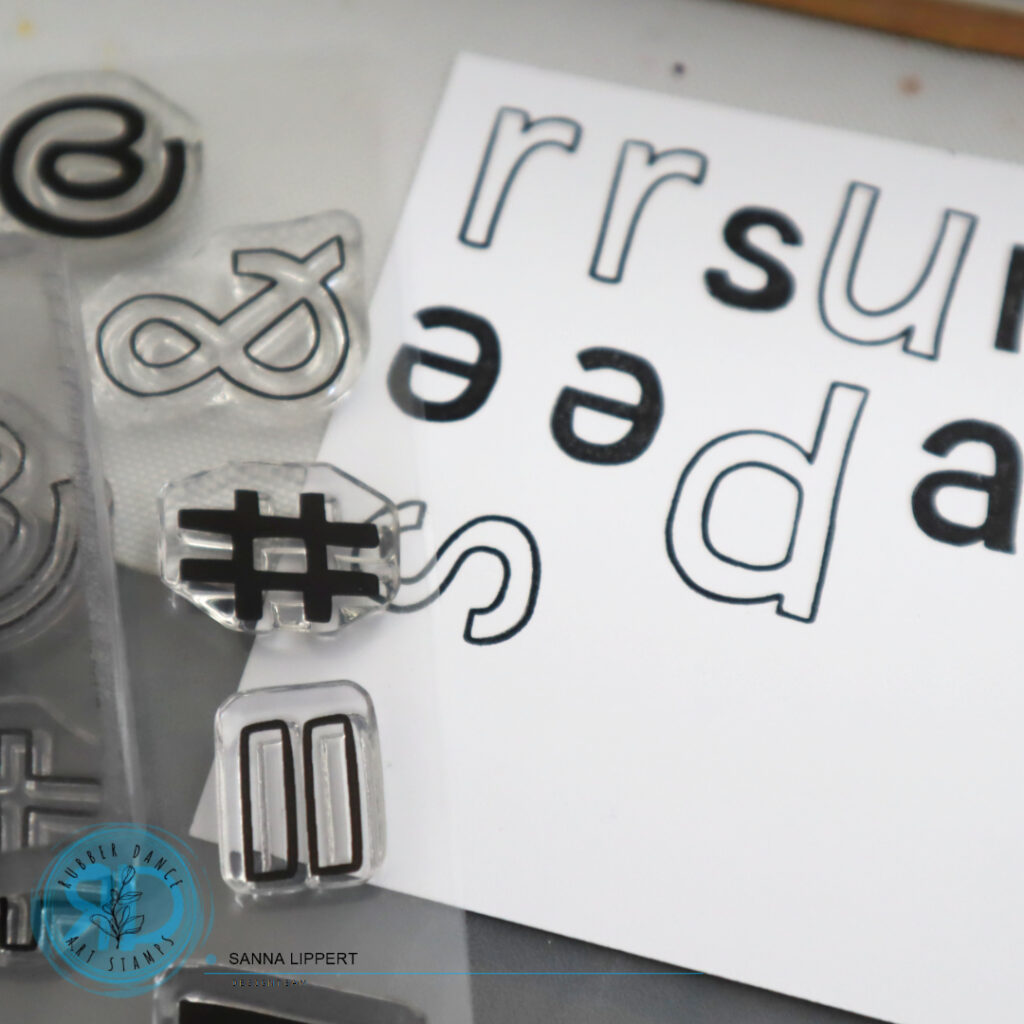
Then I decorated with leaves with golden pigment details. Next I stamped some inspirational words into the middle with the Collage Leaves 3 stamp set. For finishing touches I added a hand stamped title using the rest of my collage paper and the A to Z stamp set.
I also recorded a process video for you to watch – hope you enjoy!
Have fun creating!!
xx, Sanna