Tag Archives: Heavy Body Paints

Spring Art Journal page with tinted modeling paste and stencils – Rubber Dance

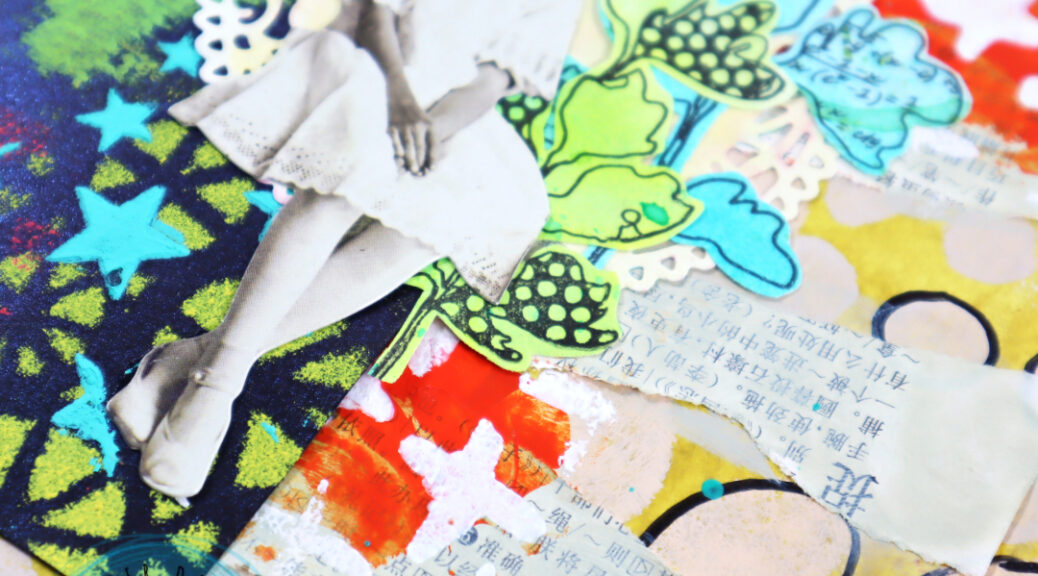
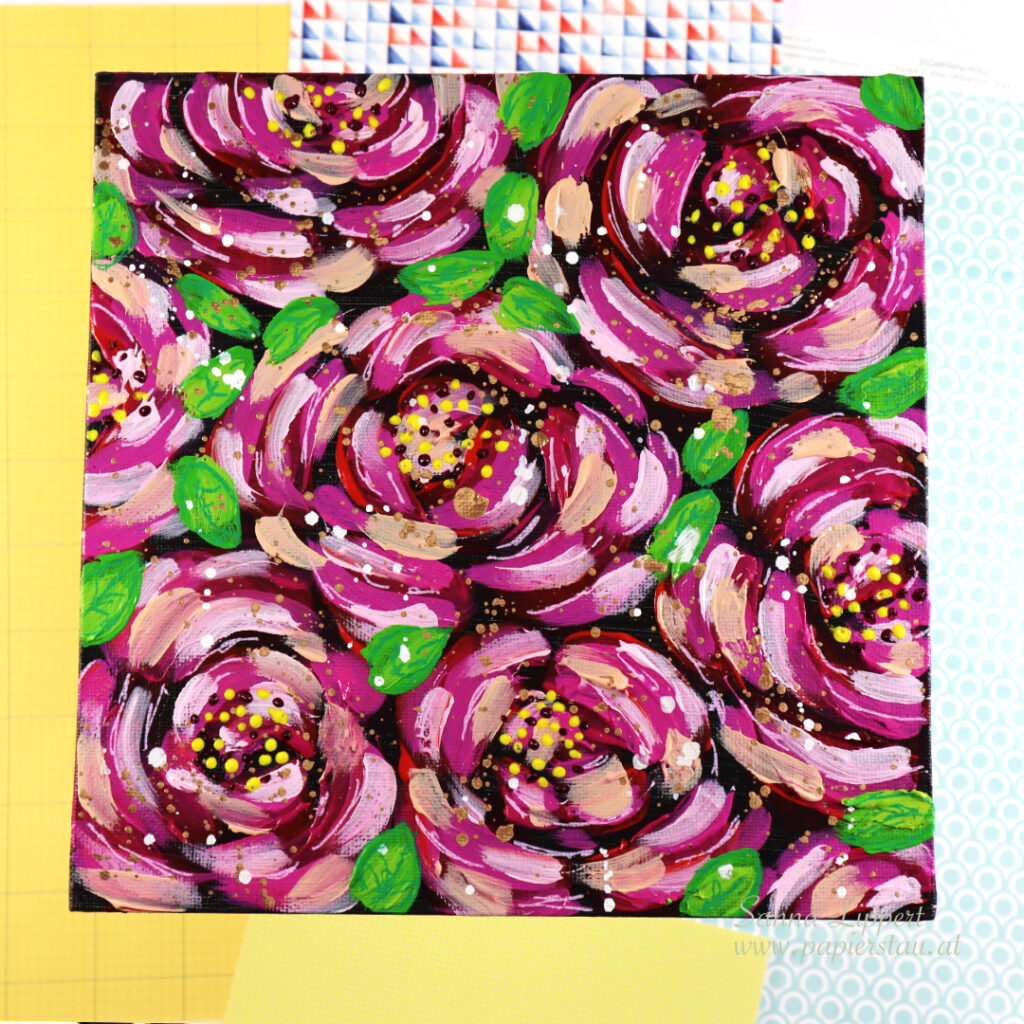
Hello, it´s my turn to share a. project over at Rubber Dance blog again. Today I am sharing a page from my art journal that started from a mark making play and ended up being a bright spring themed page. I used the Dotted 1, Organic 4 and Marks 3 stencils and the Mix It Up 5 stamp set to create the page. I also added previously made collage fodder bits done with Doodle Flowers 2 and Butterflies and Moths stamp sets.

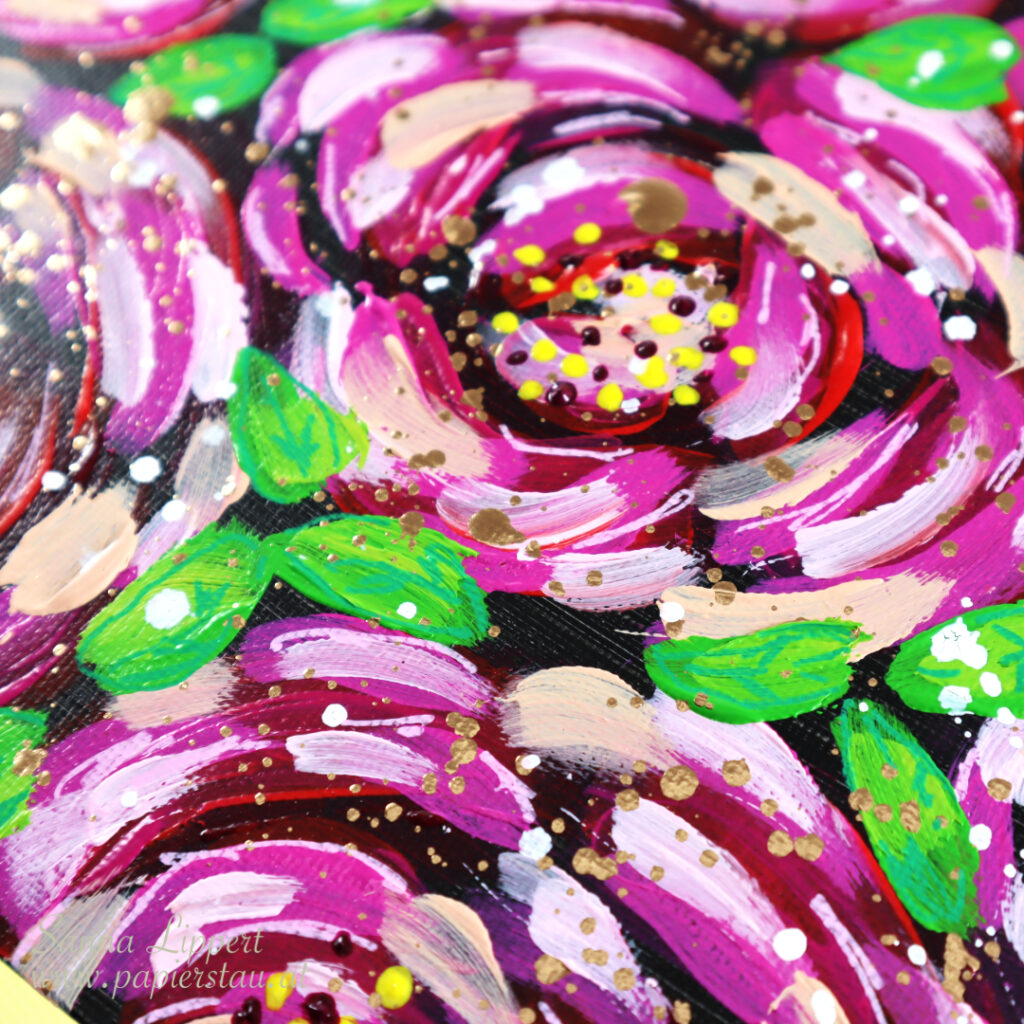
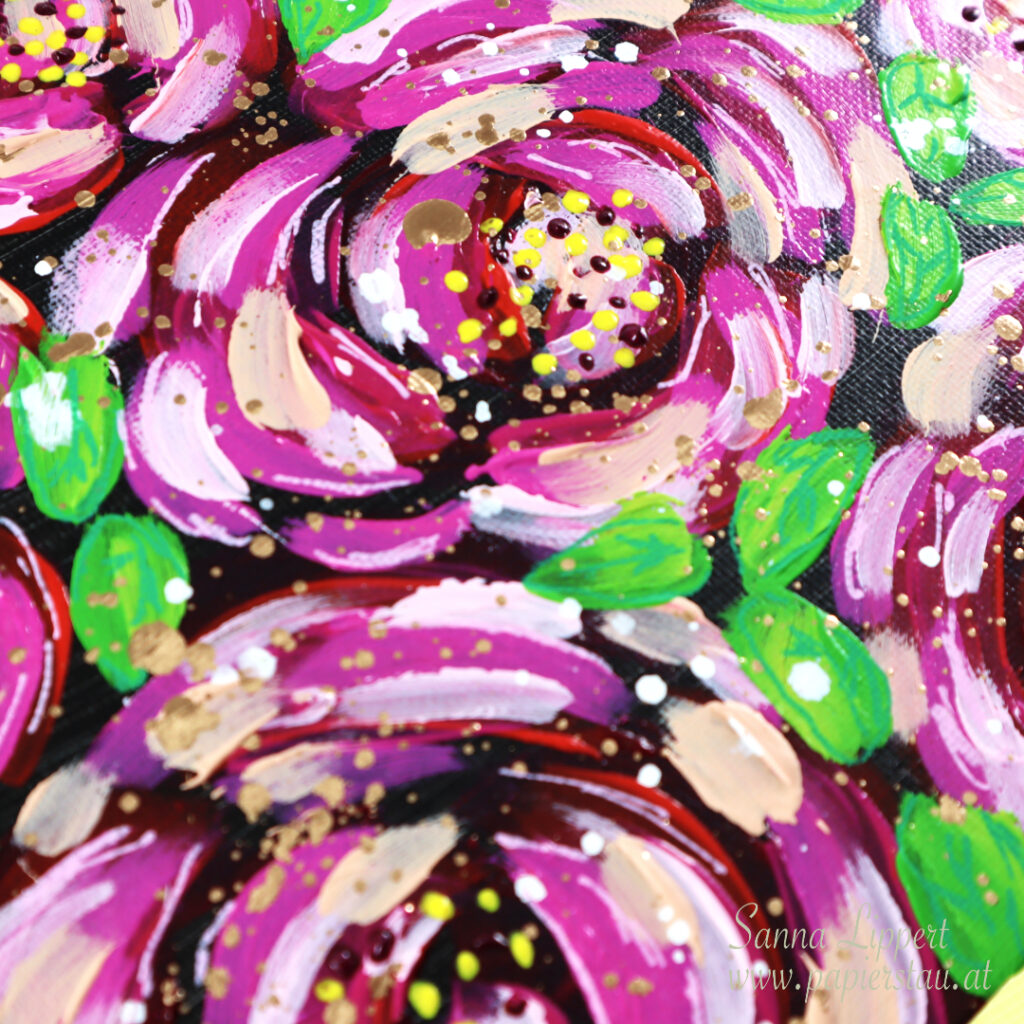
This is how my creating process went. I always have a journal close to me, when creating on other projects. That way I can wipe and add random layers to my journal with residue paints, inks and pastes. In the first photo you can see I added some residue pink paint, then some black mark making to the journal page. Next I mixed some modeling paste with neon pink and yellow paint and sky blue paint together and applied those onto the background thru the previously mentioned stencils. I love to tint my white modeling paste with acrylic paints to create different colors.

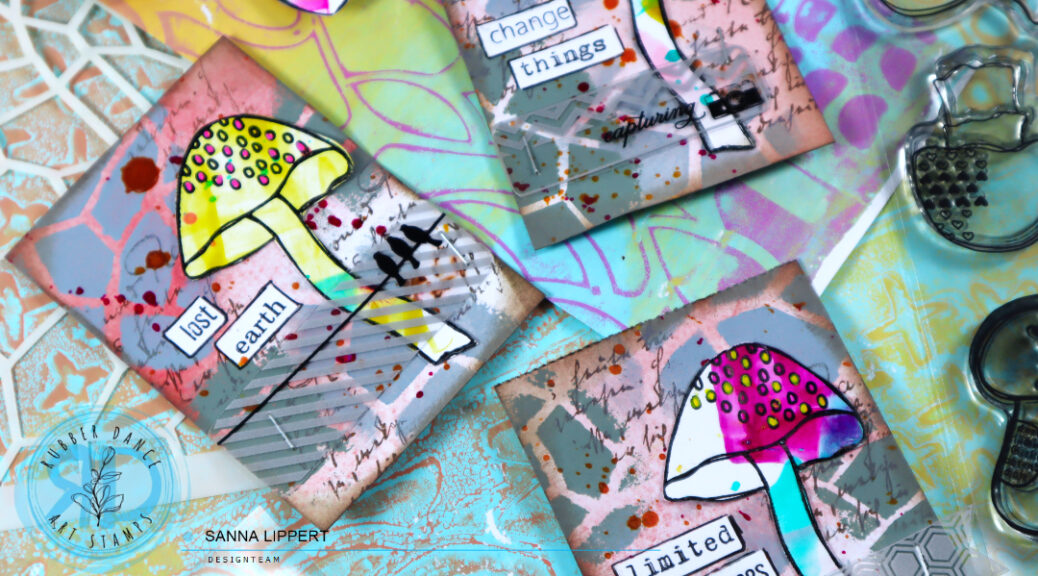
While the paste was drying, I took a pink tag and stamped some Distress Oxide Ink (kitsch flamingo) with one of the Mix It Up 5 stamp set stamps. Then I grabbed a small piece of residue gelli printed paper, stamped with the same set and black ink some images onto the piece and adhered it onto the tag. After that I arranged a cluster of leaves and flowers to the tag and cut off any residue along the edges.

After that I adhered the tag onto the journal page, created a sentiment with sticker and paper alphas and added some Gloss Spray splatters for finishing touches (Medieval).

Have you tried creating your own tinted modeling pastes? It´s a fun way to add some interest to any project (journal, wall art, card background). It also adds a nice texture and depth to a project. Wishing you a fun time playing with stencils and modeling paste!! If you missed how the fodder was done, you can watch the videos and the photo tutorial here, here and here.

Happy creating!
xxx, Sanna

Supplies:

Stenciled Art Journal Page – Rubber Dance

Hello! It´s my turn today over at Rubber Dance blog and I am up with a heavily layered, stenciled art journal page share today. For this page I used the Dotted 1, Big Ovals, Cross It, Wheels, Stars 1 and Marks 2 stencils. There are also some details added with the Doodle Flowers 2 stamp set.

I started by applying heavy body paint in “olive” with a palette knife onto the background. On top of that I used a foam brush to dab “sand” and “apricot” tones thru Big Ovals and Dotted 1 stencils. After that I outlined some of the dabbed paint “circles” with a black pen. Next I took a piece of a old dictionary book and wripped and glued strips of paper onto the background.

Next I wiped some “aloe” tone with my fingers onto the wripped dictionary page pieces to blend them into the background. I then added a layer of “tangelo” with a palette knife onto the page. Next I took the Cross It stencil out and added some white paint thru it onto the orange areas for contrast.

After that I took a black with glimmer mist misted tag out and again dabbed the “lemon” paint onto the tag thru the Wheels stencil. After that I put some “lime” toned paint onto the palette knife and wiped some of it onto the tag. The next layer was done using “stoked” tone and the Marks 2 stencil. I then added the last bits of “turquoise” paint with a palette knife thru the Stars 1 stencil onto the tag.

I sprinkled some Gloss Spray in “turquoise” for interest onto the art journal page. I then glued the stenclied black tag onto the art journal page. After that I added a misted doilie for decoration and created a cluster of leaves with “Doodle Flowers 2″ leaves next to it. There is a video at the end of this post on how I created the leaves.

I finished the page with a paper doll by Tim Holtz and some black and white alphabet stickers. Here is the start-to-finish video for further information:

And this is the video on how I made the leaves fodder:

I hope I could inspire you today. Happy creating!
Sanna

Supplies:

Flower canvas

Hello everyone and happy 2025!!! I am posting this project now to make sure the recipient has received it before this going live.

I painted a rose canvas for a relative for Christmas. She loves flowers, so this hopefully is/was a prefect gift for her.

I used acrylic paints, some Posca pens and a gilding fluid to create this canvas. I have done smaller versions of these flowers into journals before, but this was the first canvas I filled with roses.

Here´s to a good start into 2025 – may it be awesome, joyous, exciting and all kinds of positive to everyone. I wish that from the bottom of my heart!

Happy New Year!
xxx, Sanna

Supplies:

Artist Trading card set with Textured Mushrooms 2 – Rubber Dance

Hello, it´s my turn over at the Rubber Dance blog again today and I am sharing a fall themed Artist Trading Card set, created with Textured Mushrooms 2, Mix It Up 6 and Mix a Sentiment 2023 stamp sets as well as the Lattice stencil. As my starting point I again used the Gloss Spray mushrooms from my post back on the 20th of October. I made plenty of them at once and now have fun material to play with.

For this set I started with a red patterned paper piece that I fussy cut into right size. Next I took Dina Wakley paints in tones Mineral and Sage and applied those thru the Lattice stencil onto the papers very randomly. After the paint was dry, I added stamping with the Mit It Up 6 stamp set stamps and brown stamp ink.

For additional interest I added some Gloss Spray splatters in Cheddar and Fuchsia and let the layer dry before attaching some screen prints to the cards with a stapler. Now all I needed to do, was to arrange the Gloss Spray mushrooms onto the cards and adhere them on place. For finishing touches I added some Mix a Sentiment 2023 words to the ATC´s as well as added details to the mushrooms with Posca pens. Finally, to add more depth to the cards, I inked the edges with a brown Distress Oxide ink.

And here is the video start-to-finish for further details and steps – hope you like it and get inspired!

Happy creating!
xx, Sanna

Supplies: