
Hello, it´s my turn to share a Rubber Dance project again. I am sharing a set of Christmas cards this time. I used the Xmas Trees 2 and the Stars 1 stencil for these cards. The idea is very simple, you just need some gelli printed collage papers as a starting point.
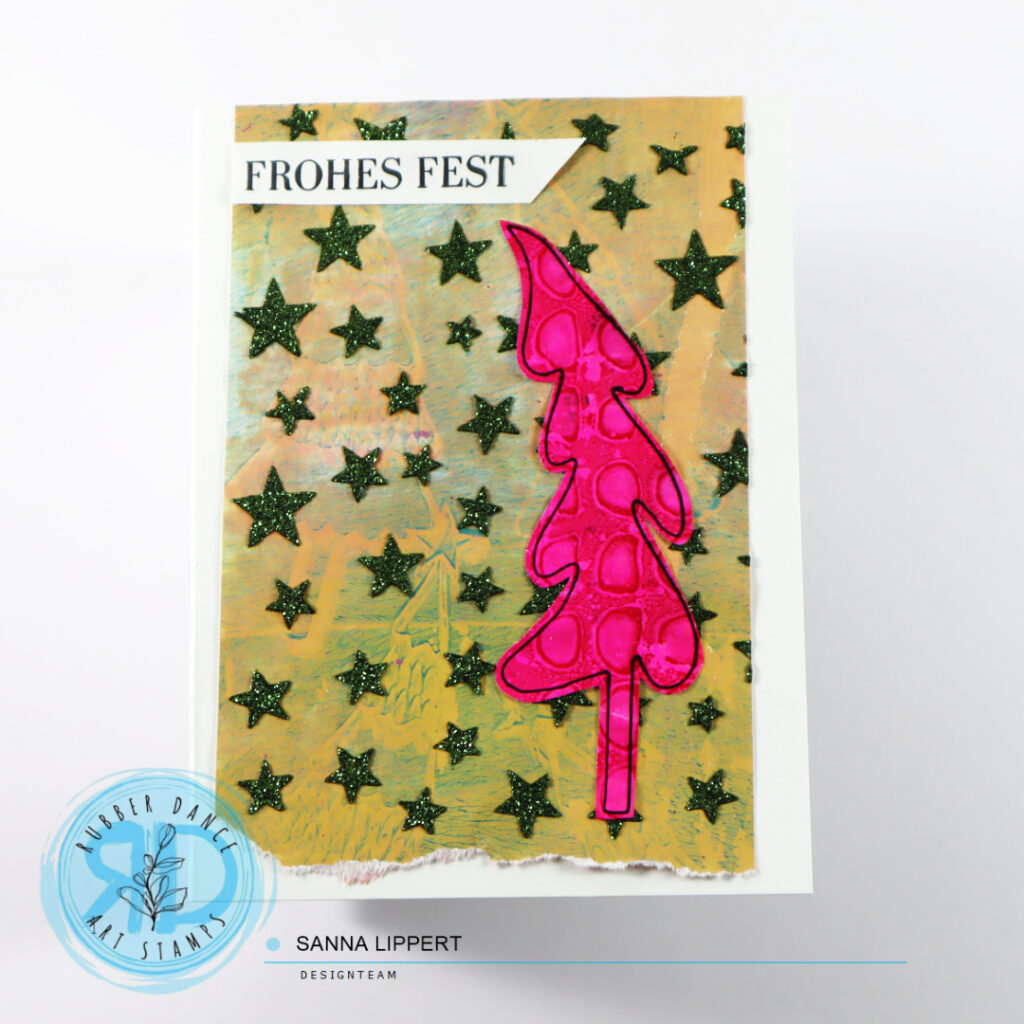
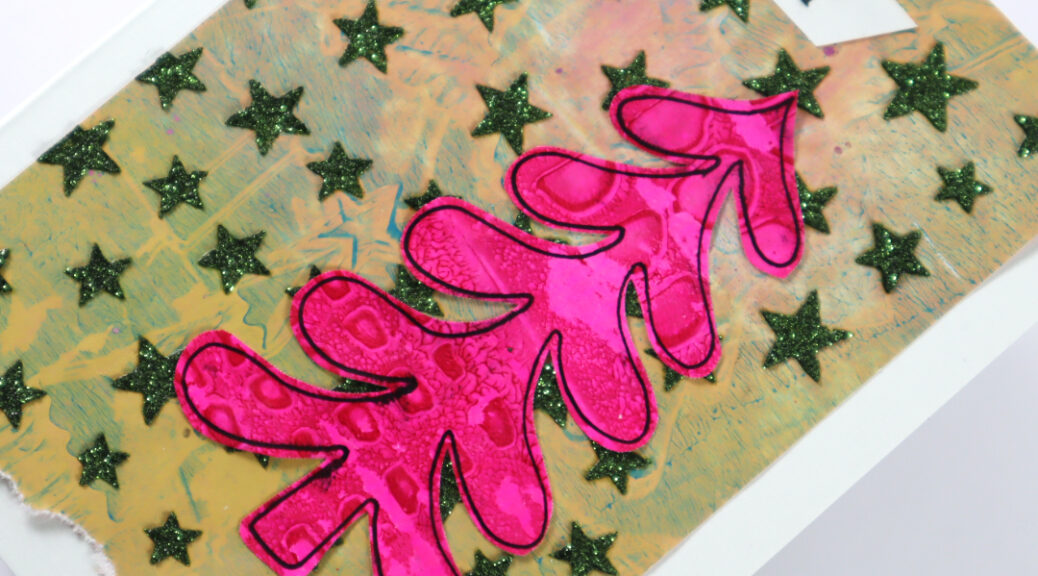
I have quite a pile of collage papers that I´ve created with Rubber Dance stamps and stencils during the past year. This pile is a great starting point to any kind of project, basically. Here I´ve used gelli printed images that I created using the Textured Xmas Trees 2 stamp set. Next I took a glitter paste and applied it thru the Stars 1 stencil onto the paper.
After cutting the paper into size, I wripped the bottom part of the paper. The “unclean” line add more interest to the card.
After that I took another collage paper (created with Marks 2 and Marks 3 stencils and bold colors) and placed the Xmas Trees 2 stencil on top. I then traced the tree patterns with a black pen onto the paper and fussy cut the trees.
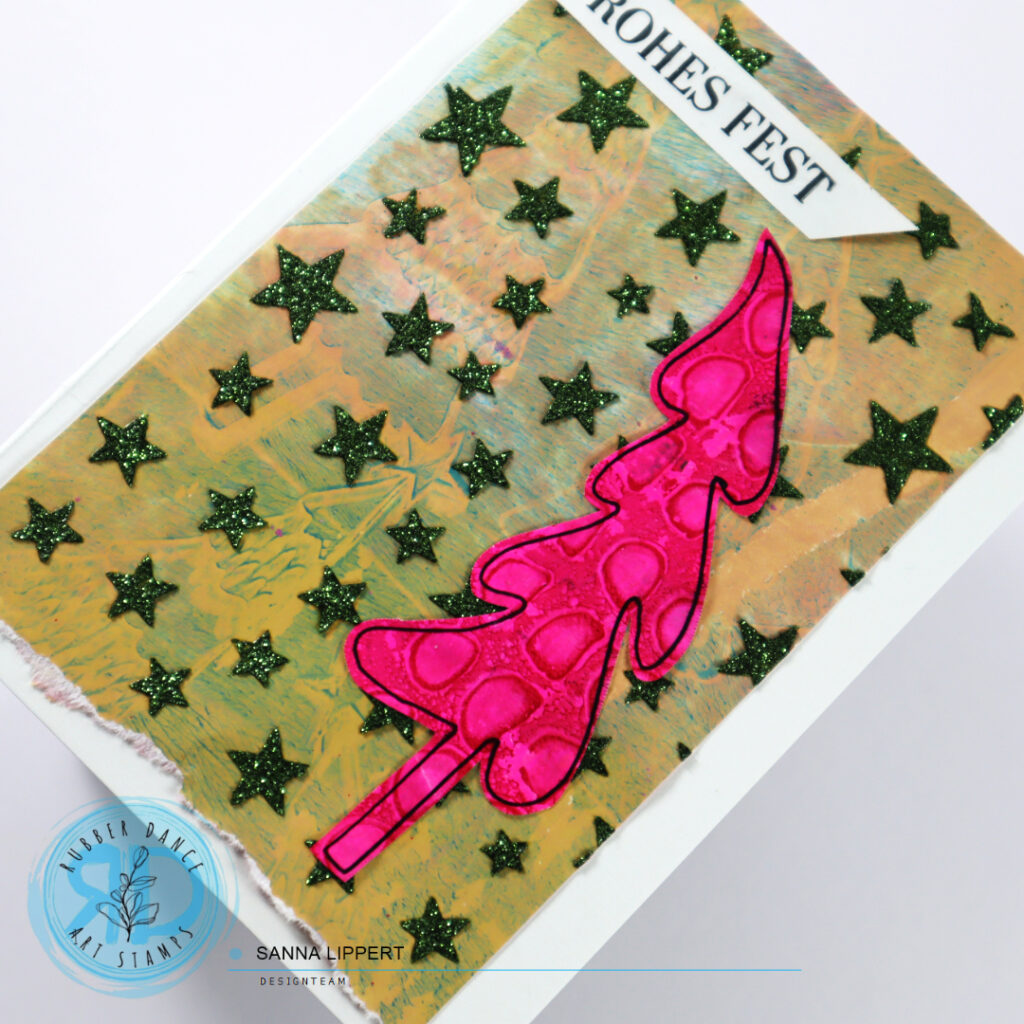
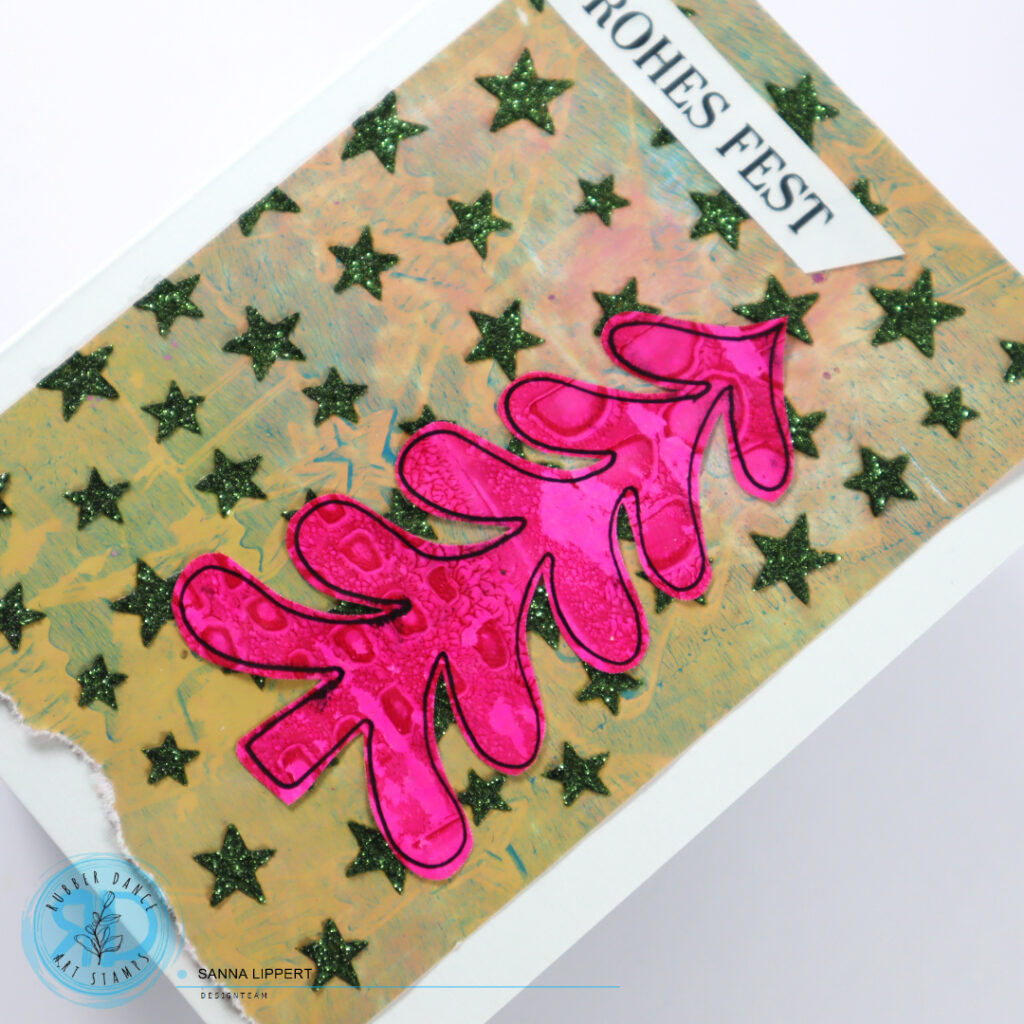
I then took a piece of white paper and stamped Christmas wishes with black ink and Kartengrüße stamp set. Cut into size and adhered to the card and the card set was done in no time.
Here is step-by-step video, too:
Have fun creating with collage papers and adding details with stencils!
xx, Sanna