Tag Archives: Thickers

50th birthday card in pink tones

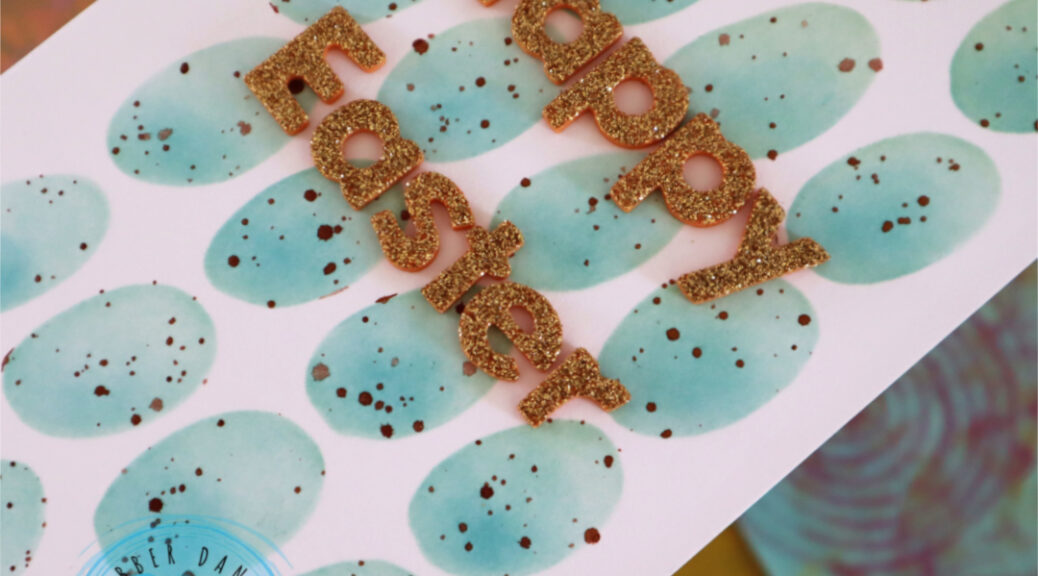
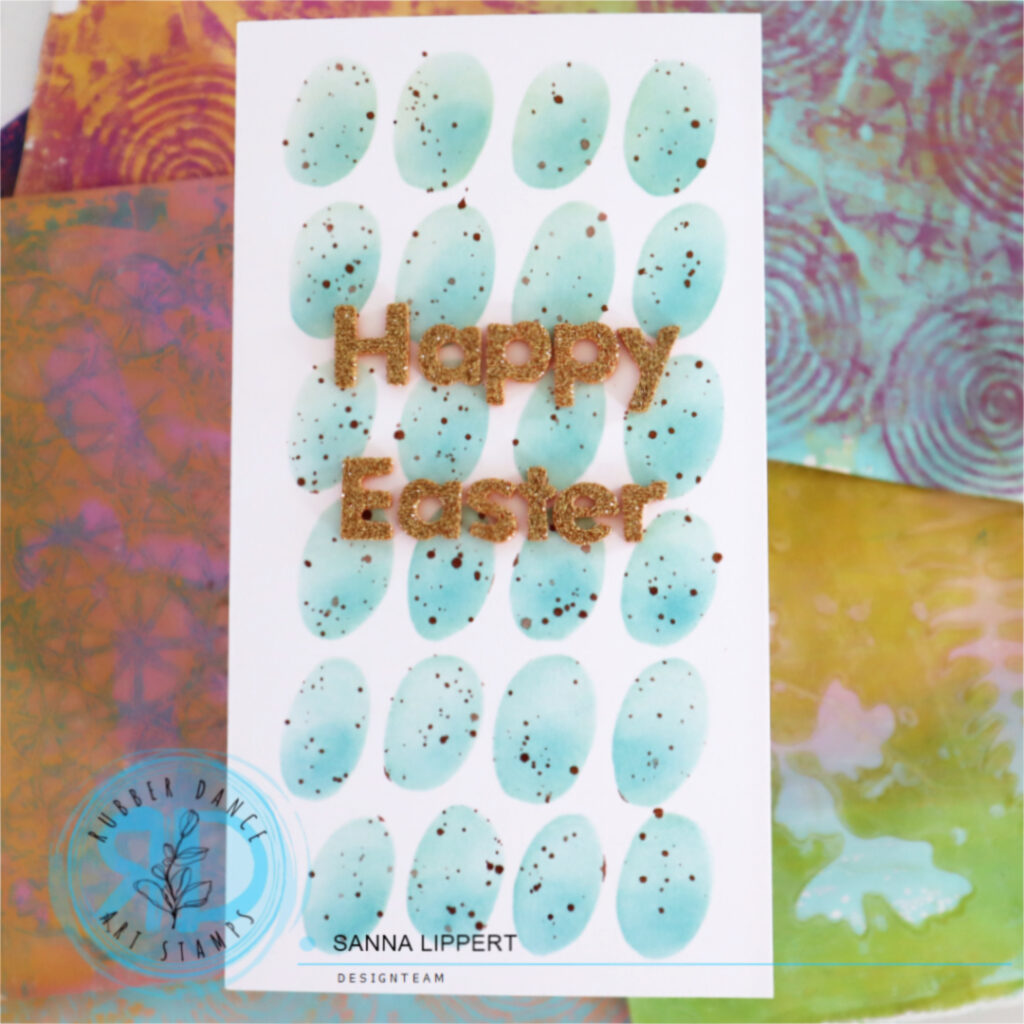
Hello everyone! Today I am sharing a 8 x 6 inch card. I created this one for a work colleagues 50th birthday. She looooves all things pink, therefore the color choices.

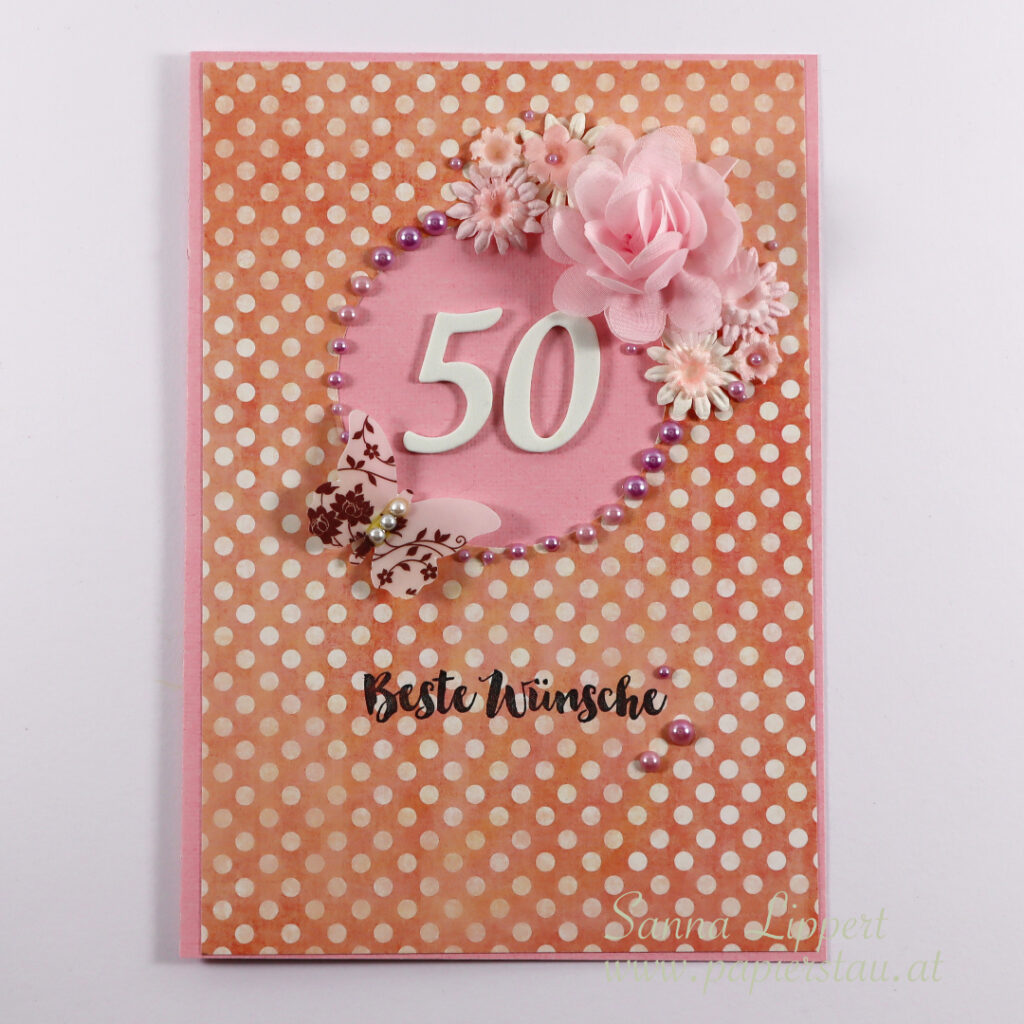
I used all kinds of things from my own older stash for this card. I have a thing for polka dotted papers and have been “collecting” them for years. This paper was just perfect for the card. I used a pink cardstock as a base, folded it into size (8×6 inches). Next I cut the polka dot paper into size (slightly smaller than the base).

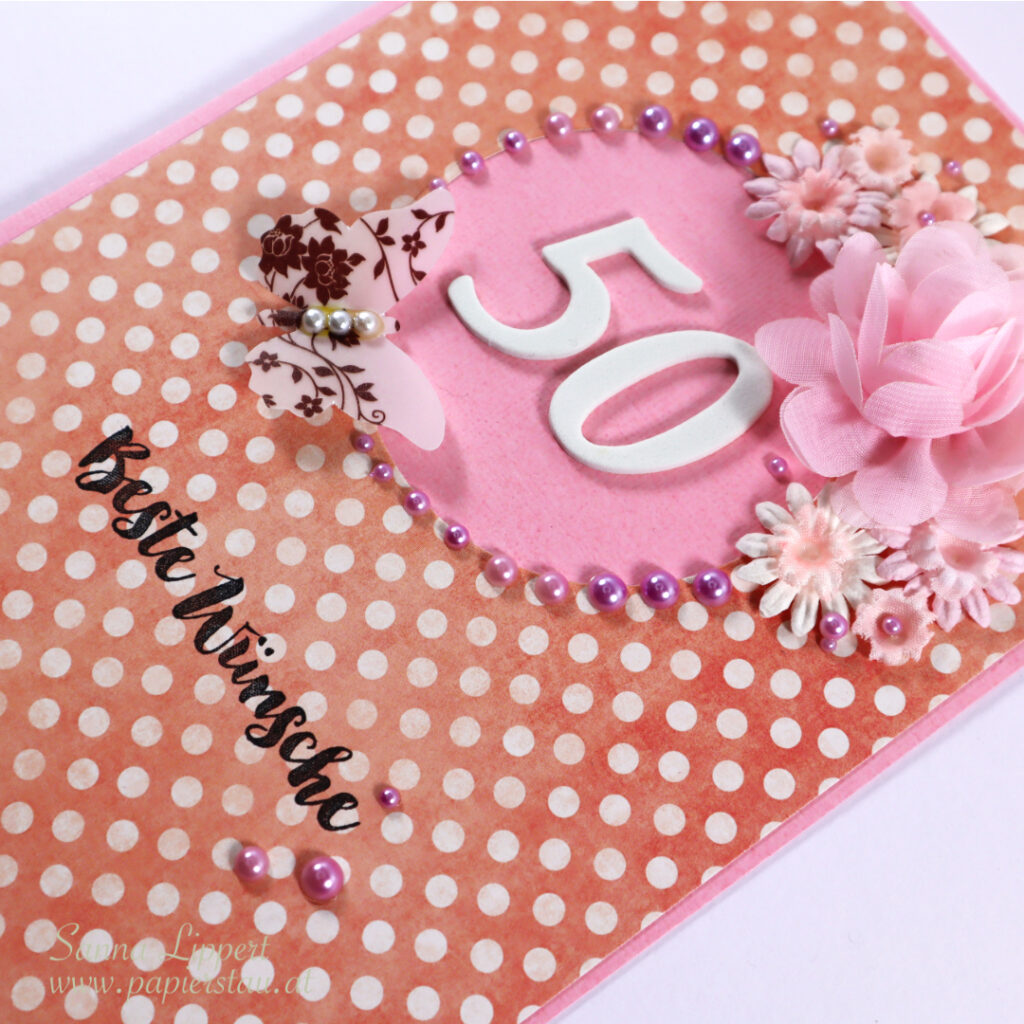
I then die cut with a Elizabeth Craft Designs circle die onto the polka dot paper, adhered it onto the base and started decorating. The flowers are from my older flower stash and added into a cluster. The numbers are Thickers in white.

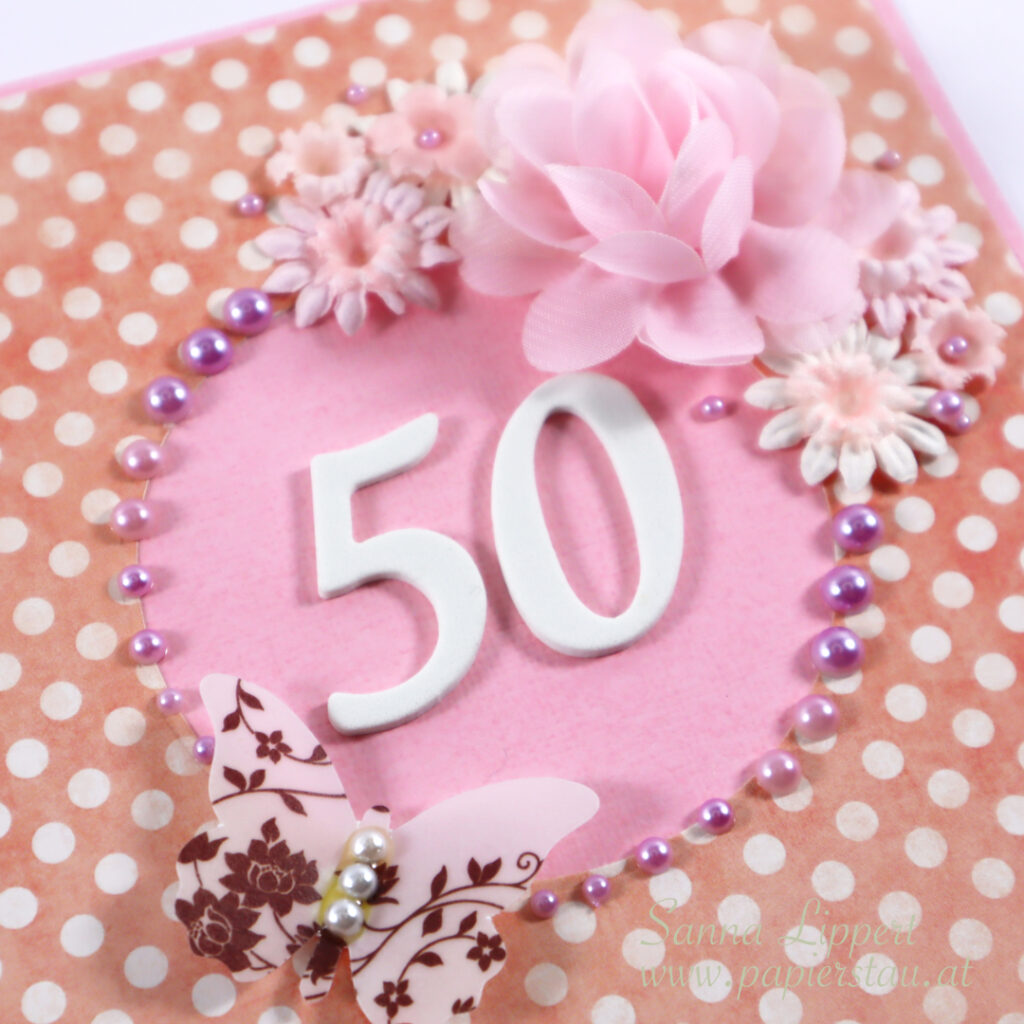
The vellum butterfly is Jenni Bowlin Studio (very old stash) and the half pearls are by Kaisercraft. All older product from my stash. The stamped sentiment is by Klartext stamps. The recipient loved her card, so mission accoplished :).

Thanks for stopping my and taking a look! I will be sharing more new projects the next weeks, so make sure to come and take a look!
Happy scrapping!
xx, Sanna

Supplies:

Simple one stencil Easter card idea – Rubber Dance

Hello everyone, I am up over at the Rubber Dance blog today again. This time with a really simple, but awesome, stenciled Easter card tutorial. You will need the Big Ovals stencil (one of my faves!), two tones of blue Distress Inks, a brown spray ink of some sort, washi tape and a white card base.

This was the kind of idea that when it hit me, I just immediately had to run to my craft room and try it out. And it worked out so great! I have this simple stenciled egg background for my Easter card and it is so easy to make.

First you need a slimline card base in white. Next take two tones of blue Distress Inks (I used tumbled glass and broken china). Start by adhering the card base with washi tape onto your working surface, next adhere the stencil on top and cover all unnecessary circle areas with washi too.

Now apply the lighter blue tone with a blending brush, then go over the lower circle areas with a darker blue tone. After that leave the stencil as is and splatter brown spray ink thru the stencil. Let shortly dry and carefully remove the stencil and the washi tape. Decorate with a “Happy Easter” sentiment, created with golden glitter alpha stickers. How´s that for a fast and easy-to-do Easter card idea with “Robins eggs!? Here is a video for you to watch – hope you like this idea.

You could also make yellow, light pink or light brown eggs. Whatever colors you prefer. I am going to make a few more in different colors for sure.

Happy crafting,
xx, Sanna

Supplies: