Hello and happy Wednesday! Today I am sharing a new card creation with you. This time for a wedding theme.
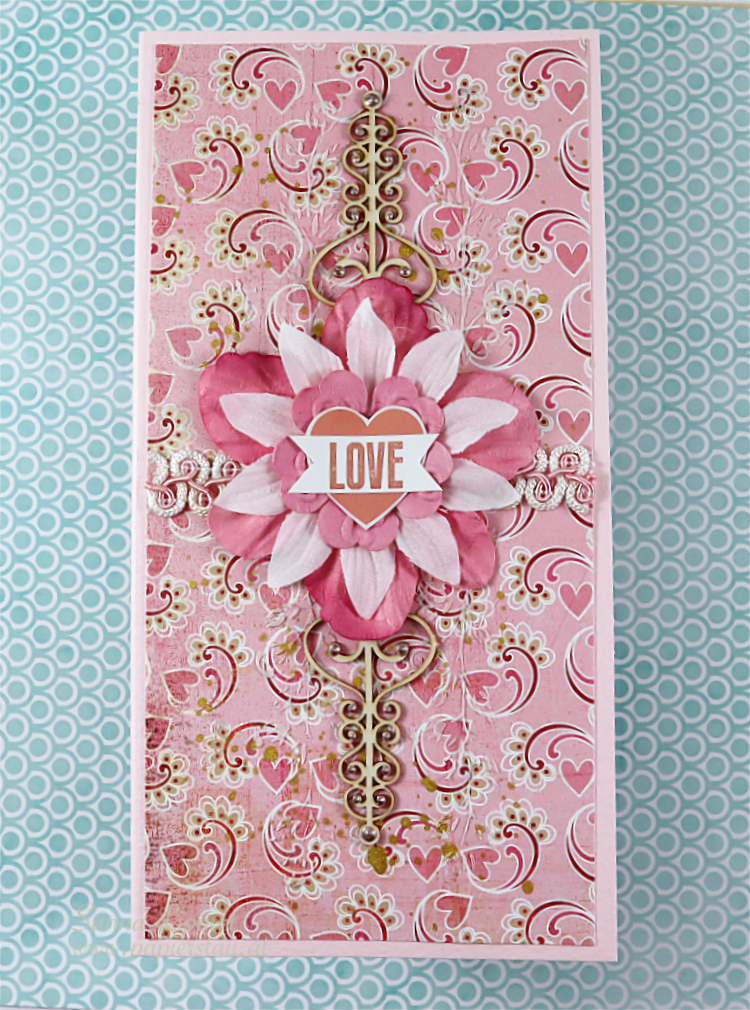
This is a slimline card with lots of pink tones on it. I have used older paper collections from my stash for the background (Basic Grey, anyone?). On top of that I have some modeling paste applied thru a The Crafter´s Workshop stencil in size 6×6. It´s small rose branches going up and down next to the Wycinanka chipboard piece.
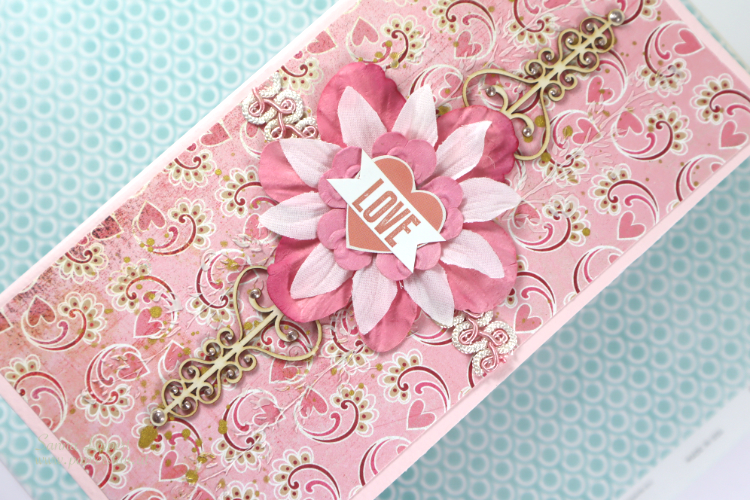
I also added some golden splatters with Gansai Tambi golden pigments here and there on the background. And as a centerpiece I layered pink and white flowers and added some Teresa Collins wedding themed stickers on top. There is also a pink and white ribbon going across the card under the flowers.
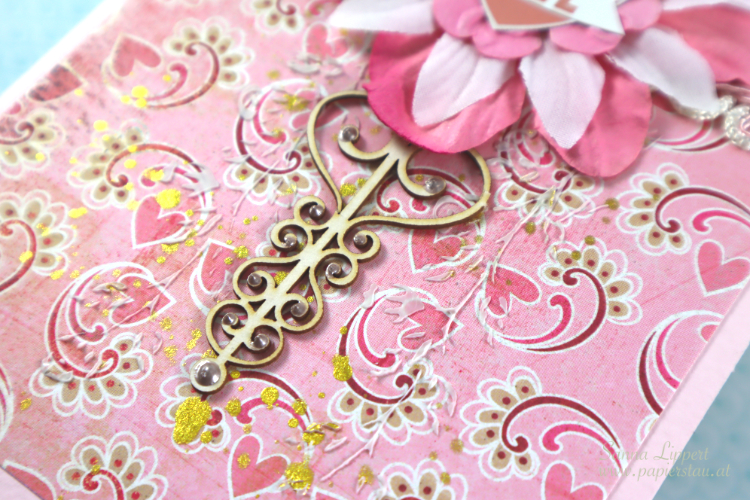
And onto the chipboard pieces I have added some Nuvo Drops for detail. Since the bride loves pink, I totally went with her color favorite for this card ;-). And luckily, she really liked the card :).
I hope you got inspired to a) use some older product from your stash and b) to create some fun cards yourself!! Wishing you a lovely day &
Happy crafting,
xxx, Sanna
Supplies (alternative product suggestions):