Hello, I don´t know what it is with January, but I always get the urge to play and craft alot in January. Thus, today I am sharing something I created yesterday evening :). A set of sparkly birthday cards:
I created these using my Elizabeth Craft Designs stash – silk microfine glitter, stamps and die cut dies. Only the rhinestones are from another manufacturer (my very old stash).
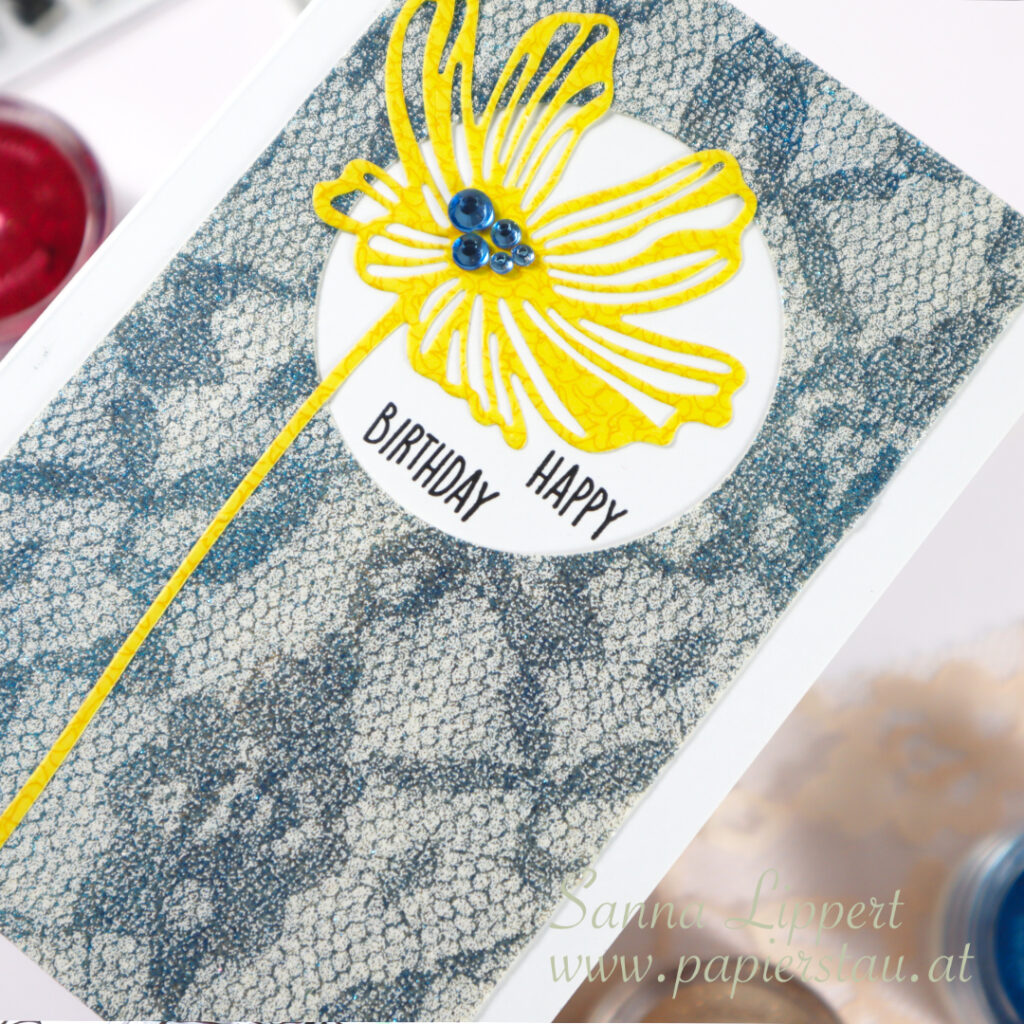
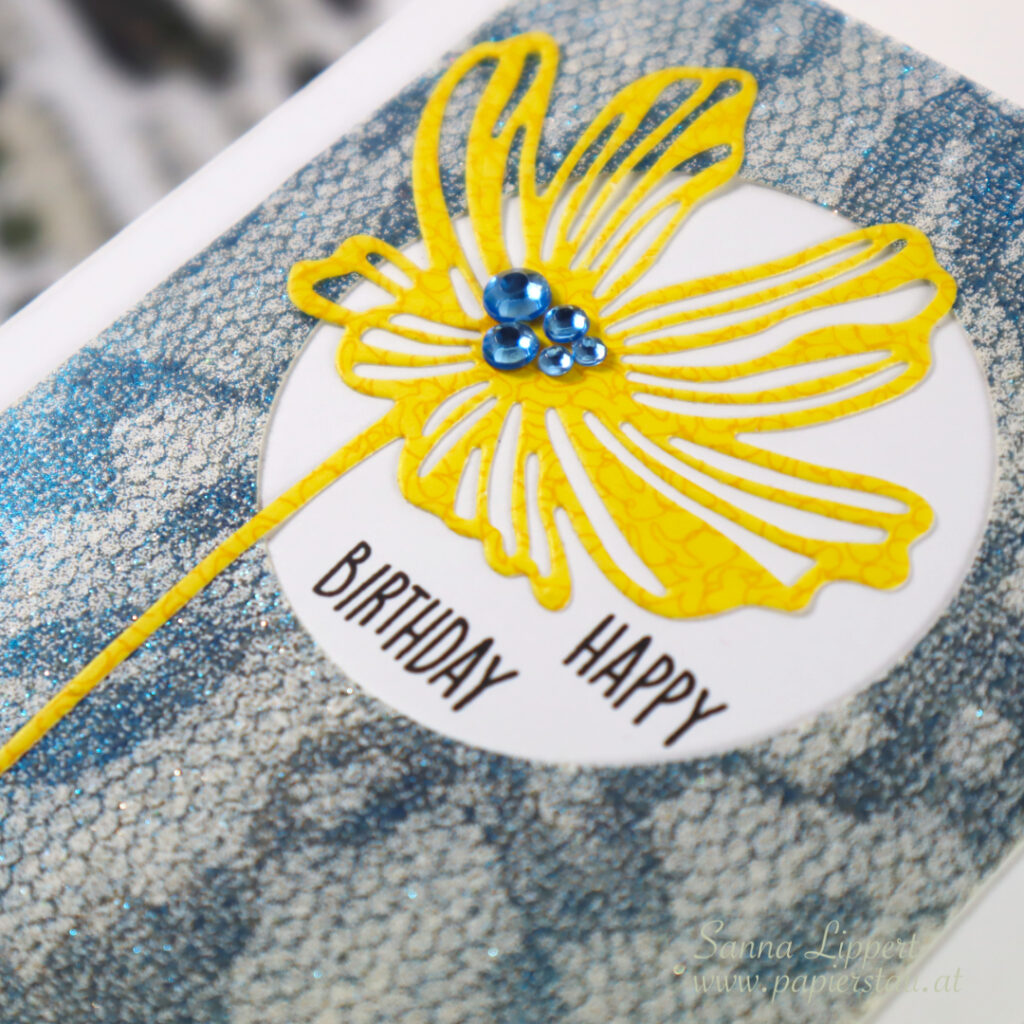
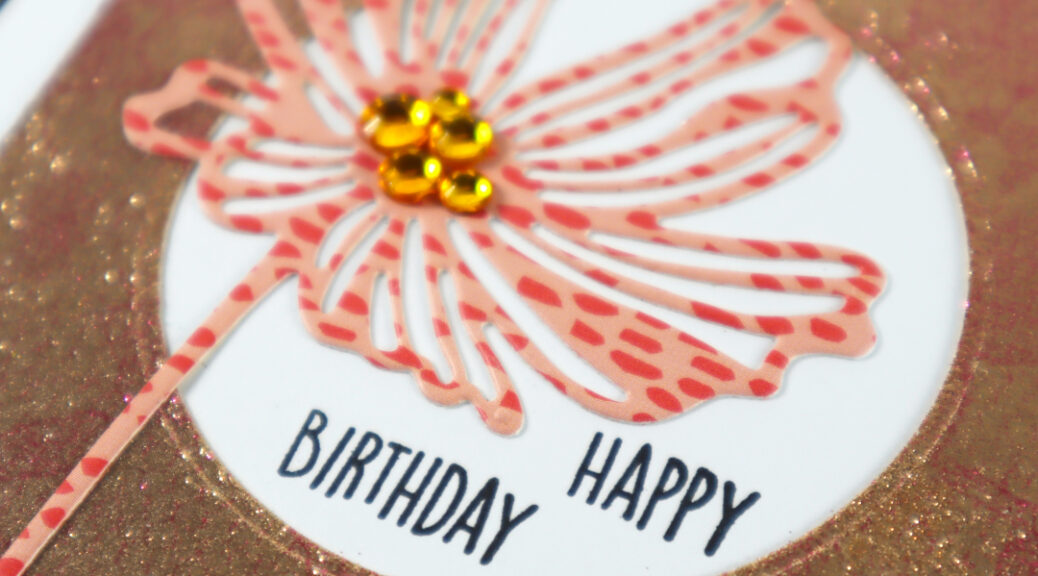
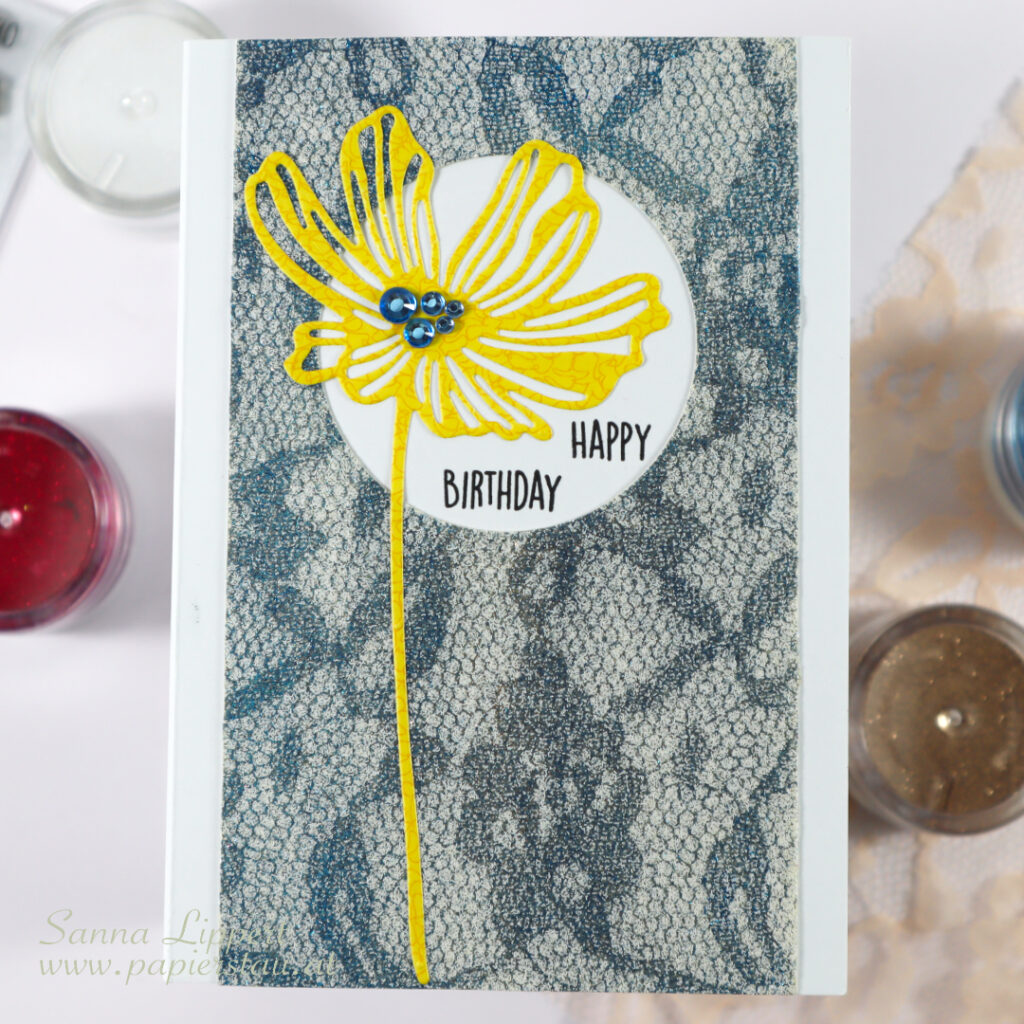
I started with a piece of lace and golden and pink glitter, but since I hadn´t done this for a while, I forgot that a stronger contrast in color makes the pattern more visible, and ended up with a shiny, sparkly golden background with hardly any noticeable pattern. Thus, the second one in blue and white :).

As you can see here. Hardly any pattern to be seen. Oh well, I still kept the paper, because of this beautiful sparkle. There is very little going on else on the cards, just a die cut flower and a stamped sentiment.
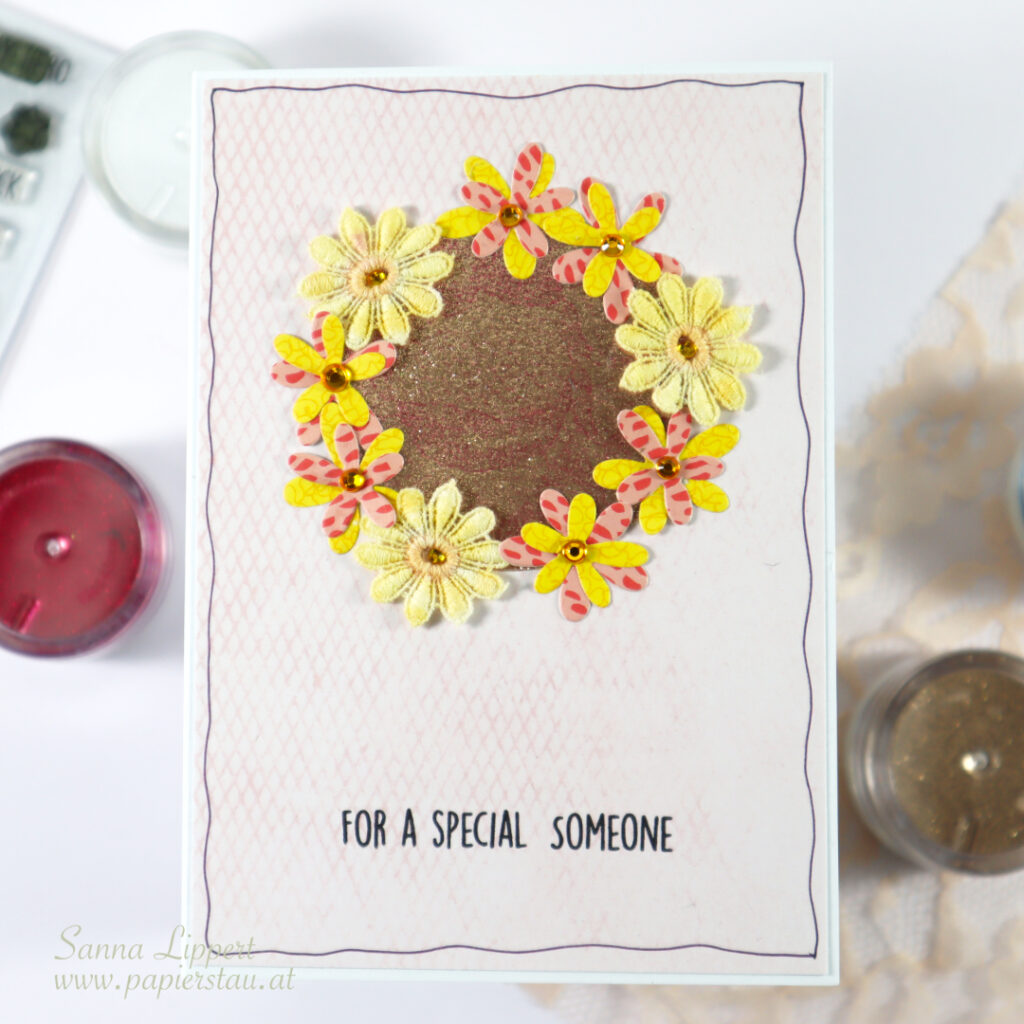
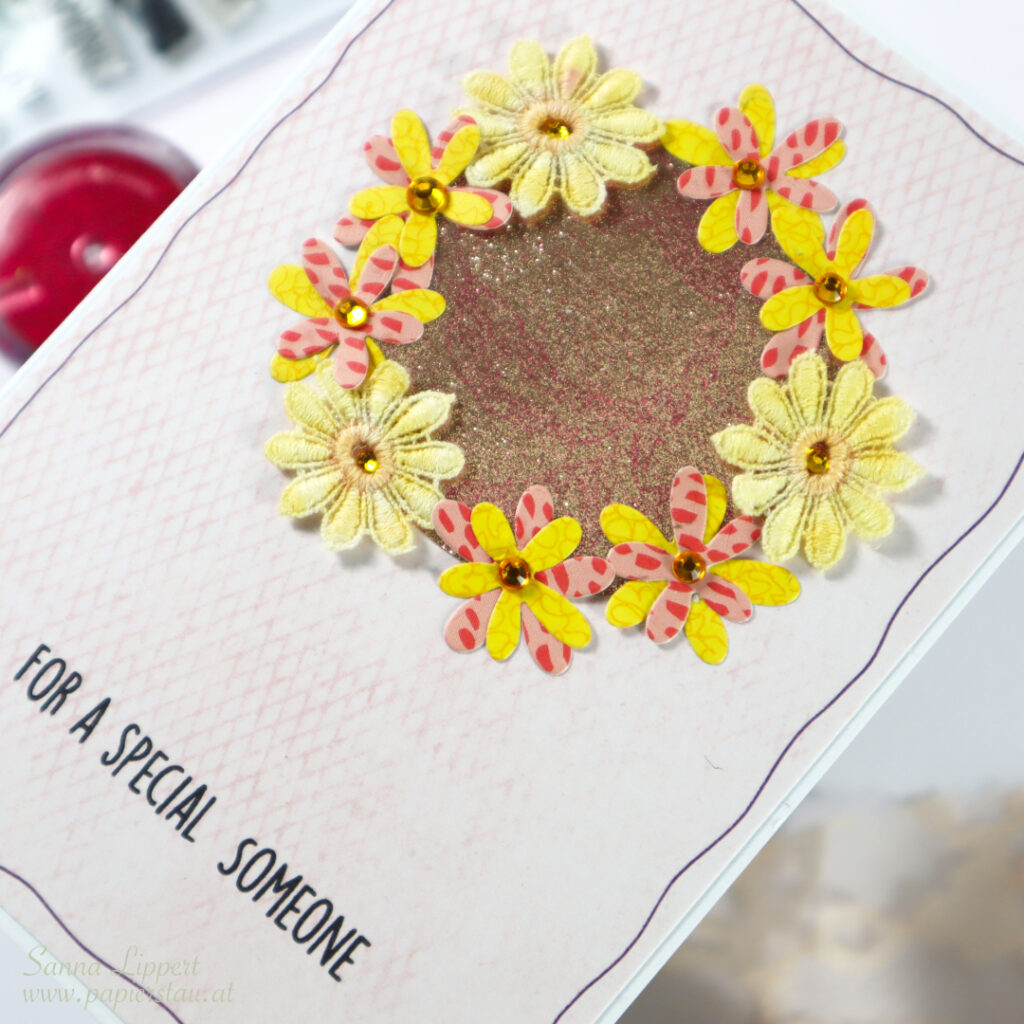
I had originally planned on using the postcard paper as is, but ended up die cutting a circle in the center and going on from there. So I had leftover pieces which I then used for these two “residue” cards. I used up all the glitter bits and the patterned paper pieces left from die cutting the flowers for the first two cards.
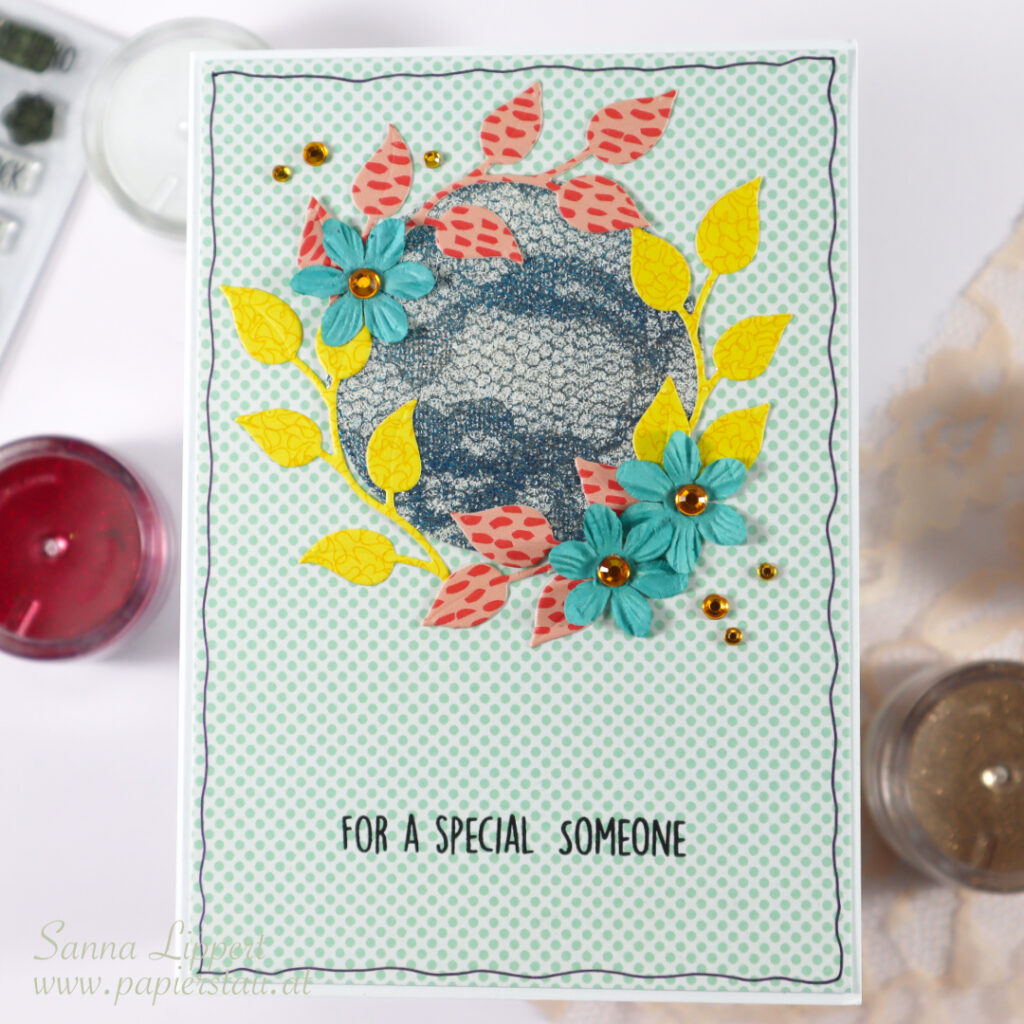
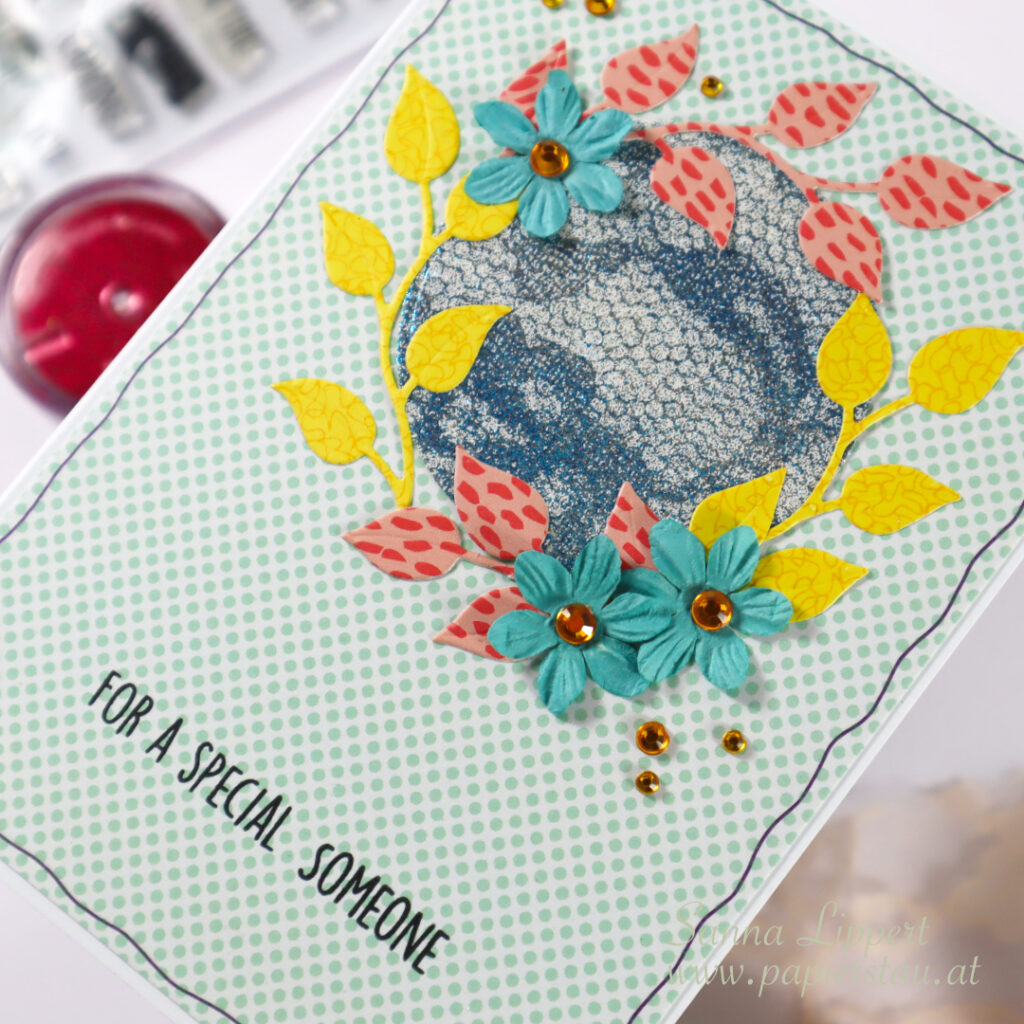
I created a cluster around the leftover glitter circles from die cut leaves and flowers and adhered everything on lightly patterned papers. I then embellished with rhinestones again and stamped a sentiment.
I made a little start-to-finish video, too, while I was at it – hope you like it:
Thanks for stopping by!! It was fun to go back to this technique. I haven´t done it in a while and still have plenty of lovely glitter here, so I should probably do this more often :). Have a great Sunday and happy crafting!
xxx, Sanna
Supplies (also added alternatives to my older die cut dies):